
Precis L4-1468cc 1.5L SOHC (1993)
Axle Shaft Assembly: Overhaul
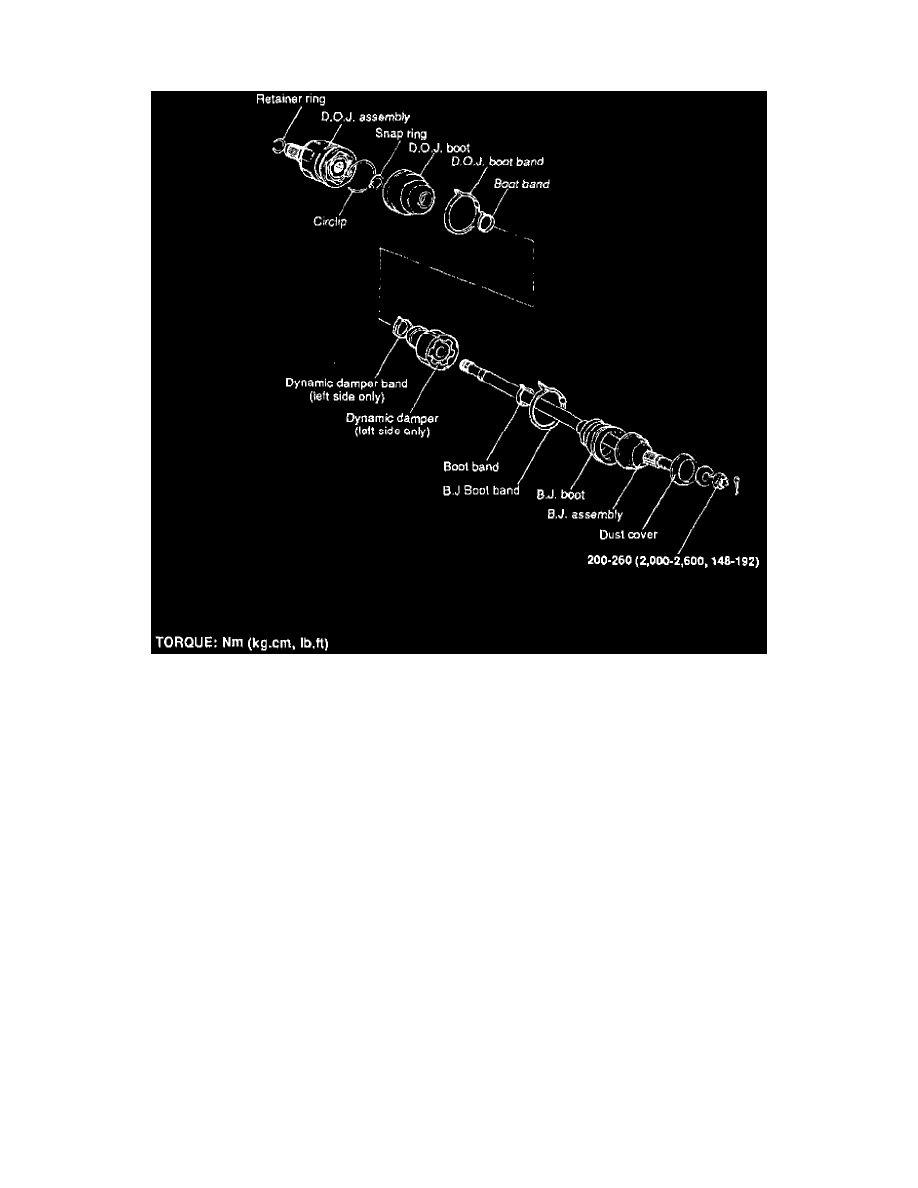
Disassembly
Front Driveshaft
1.
Remove double offset joint (DOJ) boot band, Fig. 2.
2.
Remove DOJ boot from DOJ outer race.
3.
Using screwdriver, remove circlip.
4.
Remove DOJ outer race, then wipe off grease.
5.
Remove snap ring, remove DOJ inner race, cage, then the balls as an assembly. Clean assembly. If balls drop out of cage, reinstall with inner race.
6.
Wipe grease off spline portion.
7.
Remove Birfield joint (BJ) boot band.
8.
Remove DOJ and Birfield joint (BJ) boot. If boots can be reused, wrap vinyl tape around driveshaft spline so that boots are not damaged as they
are removed.
9.
Wipe grease off Birfield joint (BJ). Do not disassemble.
10.
Inspect all components and replace as necessary.
Assembly
1.
Wrap vinyl tape around driveshaft spline, then install Birfield joint (BJ) and DOJ boots in this order.
2.
Fill inside of Birfield joint and Birfield joint boot with specified grease.
3.
Place Birfield joint boot over Birfield joint, then use new Birfield Joint boot bands to secure boot.
4.
Using grease supplied with repair kit, lubricate DOJ cage, balls and inner race.
5.
Install DOJ cage, balls and inner race onto driveshaft, then fit snap ring securely into groove on driveshaft.
6.
Using grease supplied with repair kit, lubricate DOJ outer race, fit driveshaft into DOJ outer race, then apply more grease to DOJ outer race.
7.
Install new circlip on driveshaft.
8.
When installing new boot bands, ensure distance between center of bands is 3.42-3.66 inch for LH shafts, and 3.23-3.47 inch for RH shafts on
turbocharged models, and 3.23-3.47 inch for LH shafts, and 3.42-3.66 inch for RH shafts on non turbocharged models.
9.
Wipe excess grease from lips of DOJ and Birfield Joint boots.
10.
Install new circlip onto DOJ outer race.