Raider 2WD V6-3.7L (2008)

FILL TUBE EQUIPPED WITH INDICATOR
NOTE: Engine and Transmission should be at normal operating temperature before performing this procedure. After the fluid has been checked, seat
the dipstick fully to seal out water and dirt.
1. Start engine and apply parking brake.
2. Shift the transmission into DRIVE for approximately 2 seconds.
3. Shift the transmission into REVERSE for approximately 2 seconds.
4. Shift the transmission into PARK.
5. Hook up scan tool and select transmission.
6. Select sensors.
7. Read the transmission temperature value.
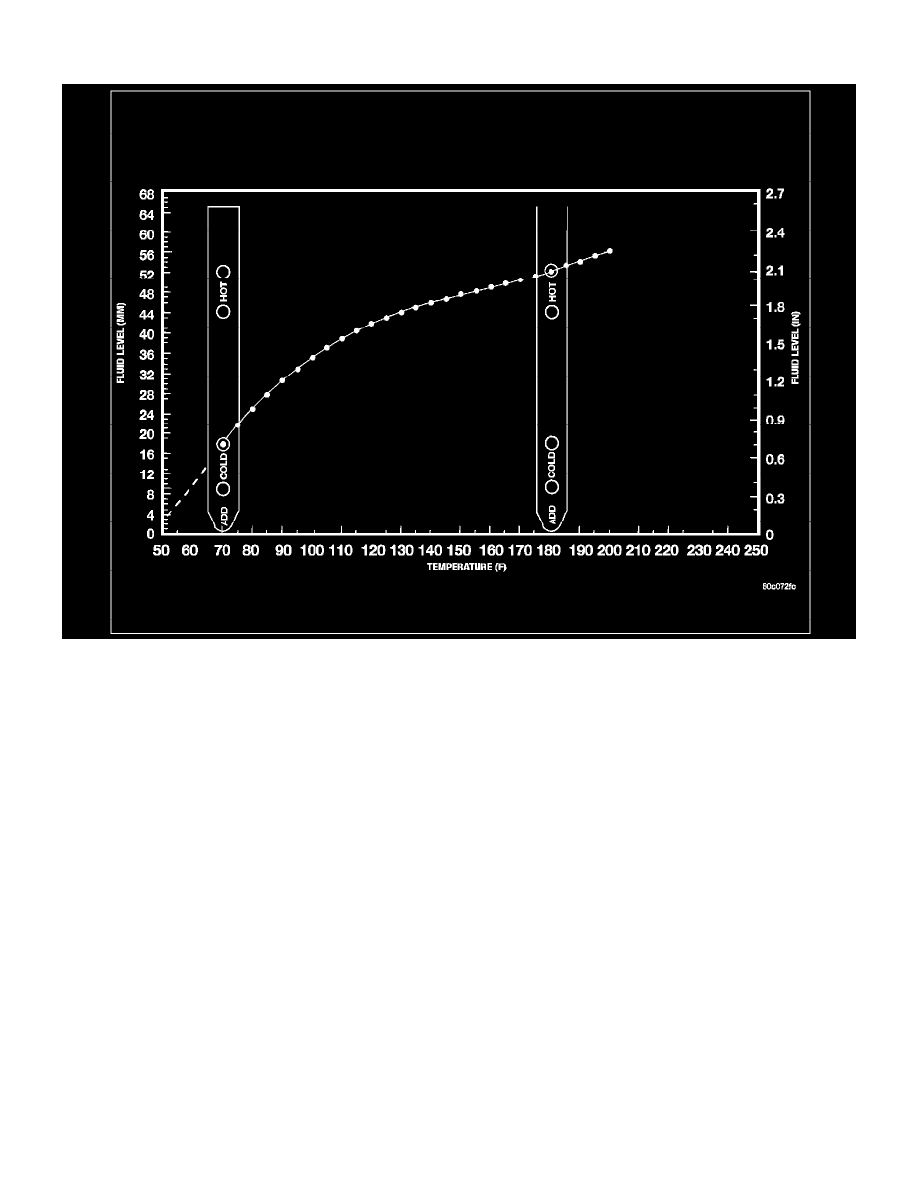
8. Compare the fluid temperature value with the chart.
9. Adjust transmission fluid level shown on the dipstick according to the Transmission Fluid Temperature Chart.
NOTE: After adding any fluid to the transmission, wait a minimum of 2 minutes for the oil to fully drain from the fill tube into the transmission
before rechecking the fluid level.
10. Check transmission for leaks.
CAPPED FILL TUBE
1. Verify that the vehicle is parked on a level surface.
2. Remove the dipstick tube cap.
WARNING: There is a risk of accident from vehicle starting off by itself when engine is running. There is a risk of injury from
contusions and burns if you insert your hands into the engine when it is started or when it is running.
Secure vehicle to prevent it from moving off by itself. Wear properly fastened and close-fitting work clothes. Do not touch hot or rotating
parts.
3. Actuate the service brake. Start engine and let it run at idle speed in selector lever position "P".
4. Shift through the transmission modes several times with the vehicle stationary and the engine idling.
