
Raider 4WD V6-3.7L SOHC (2007)
ASSEMBLY
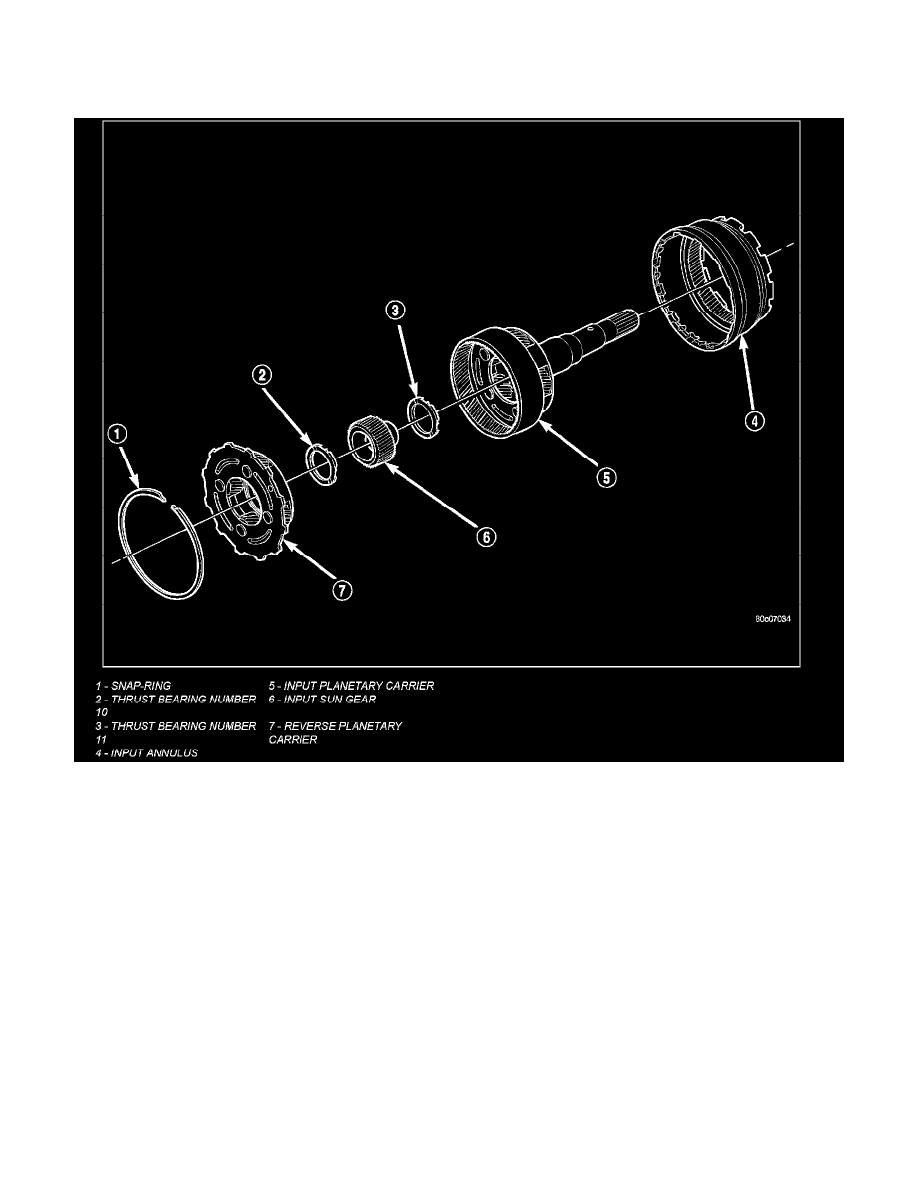
NOTE: Clean and inspect all components. Replace any components which show evidence of excessive wear or scoring.
1. Install the number 11 thrust bearing (3) into the input planetary carrier (5) so that the inner race will be toward the front of the transmission.
2. Install the input sun gear (6) into the input carrier (5).
3. Install the number 10 thrust bearing (2) onto the rear of the reverse planetary carrier (7) with the inner race toward the carrier.
4. Install the number 9 thrust bearing onto the front of the reverse planetary carrier (7) with the outer race toward the carrier and the inner race facing
upward.
5. Install the reverse planetary gear carrier (7) into the input carrier (5).
6. Install the input annulus gear (4) into the input carrier (5).
7. Install the snap-ring (1) to hold the input annulus gear (4) into the input carrier (5).