
Aurora V6-214 3.5L VIN H SFI (2001)
2.
Along the fold lines (2), cut through the paper backing ONLY.
3.
Remove the lower RH closeout/insulator panel. Refer to the Instrument Panel, Gauges and Console subsection of the Service Manual.
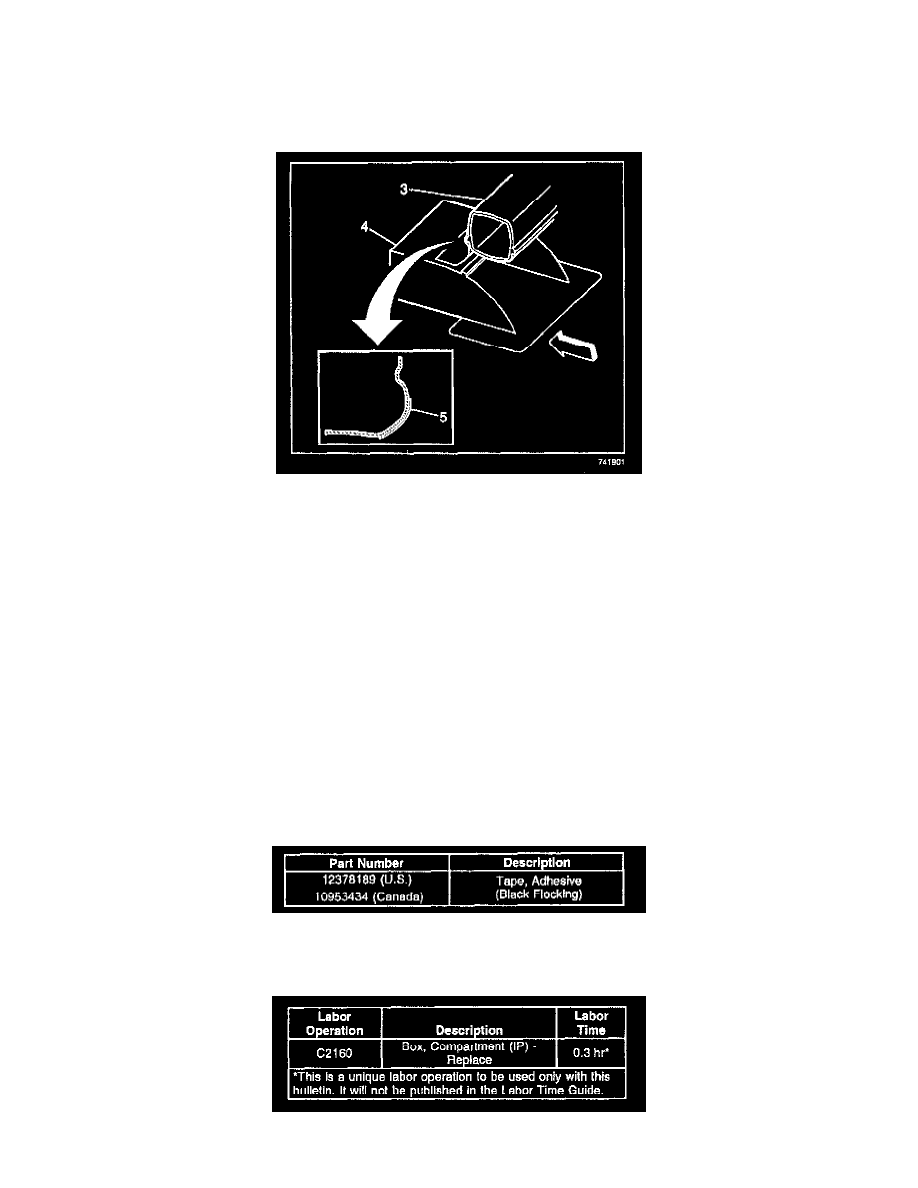
4.
Remove the four fasteners that secure the IP storage compartment (glovebox) to the instrument panel. Do not remove the glovebox.
5.
Install the Adhesive Flocking Tape sheet, P/N 12378189 (P/N 10953434 in Canada) using the following steps:
5.1.
Remove the backing paper from one of the outboard sections of the Adhesive Flocking Tape sheet and apply it to the backside of the air
duct (3).
5.2.
Remove the backing paper from the other outboard section of the Adhesive Flocking Tape sheet and apply it to the top of the rear section of
the glovebox (4).
Important:
Do not remove the backing paper from the center section (5) of the Adhesive Flocking tape sheet.
6.
Install the four fasteners that secure the P storage compartment (glovebox) to the instrument panel.
Tighten
Tighten the fasteners to 2 Nm (18 lb in).
7.
Install the lower RH closeout/insulator panel. Refer to the Instrument Panel, Gauges and Console sub-section of the Service Manual.
Parts Information
Parts are currently available from GMSPO.
Warranty Information
For vehicles repaired under warranty, use the table.