
Grand Voyager L4-2.4L DOHC (1996)
6.
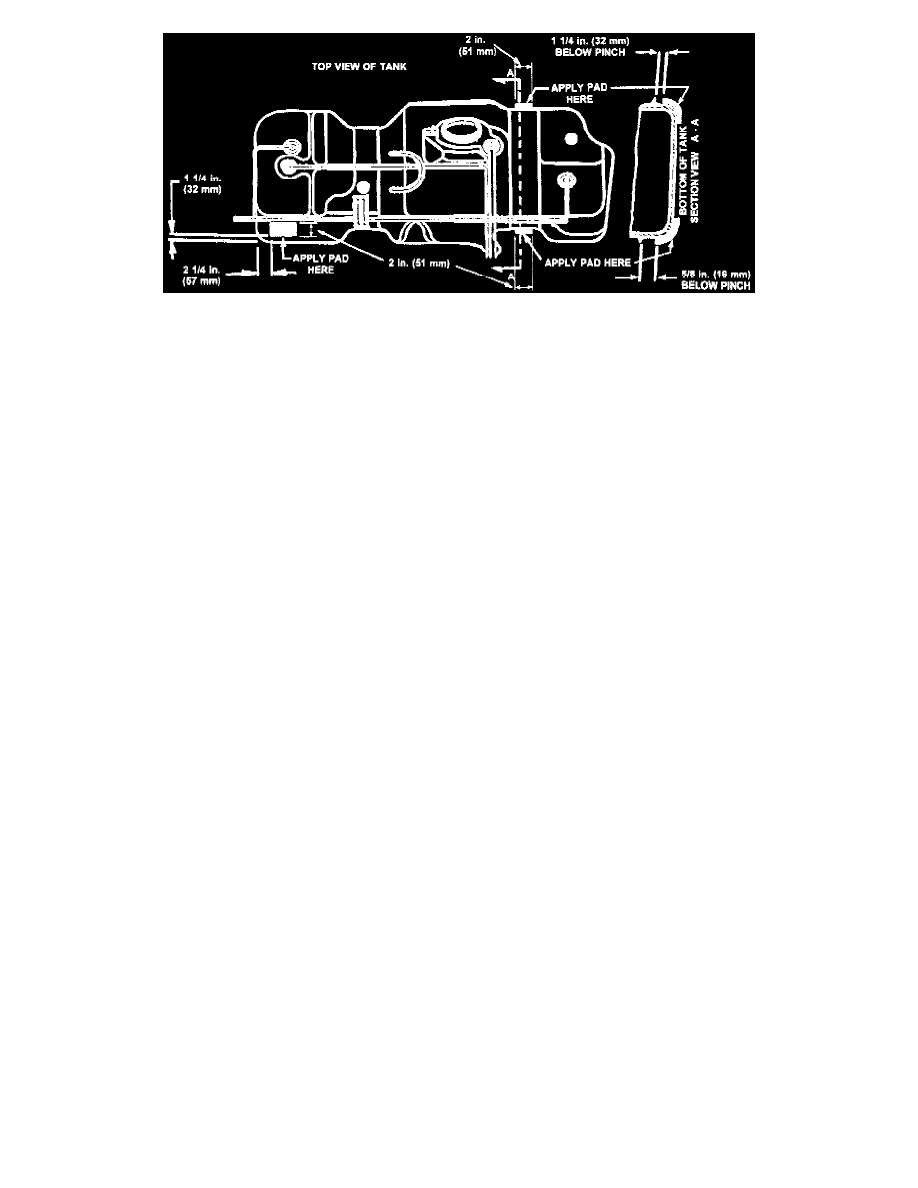
Install the foam pads (P/N 4882346) as shown in the illustration.
7.
Raise the fuel tank to the body, making sure none of the fuel tank lines are crossed or pinched on top of the fuel tank.
8.
Install the fuel tank support straps. Torque the attaching bolts to 30-40 ft. lbs. (40-68 Nm).
9.
Install the filler tube blocker. Torque the screws to 45-55 in. lbs. (5-6 Nm).
10.
Lower the vehicle and attach the filler tube to the body. Torque the screws to 17- 22 in. lbs. (2-2.5 Nm).
11.
Install the fuel filler cap.
Repair Procedure 4
Repair Procedure 4 - Sway Bar Bushings
1.
With the vehicle on a frame contact hoist, check the sway bar links for looseness by trying to move the links by hand. If a link is loose, torque the
fasteners to 65 ft. lbs. (88 Nm).
2.
If the vehicle was built before Dec. 15, 1995 (MDH 1215XX) or the sway bar is loose inside the sway bar bushings, replace the sway bar bushings
(P/N 4684890).
NOTE:
REPLACEMENT BUSHINGS SHOULD MEASURE 2-1/8 IN. (54 mm) FRONT TO REAR AND 2 IN. (51 mm) TOP TO BOTTOM. THE
REAR SIDE OF THE BUSHING HAS THE SLIT IN IT.
Torque the sway bar bushing retainer bolts to 50 ft. lbs. (70 Nm).
3.
Torque the upper strut rod mount to shock tower nuts to 250 in. lbs. (28 Nm).
4.
Torque the upper strut rod to mount nuts to 70 ft. lbs. (95 Nm).
5.
Torque the suspension cradle to frame rail bolts to 120 ft. lbs. (163 Nm).
6.
Torque the suspension cradle reinforcement plate attaching bolts to 112 ft. lbs. (152 Nm).
7.
Lower the vehicle.