
Grand Voyager V6-3.8L VIN L (1999)
Window Regulator: Service and Repair
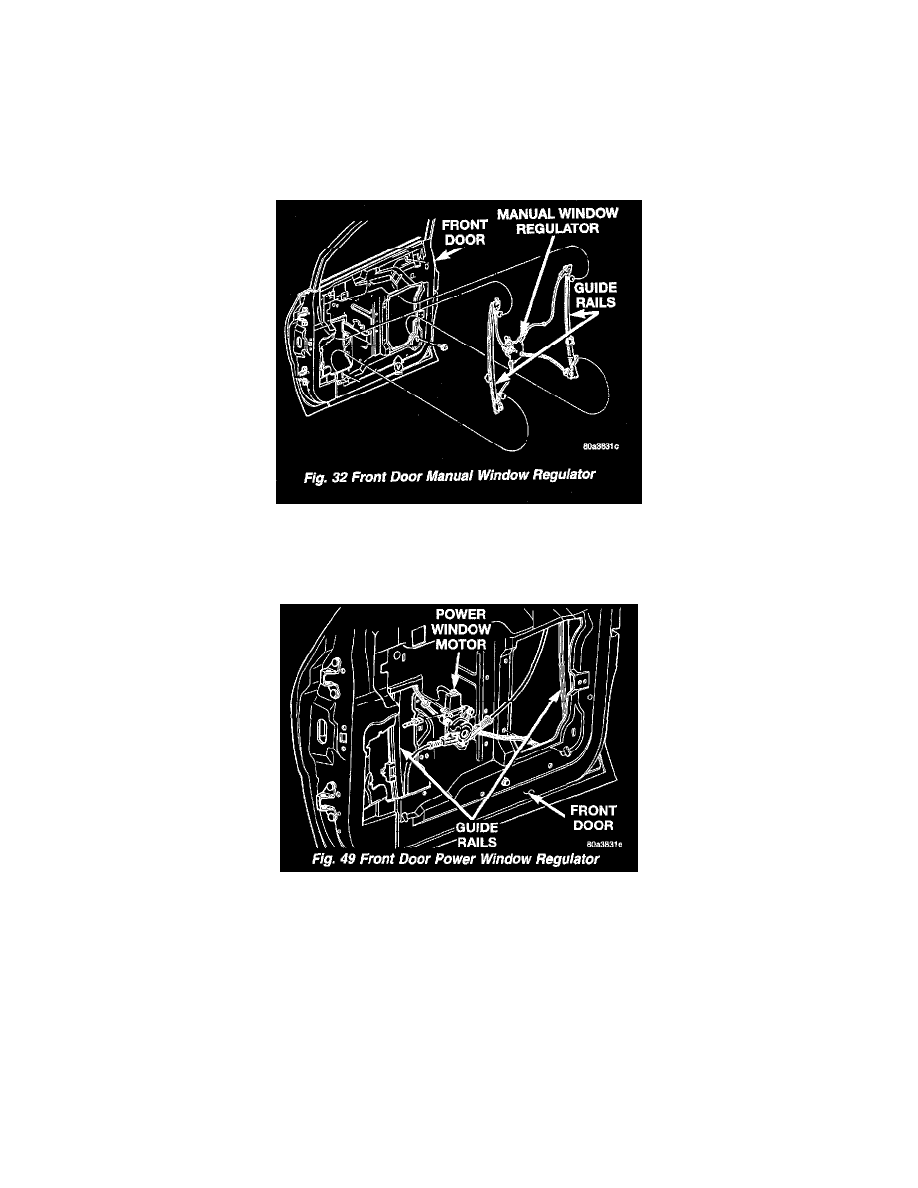
Front Door Window Regulator
FRONT DOOR WINDOW REGULATOR
REMOVAL
1. Remove door trim panel and sound shield.
2. Remove door glass retaining clips and allow glass to rest on bottom of door.
3. Disconnect wire connector from power window motor, if equipped.
4. Loosen screws attaching front and rear window guide rails to inner door panel.
5. Remove screw heads on guide rails from key hole slots in inner door panel.
6. Loosen screws attaching regulator to inner door panel.
7. Remove regulator from inner door panel.
Front Door Power Window Regulator
8. Extract rear guide rail through inner door panel rear access hole.
9. Extract front guide rail through front access hole.
INSTALLATION
1. Insert front guide rail through front access hole.
2. Insert rear guide rail through rear access hole.
3. Place window regulator in position on inner door panel.
4. Place screw heads on guide rails in position through key hole slots in inner door panel.
5. Tighten screws to attach front and rear guide rails to inner door panel.
6. Connect wire connector into power window motor, if equipped.
7. Install door glass.
8. Verify door glass alignment and operation.
9. Install sound shield and door trim panel.