
Prowler V6-3.5L VIN G (1999)
Intake Manifold Supports - Front
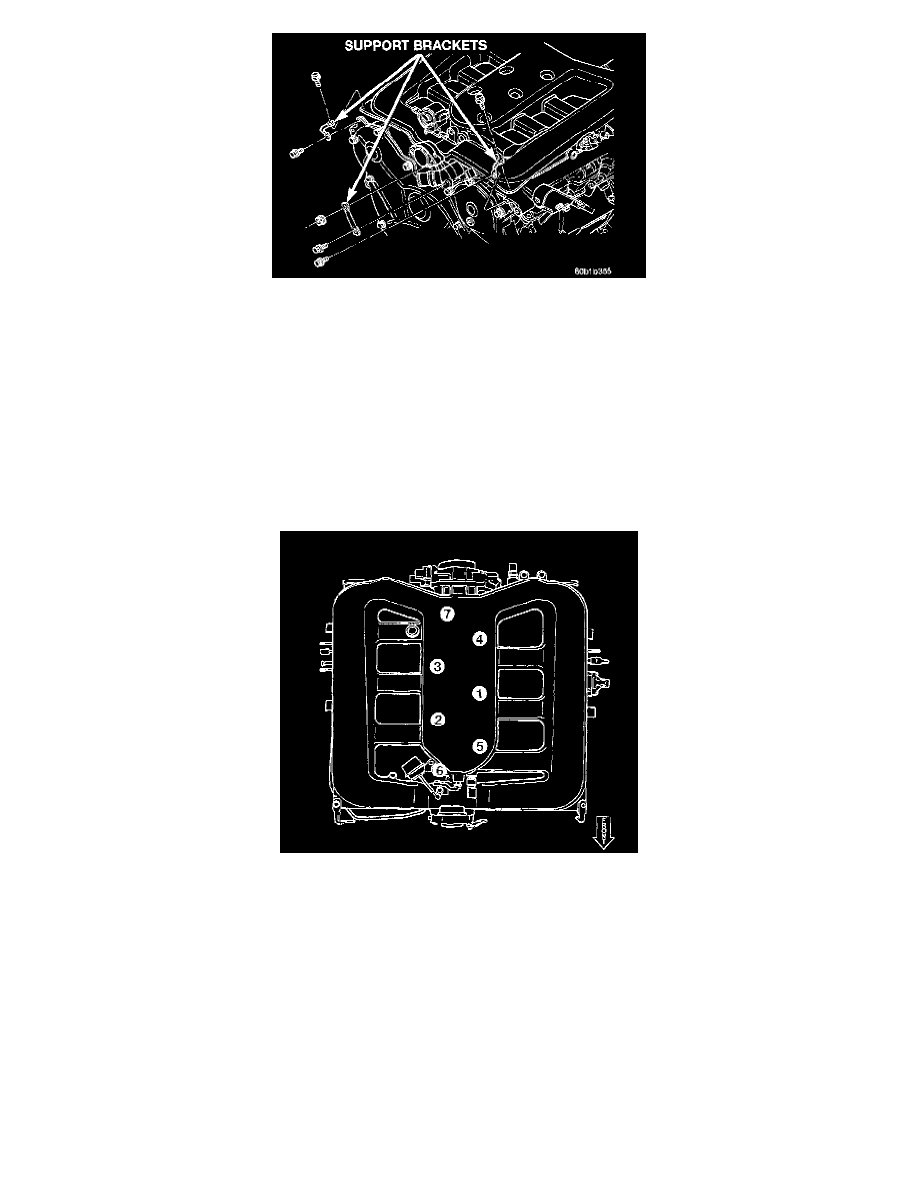
8. Remove support brackets at intake manifold front corners and at MTV.
9. Remove clips attaching EGR tubes to intake manifold.
10. Remove bolts attaching intake manifold and remove manifold.
Installation
1. Clean and inspect gasket sealing surfaces.
NOTE: Intake gaskets can be reused, provided they are free of cuts, tears, or deformation.
2. Inspect gasket for cuts, tears, or deformation. Replace gaskets as necessary.
3. Install intake manifold and hand start all attaching bolts.
Upper Intake Manifold Tightening Sequence
4. Tighten bolts gradually in sequence until a torque of 12 Nm (105 inch lbs.) is obtained.
5. Install right side and left side intake manifold supports. Tighten bolts to 28 Nm (250 inch lbs.).
6. Install manifold support brackets at front corners and at MTV. Tighten fasteners to 12 Nm (10.13 inch lbs.).
7. Connect vacuum lines to: Secondary Runner Valve, Speed Control Reservoir, Positive Crankcase Ventilation (PCV) Valve, Brake Booster, and
Proportional Purge Solenoid.
8. Connect electrical connectors to: Intake Air Temperature/Manifold Absolute Pressure (TMAP), Idle Air Control (IAC), Throttle Position Sensor
(TPS), and Manifold Tuning Valve (MTV).
9. Install EGR tubes to intake manifold.
10. Install throttle and speed control cables to bracket and throttle arm.
11. Install air intake duct.
12. Install upper radiator crossmember and front engine compartment supports.
13. Connect negative cable to battery.