Vibe FWD L4-1.8L (2010)

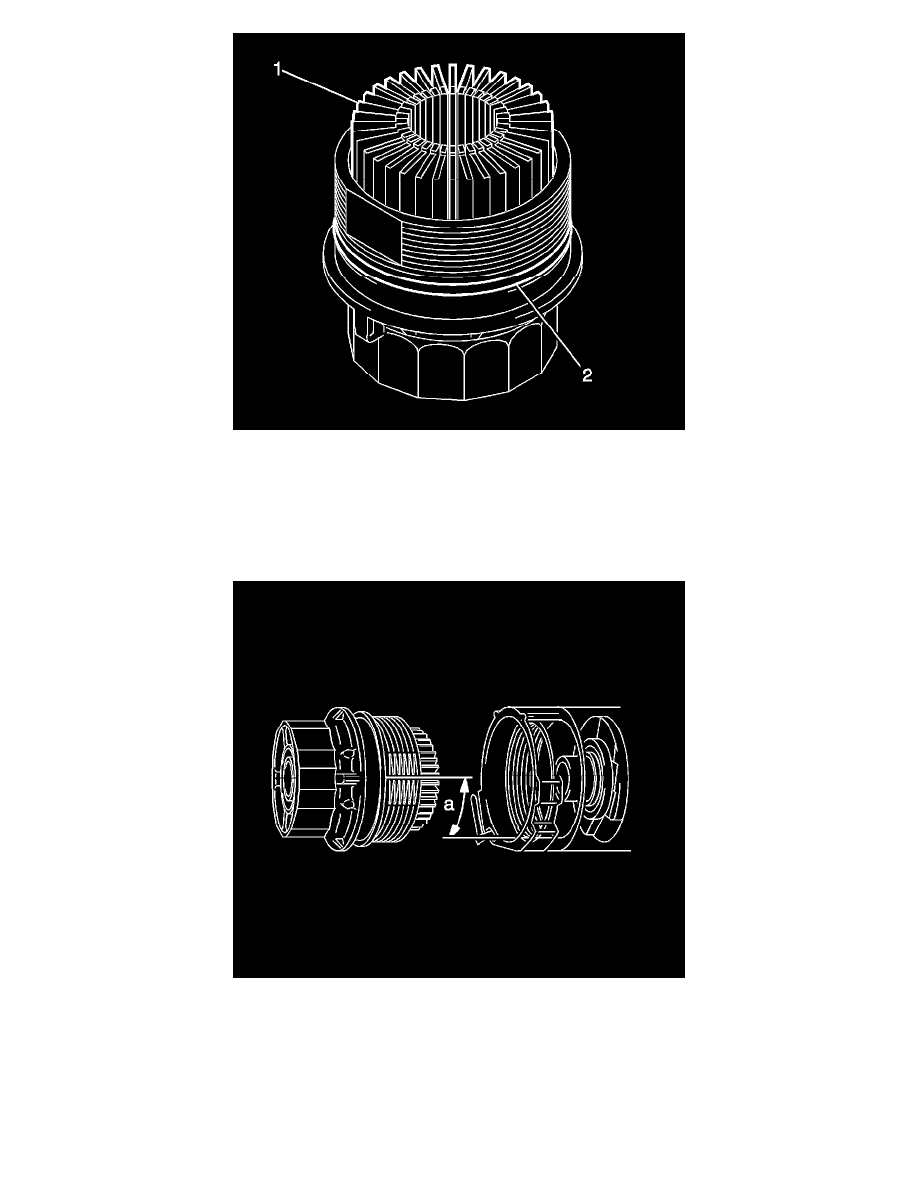
Note: Be sure to remove the O-ring (2) (for the cap) by hand, without using any tools, to prevent damage to the groove for the O-ring on the cap.
6. Remove oil filter element (1) and O-ring (2) from the oil filter cap.
7. Clean the oil filter cap threads and O-ring groove.
8. Apply a small amount of engine oil to a new O-ring and install it to the oil filter cap.
9. Set a new oil filter element in the oil filter cap.
10. Remove any dirt or foreign matter from the installation surfaces.
Note: Make sure that the O-ring does not get caught between the parts.
11. Apply a small amount of engine oil to the O-ring of the oil filter cap assembly. Align the cutout in the oil filter cap threads 90 degrees to the
grooves in the oil filter bracket and temporarily tighten the cap.
Note: After tightening the oil filter cap assembly, check for gaps between the installation surfaces. Do not remove the oil filter bracket clip when
installing the oil filter cap assembly. Do not cross thread the oil filter cap assembly.
12. Using a strap type wrench, tighten the oil filter cap assembly to 25 Nm (18 lb ft).
