
911 Carrera 2 Targa F6-3600cc 36L SOHC (1992) Battery Discharged Unit Diagnosis
Carbon brush checking and excitation winding checking.
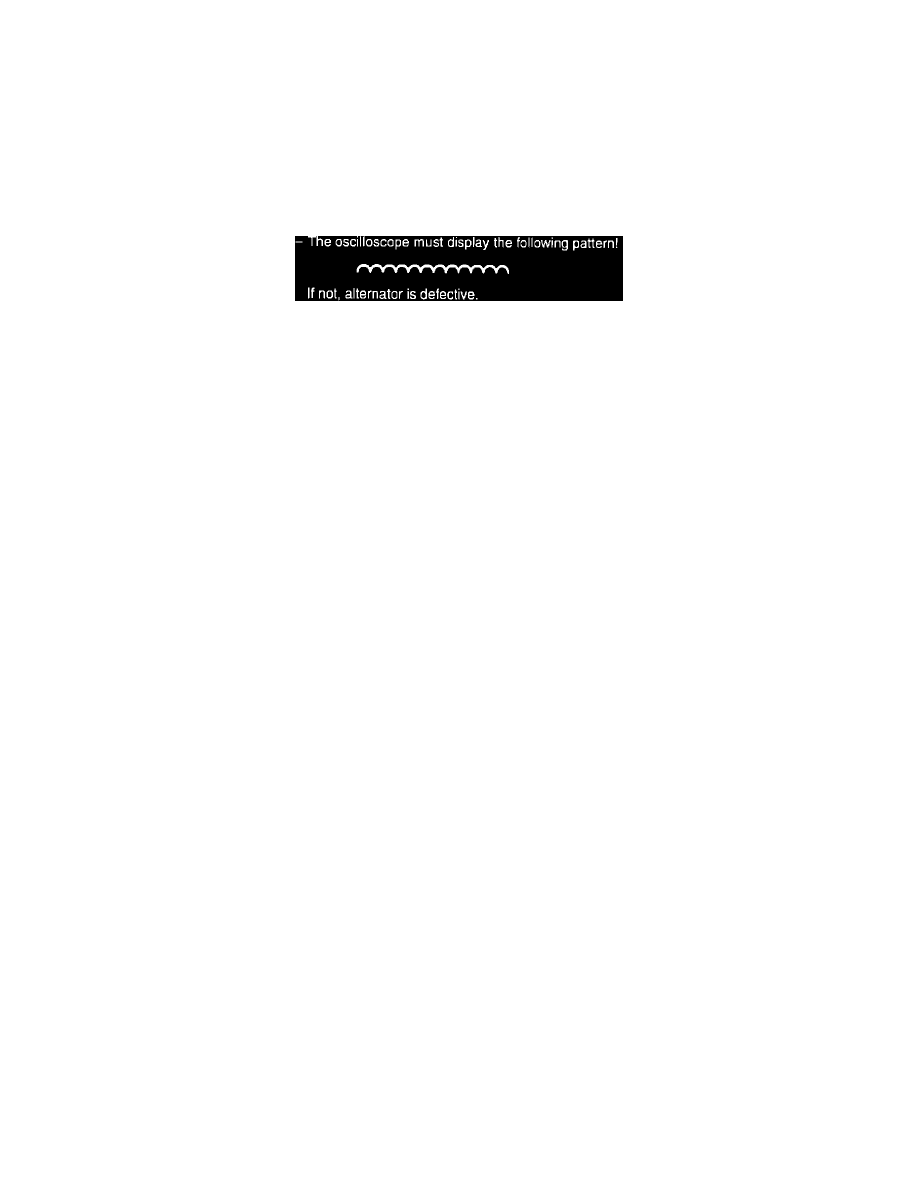
-
After removal of the voltage regulator, the carbon brushes and the slip rings can be inspected.
-
To check the excitation winding, connect ohmmeter between terminal DF and terminal D+. A resistance of 3-4 ohm should be noted.
Step 4.2: Alternator checking
The charging function of the alternator can be checked by connecting a voltmeter on the battery + and - poles.
-
Start engine and bring to approximately 2,000 RPM for one minute. Be certain all consumers are switched off.
-
The battery voltage must be above 13.0 volts. If not, the alternator must be checked using an oscilloscope.
-
Connect the oscilloscope lead as described in Step 4.1 or directly on the battery poles. Start engine and allow to idle.
Step 4.3: Voltage regulator checking
If the alternator is not defective, the voltage regulator must be checked.
-
Start engine and bring to 2,000 RPM for one minute.
-
The voltage on terminal D+ must be between 13.2V and 15.0V. If the voltage is out of specification, replace voltage regulator.
NOTE:
After repairs, reset the time clock and recode the radio.
For additional information, refer to Technical Bulletin Book 1, Group 2, Number 9204, page 49.
Warranty Information:
(If applicable)
Damage Code: 9030 40 0001
Labor Operations
Description
TU
9030 1900
R&R Clock
20
9030 4950
Solder Jumper Wire
20
per Technical Bulletin
9030 4900
R&R Clock & Remove Bulb
25