
911 Carrera Coupe F6-3600cc 3.6L SOHC (1997)
6. Unscrew 13 fixing screws (head diameter 12 mm) with Torx Insert T 27 and lower hydraulic control unit only so far as to guarantee that the wiring
harness is not subjected to any tension.
-
Place the hydraulic control unit on a suitable surface (e.g. transmission jack).
NOTE: The hydraulic control unit must not be suspended from the wire harness.
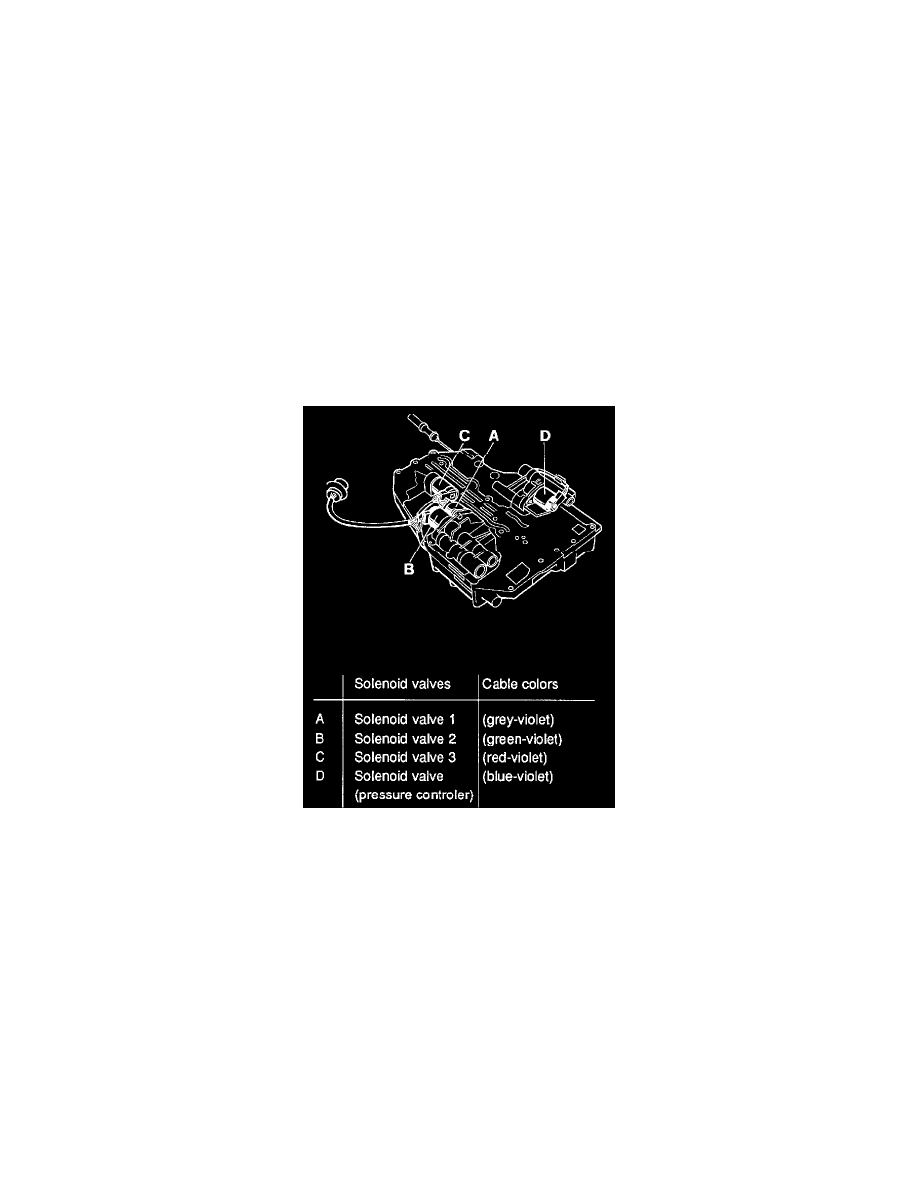
7. Mark the push-on sleeves for re-installation and pull off from the solenoid valves.
8. Pull the wiring harness out of the holding clamps and remove the control unit.
Installation
Installation takes place in reverse order.
1. Tightening torques:
-
Control unit to transmission: 8 Nm (6 ft lb)
-
ATF strainer to control unit: 8 Nm (6 ft lb)
-
ATF pan to transmission: 6Nm (4 ft lb)
-
Drain screw to ATF pan: 40 Nm (29 ft lb)
-
Hollow screw to ATF pan: 40 Nm (29 ft lb)
2. Push on push-on sleeves for solenoid valves up to the stop.
-
Pay attention to cable colors.
3. Mount the hydraulic control unit so that the pin of the notched disk projects into the recess of the selector slide.