
911 SC Cabriolet F6-2994cc 3.0L SOHC (1983)
Windshield Washer Spray Nozzle: Technical Service Bulletins
Electrically Heated Windshield Washer Spray Jet - R&R
Subject:
Spray Jet
Part Identifier 92 66
Applies To
911, 911 TURBO
Group
92
Key Points
Installation Of Electrically Heated Windshield Washer Spray Jets
C
Number
83-01
January 19, 1983
Electrically heated windshield-washer jets are available as spare parts and can be service installed.
The jets are equipped with a heating resistor which can be connected on terminal 15, such that heating occurs when the ignition is on
Parts required:
2 windshield washer jets, Part No. 944 628 911 00 wire - red 20 AWG, approx. 10-1/2 ft long wire - brown 20 AWG, approx. 10 ft long insulating
tubing for 1 20 AWG wire, approx. 4 in. long for 2 20 AWG wires, approx. 40 in. long for 4 20 AWG wires, approx. 36 in. long
1 wire connector 6.5 mm dia.
Washer jets, installing
-
unscrew luggage compartment trim panel and remove standard jets
-
open up holes in cowl panel to 10 mm (13/32 in.) dia. Touch up area around holes with a suitable paint
-
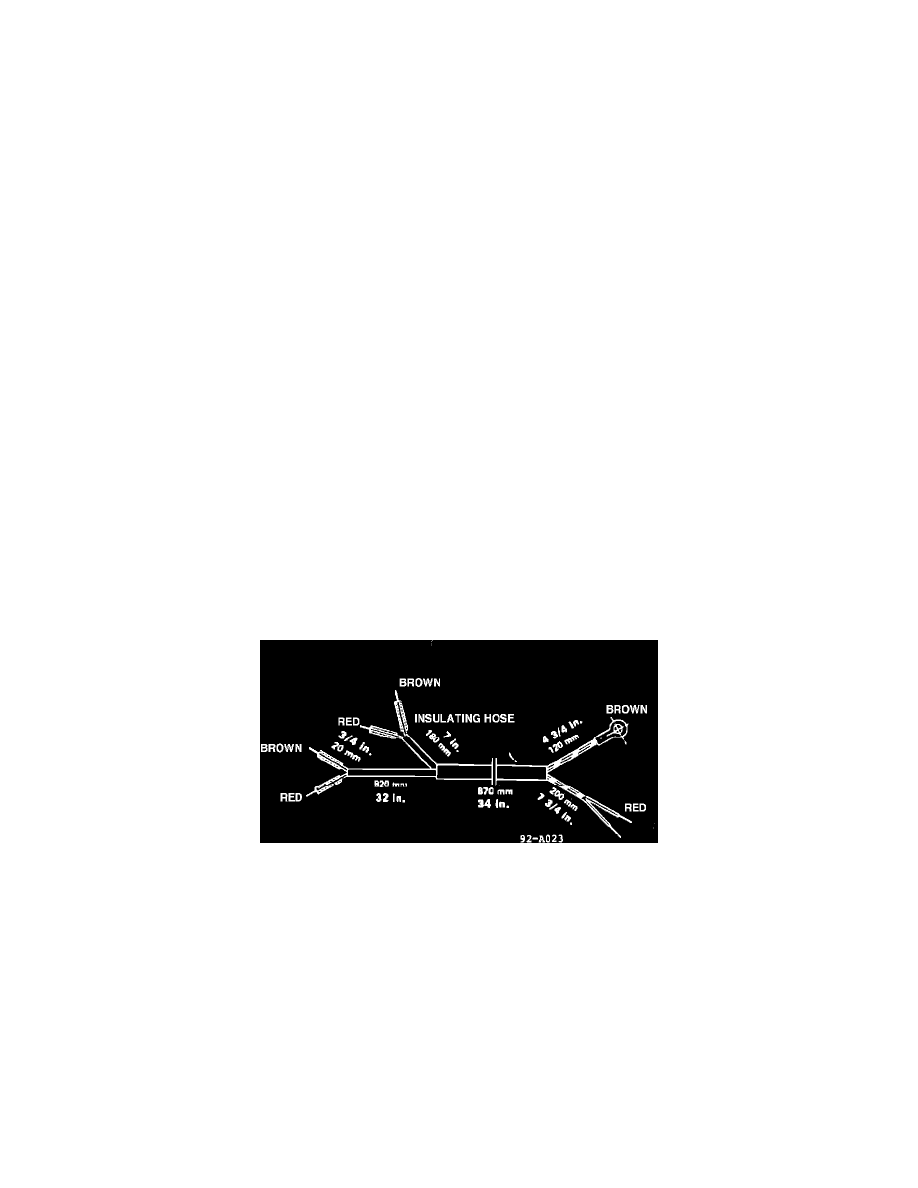
make up extra wire harness as shown
-
pull in "extra wire harness". Place lock washers on wires and route wires out through the holes. Solder wires on jets. Insulate soldered points with
insulating tubing
-
insert and aim jets. Press on lock washers firmly from below
-
connect water hoses on jets. Press down on jets from above while connecting hoses to prevent jets from becoming loose
Note
Voltage is supplied from the stop light/cruise control fuse (No. 15)
-
connect positive wire (red) on bottom of fuse. Screw ground wire (brown) on ground point next to fuse box
-
operate windshield washer. Check hoses for leaks
-
aim jets with a pin
-
turn on ignition. Heat must be felt on jets after waiting several minutes