
911 Turbo AWD F6-3600cc 3.6L SOHC Twin Turbo (1997)
When working on the brake system be careful not to spill any brake fluid on painted surfaces. Brake fluid will damage the paint.
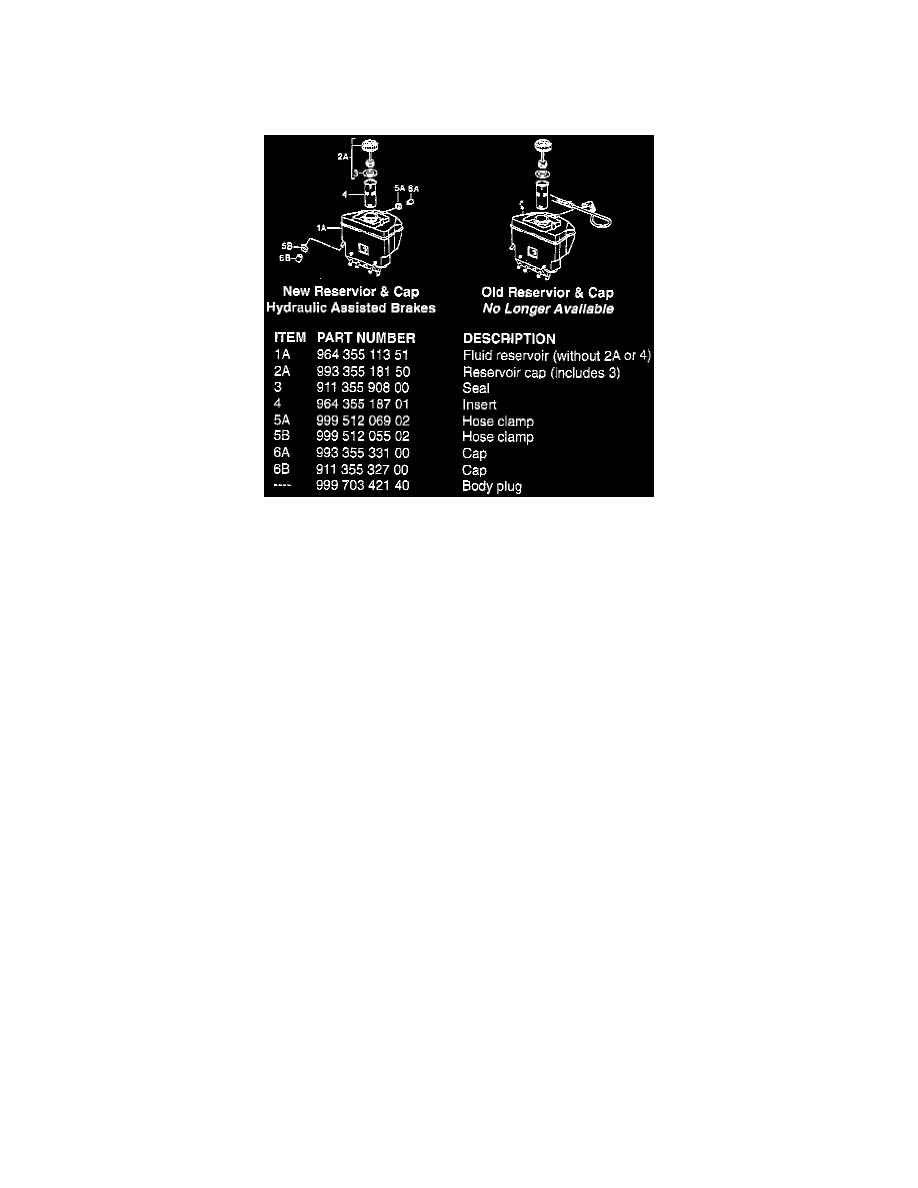
Hydraulic Assisted Power Brakes
A) Reservoir cap replacement only.
-
Remove the old vent line from the reservoir and wheel well and discard. Remove the old reservoir cap and discard.
-
Cap the vent fitting on the old reservoir with cap (6A) and secure the cap with hose clamp (5A).
-
Install the body plug part number, 999 703 421 40, into the hole at the wheel well where the old vent line was previously installed. It will be
necessary to remove the rear portion of the left inner fender liner to install the body plug.
-
Top off the brake fluid level and install the new vented reservoir cap (2A).
Hydraulic Assisted Power Brakes
B) Reservoir and reservoir cap replacement.
-
Remove the old vent line from the reservoir to wheel well and discard. Remove the old reservoir cap and discard. Drain and remove the old reservoir.
-
Install the new reservoir (1), cap (6A) and secure with clamp (5A).
-
On the America Roadster with Tiptronic Transmission and the 1996 911 Turbo, also install the cap (6B) and secure with clamp (5B).
-
Install the body plug, part number, 999 703 421 40 into the hole at the wheel well where the old vent line was previously installed. It will be
necessary to remove the rear portion of the left inner fender liner to install the body plug.
-
Fill the brake reservoir with brake fluid, reinstall the insert (4) and new vented reservoir cap (2A).