
911 Turbo AWD F6-3600cc 3.6L SOHC Twin Turbo (1997)
CAUTION:
-
Make sure the brake hose and the electrical wiring are not under tension (risk of damage).
-
Do not push spring strut/suspension too far down and do not move upper end too far out.
7. Remove old seal.
-
If required, a second mechanic should help with removal.
-
Remove seal residue from spring strut turret and from body panels.
8. Bond new seal correctly in place:
-
The threaded studs of the mount must be centered in the seal holes.
-
If this precaution is not observed, the seal may be squeezed at the studs.
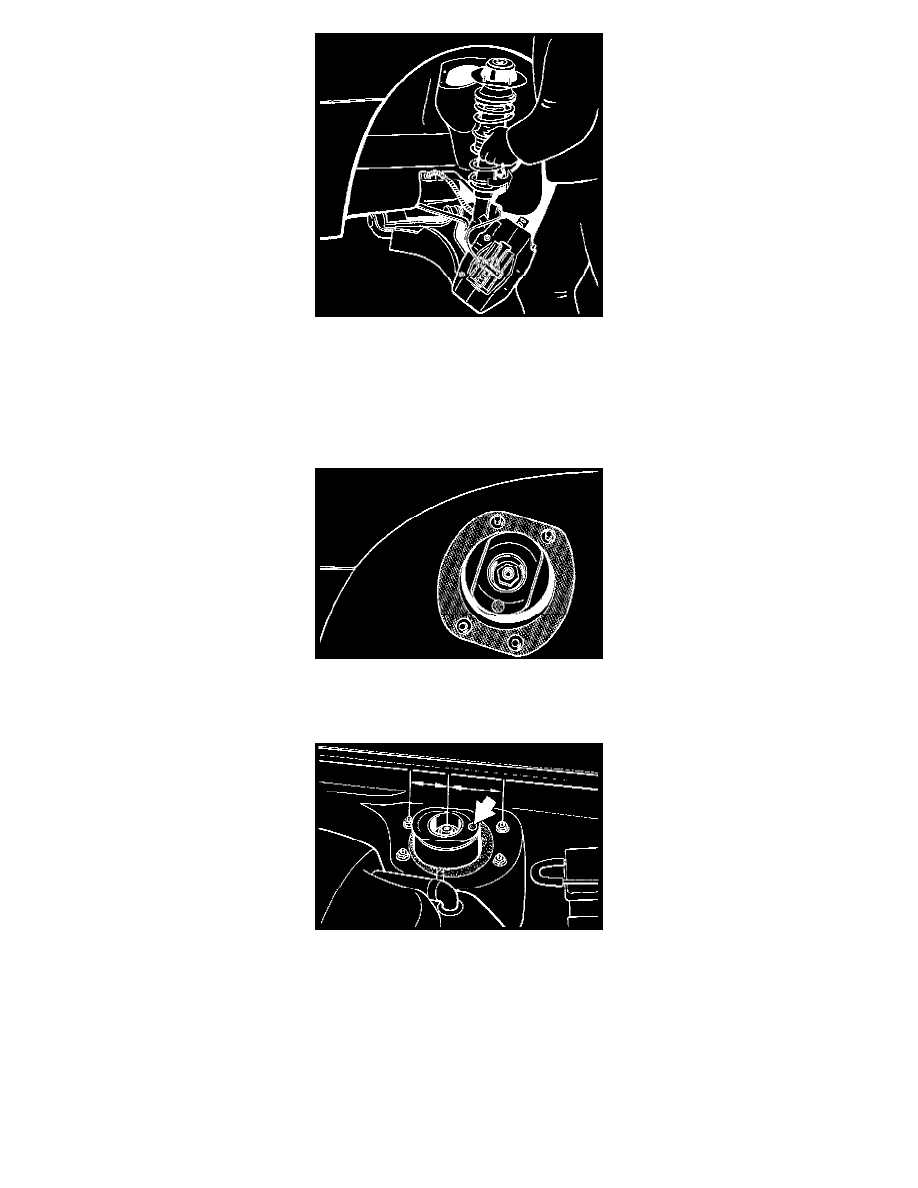
9. Install spring strut mount to strut turret in correct position, i.e. the red color dot (arrow) must point forwards (strut mount is not symmetrical).
-
This is the reason why the shock absorber piston rod is offset somewhat towards the rear.
-
Use new lock nuts.
-
Align spring strut with marks applied (position of four flange lock nuts) before tightening.
-
Tighten to: 33 Nm (24 ft lb).
NOTE: Do not grease threads (except for wheel mounting bolts) during reassembly.
10. Repeat assembly operations (items 2 to 9) on other side of axle.
11. Fit stabilizer mount and tie rods.
-
Replace lock nuts.
-When tightening the lock nuts of the tie rod ball joint, use Special Tool 9546 (Torx screwdriver) to lock.