900 L4-2118cc 2.1L DOHC (1992)

17.
Install upper bushing for pinion and hydraulic seal using sleeve tool No. 8996407 or equivalent. Do not apply a force greater than 38 lbs. per
sq. inch.
18.
Install inner hydraulic seal to rack. Prevent sealing lip from being damaged by rack teeth using sleeve tool No. 8995938 or equivalent.
19.
Install rack in housing, then press in inner hydraulic seal using the rack pinion, using care not to apply a force greater than 32 lbs. per sq. inch.
Avoid withdrawing rack too far after inner seal has been fitted.
20.
Install bushing in cylinder with small bore facing inward. Install the washer against the bushing.
21.
Install a new O-ring on the outer hydraulic seal support. Inspect old seal and install if free of defects. If seal is to be replaced, install using sleeve
tool No. 8996407 or equivalent.
22.
Slide sealing ring support carefully onto rack and avoid damaging the sealing lip. Press in sealing ring support using sleeve tool No. 8390148 or
equivalent.
23.
Push in rack so that it extends the same amount on both sides. Rotate rack so that pinion meshes in teeth.
24.
Assemble steering gear as follows:
a. Hold valve unit so that groove in end of shaft (for tensioning screw) points toward the left at 9 o'clock position in relation to direction of
movement of vehicle when pinion engages the rack.
b. Insert pinion. The valve unit should then rotate so that the groove in the end of the shaft in the withdrawn position, points to the front (12
o'clock when the rack is centralized).
25.
Install nut at pinion. Grip top end of shaft using an 11/16 inch socket or a soft-jawed vise. Torque nut to 22-34 ft. lbs.
26.
Install cover, washer, needle bearing, sealing ring, dust cover and the snap ring at top of the steering valve. Protect sealing lips using a protective
sleeve of plastic film or metal foil. Use sleeve tool No. 7841067 or equivalent, to insert the seal.
27.
Install radial bearing piston, the spring and adjusting plug. To set the radial adjustment, screw adjusting plug all the way down (clockwise),
then back off (counterclockwise) 30°-50°.
28.
Torque locknut to 48-55 ft. lbs. Install new seal using sleeve tool No. 8996407 or equivalent.
29.
Slide on plastic sleeves (end stops) then install inner ball joints and tie rods onto the rack ends. Install rack in a soft vise and torque ball joints to
59-72 ft. lbs. Torsional force should not be exerted on the pinion.
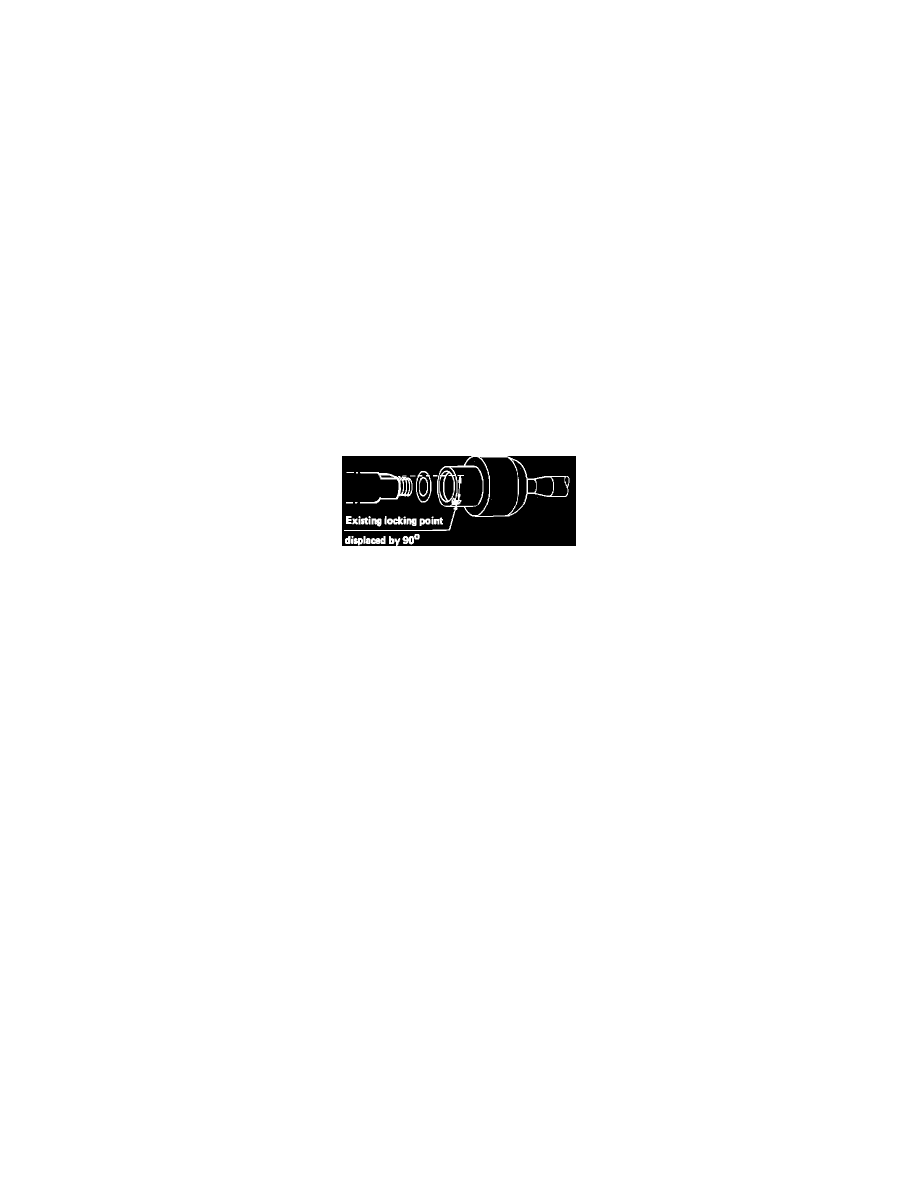
Fig. 2 Positioning Locking Mark On Inner Ball Joint
30.
Lock inner ball joints by driving flange into two surfaces of rack using drift. If old joint is to be reused, previous locking mark must be offset
90°. Install shim, Fig. 2, between joint and shoulder of rack.
31.
Install snap ring for sealing ring support in the end of hydraulic cylinder:
a. Using an 11/16 inch socket, turn pinion so that inner ball joint presses against the sealing ring support.
b. Press in the support and at same time install sealing ring in the groove using a thin screwdriver.
32.
Install rubber bellows and breather tube between the two.
33.
Install hydraulic lines between steering valve and hydraulic cylinder, torquing to 14-22 ft. lbs.
34.
Install tie rod ends and torque locknuts to 44-60 ft. lbs.
