Cowl: Service and Repair
- Make
- Saturn
- Model
- Aura
- Engine
- V6-3.5L
- Year
- 2007
- Section
- Cowl › Service and Repair
Cowl: Service and Repair
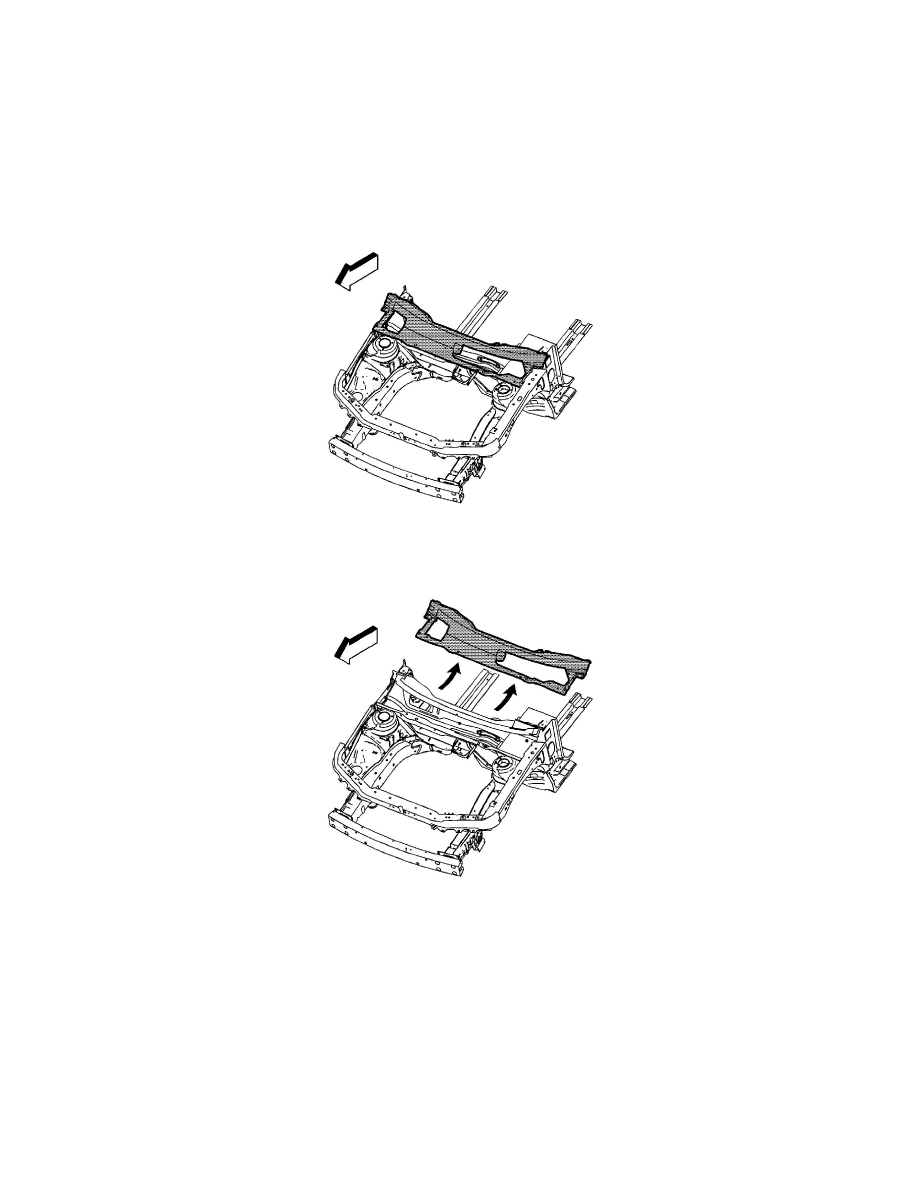
Plenum Upper Panel Replacement
REMOVAL PROCEDURE
CAUTION: Refer to Approved Equipment for Collision Repair Caution in Service Precautions.
1. Disable the SIR system. Refer to SIR Disabling and Enabling.
2. Disconnect the negative battery cable.
3. Remove all related panels and components.
4. Repair as much of the damage as possible.
5. Remove the sealers and anti-corrosion materials from the repair area, as necessary. Refer to Anti-Corrosion Treatment and Repair.
IMPORTANT: Note the number and location of the factory welds for installation of the upper plenum panel.
6. Locate and drill out all the necessary factory welds.
7. Remove the upper plenum panel.
INSTALLATION PROCEDURE
IMPORTANT: If you cannot determine the location of the original plug weld holes, space the plug weld holes every 40 mm (1 1/2 in) apart.
Pinch or Ctrl + scroll to zoom. Double-tap to reset.
Parts & tools for this job For 2007 Saturn Aura 3.5L
- TOOLTrim removal tool kitSearch: trim removal tool kit
- PARTTouch-up paintSearch: Saturn touch up paint
- PARTPanel clip assortmentSearch: Saturn panel clips assortment
Links open Amazon search results in a new tab. As an Amazon Associate I earn from qualifying purchases.