
ION L4-2.2L VIN F (2004)
1. Install the small boot retaining clamp on the neck of the inboard boot. Do not crimp.
2. Slide the inboard boot onto the axle shaft.
Important: The clamp must be in the correct orientation during the crimp operation, to ensure a proper circumference seal.
3. Crimp the boot retaining clamp with the SA9203C
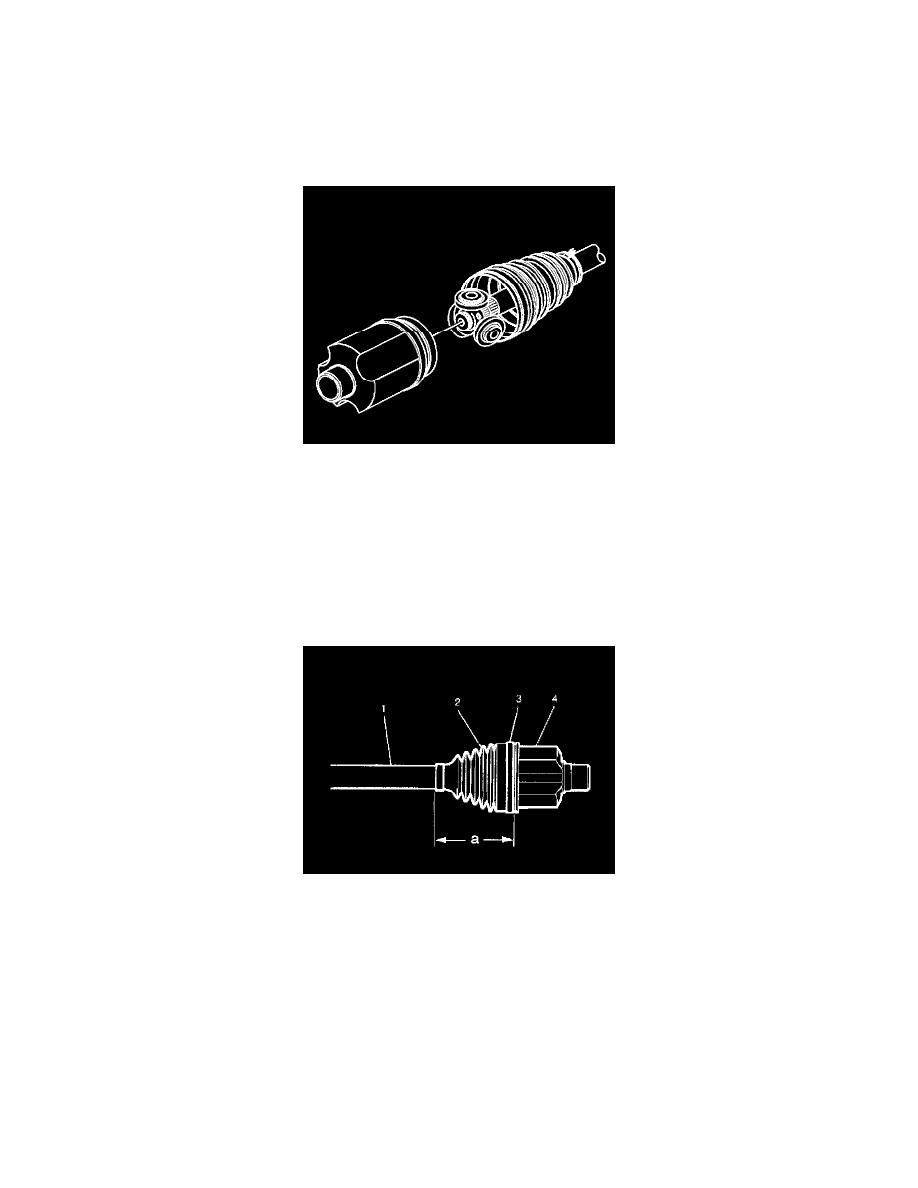
4. Measure the clamp end gap (a), taking care not to exceed 3 mm (0.118 inch). Repeat the previous step as necessary.
5. Slide the tripot joint spider assembly past the spider retaining ring groove until seated against the shoulder.
6. Install the spider retaining ring in the groove of the axle shaft with the SA9198C.
7. Place approximately half of the grease from the service kit in the inboard boot. Use the remainder of the grease to repack the housing.
Important: The CV joint must be assembled with the convoluted retainer in position. Boot damage will result if the joint is not assembled
correctly.
8. Install the trilobal tripot bushing to the housing. Ensure the trilobal tripot bushing is flush with the face of the housing.
9. Position the larger new clamp on the inboard boot.
10. Slide the housing over the tripot joint spider assembly on the axle shaft.
11. Slide the large diameter of the inboard boot (2), with the larger clamp in place (3), over the outside of the trilobal tripot bushing and locate the lip
of the boot in the groove (4).