
SW1 L4-1.9L SOHC VIN 8 (1996)
3.
Place one hand on the front side of the door trim panel (the side that is on the work bench) at one of the door insert corners. Press and hold the
door insert heat stake against the door trim panel substrate.
IMPORTANT:
A desirable round heat stake weld should have an approximate diameter of 10 mm (13/32 in.) and 2 mm (3/32 in.) high. A desired rectangular heat
stake weld should be approximately 13 mm (1/2 in.) long, 5 mm (13/64 in.) wide and 5 mm (13/64 in.) high
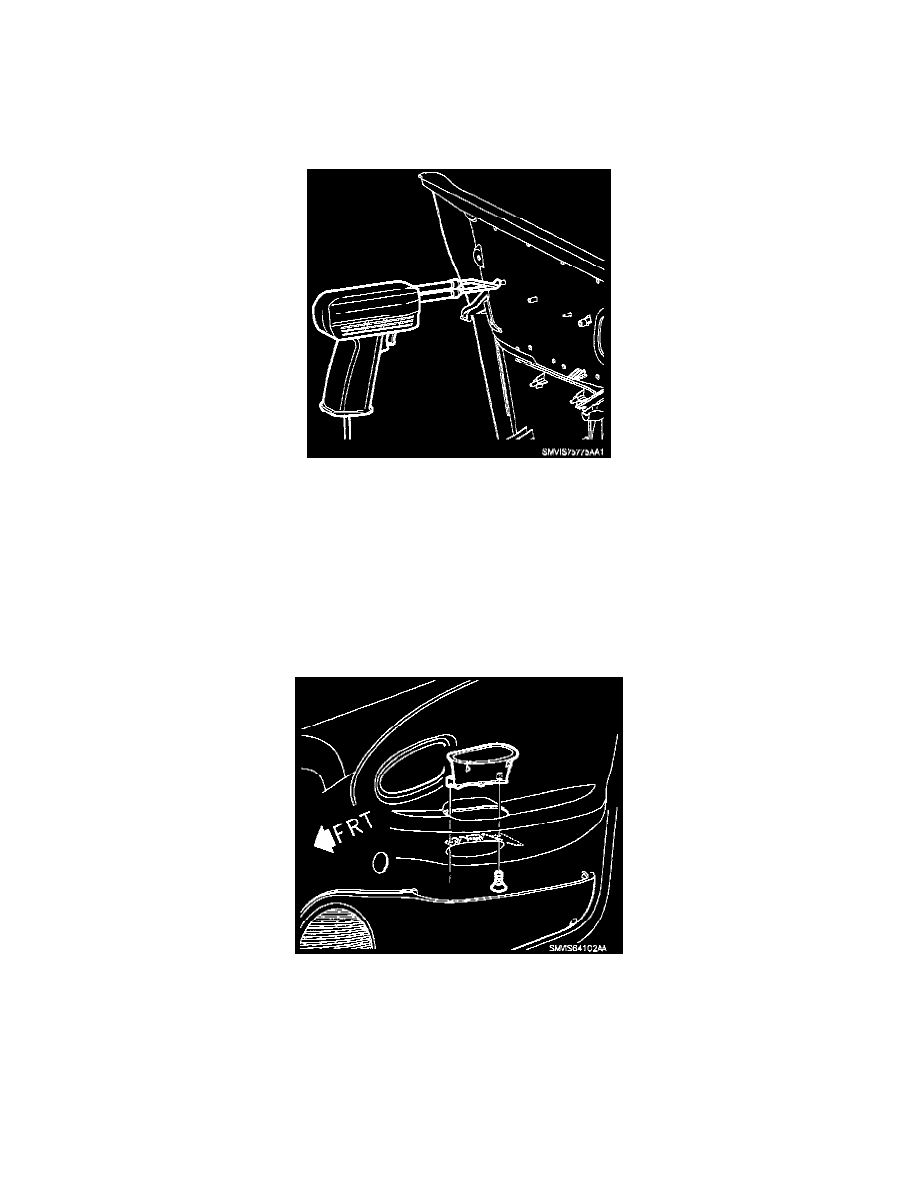
4.
Using a Weller(R) model 8200 soldering gun or equivalent, equipped with a flat tip, use a circular motion around the heat stake and apply firm
steady pressure to spread the heat stake material onto the door trim panel substrate to achieve a proper weld. (Sedan panel shown, Coupe panel
similar)
5.
After the heat stake has been melted, keep steady pressure on the door insert with your hand for 30 seconds to allow the heat stake to harden.
6.
Repeat steps 3-5 for the remaining door inserts corners.
7.
Continue to press and hold the door insert against the door trim panel substrate and heat stake the remaining door insert studs.
8.
Verify that the door insert is securely heat staked to the door trim panel substrate in all locations.
9.
Install the door pull cup.
(Sedan panel shown, Coupe panel similar)