
SW1 L4-1.9L SOHC VIN 8 (1996)
3.
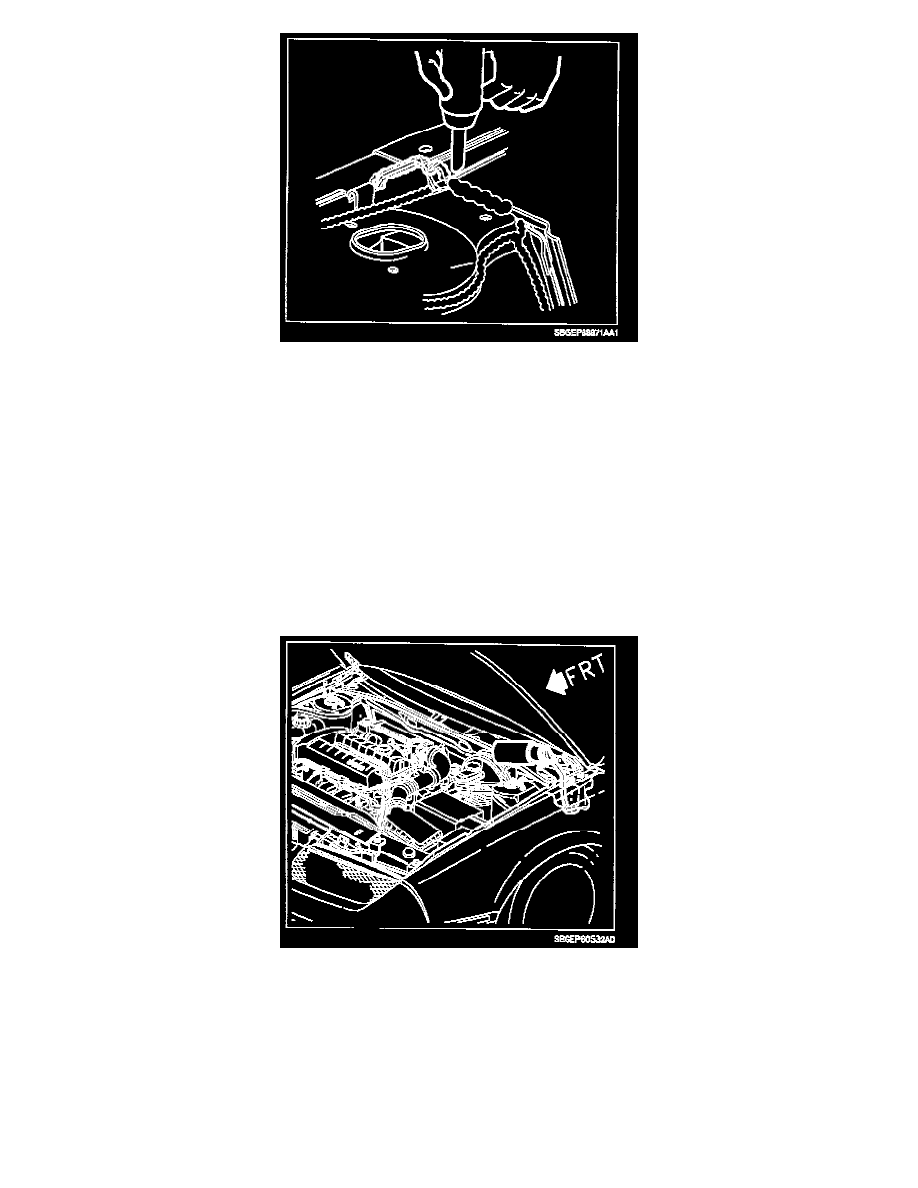
Using Kent Industries High Tech Leak Check Seam Sealer P/N 10105) or equivalent, pump sealant along upper frame rail.
4.
Verify repair by water testing after sealant has been allowed to dry according to manufacturer's recommended instructions.
5.
After verifying repair, go back and perform step 6 under "General Waterleak Testing" in this bulletin to ensure there is no additional waterleak at
the frame rail/hood hinge area.
Frame Rail/Hood Hinge Area Waterleak Repair
1.
Remove wheelhouse liner-to-fender fasteners on affected side of vehicle.
2.
Remove all fasteners from top and rear of front fender on affected side of vehicle. Pull fender away from body to allow access to area to be
repaired.
IMPORTANT:
Excess sealer in this area can cause a drain hole to be plugged. Once the sealer has cured, water test to verify that the frame rail drain holes have not
been plugged. Water naturally drains through the frame rail into the wheelhouse area above the wheel.
3.
Using Kent Industries Wet/Dry Re-Sealant Pump Grade sealer P/N 10590), or equivalent, and hand pump applicator (P/N 90010), seal frame rail/
hood hinge area.
3.1
Remove screw-on tip and replace with a 203 mm (8 in.) length of 1/4 inch diameter hose.
3.2
Insert end of hose for sealer into the 3-nut slot at the rear of front fender toward rear of vehicle.
3.3
Direct sealer toward lower left corner of frame rail toward center of vehicle.
3.4
Allow sealer to cure according to sealer manufacturer, s recommendations.