
SW1 L4-1.9L SOHC VIN 8 (1996)
NOTE: Be careful, when removing or replacing I/P upper trim panel, not to damage VIN plate.
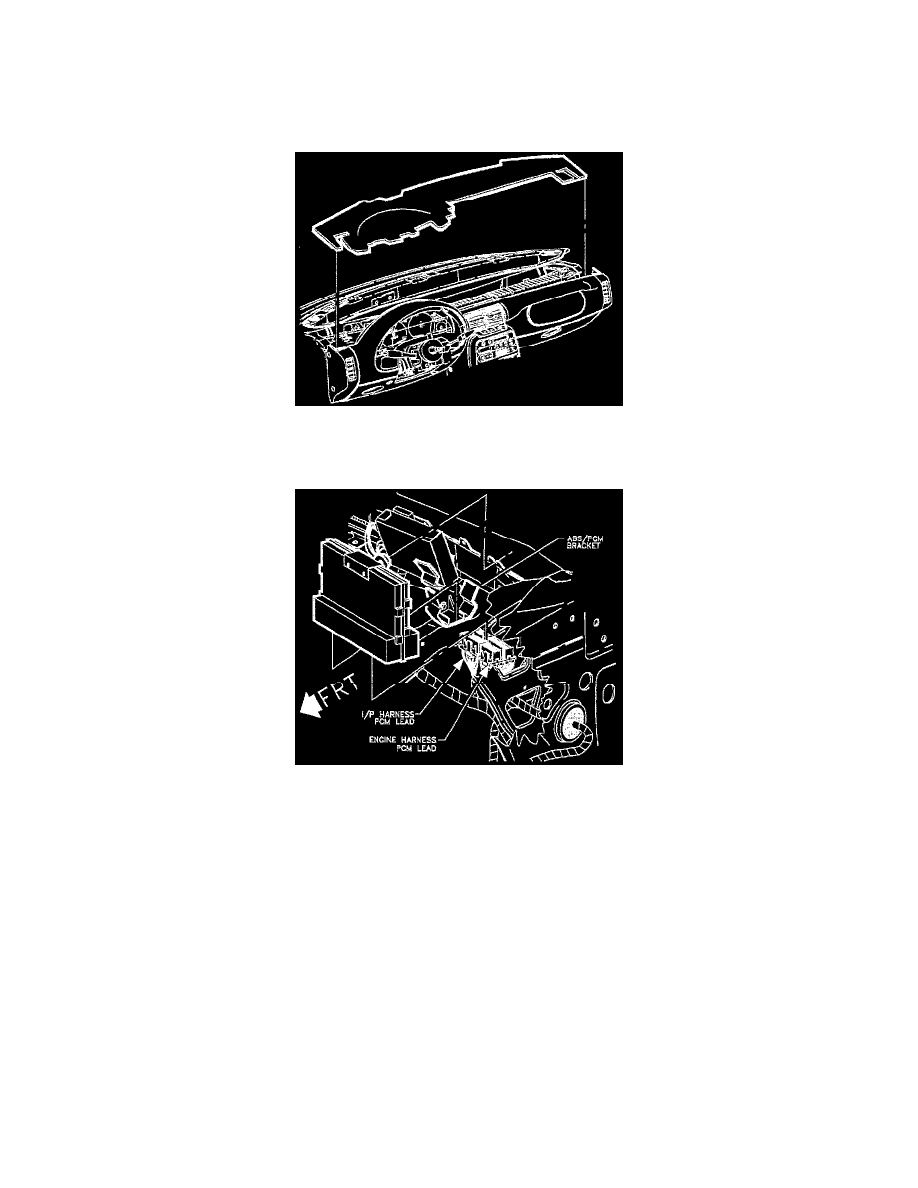
6. Remove I/P upper trim panel.
NOTE: Be careful, when removing upper trim panel, not to damage the upper trim panel seal (SL/SW only).
I/P Upper Trim Panel
7. Remove I/P upper trim pad sound insulator.
PCM Mounting
8. Disconnect PCM electrical connector from under instrument panel.
NOTE: Do not pull on the connectors or wires to remove the PCM. This could back out a terminal and cause an intermittent connection.
9. Loosen PCM attachment out at cross car beam and lift PCM upward (towards windshield) to disengage PCM from ABS/PCM bracket.
INSTALLATION
1. Lower PCM into ABS/PCM bracket while guiding attachment stud into slot in cross car beam.
NOTE: Torque is critical to preserve the integrity of the plastic insulator on the PCM case. Damage to the PCM can result from over torque of the
nut.
2. Install and torque nut.
- Torque: 10 N.m (89 in.lbs.)
3. Install PCM connectors.