
SW1 L4-1.9L SOHC VIN 8 (1996)
Starter Motor: Testing and Inspection
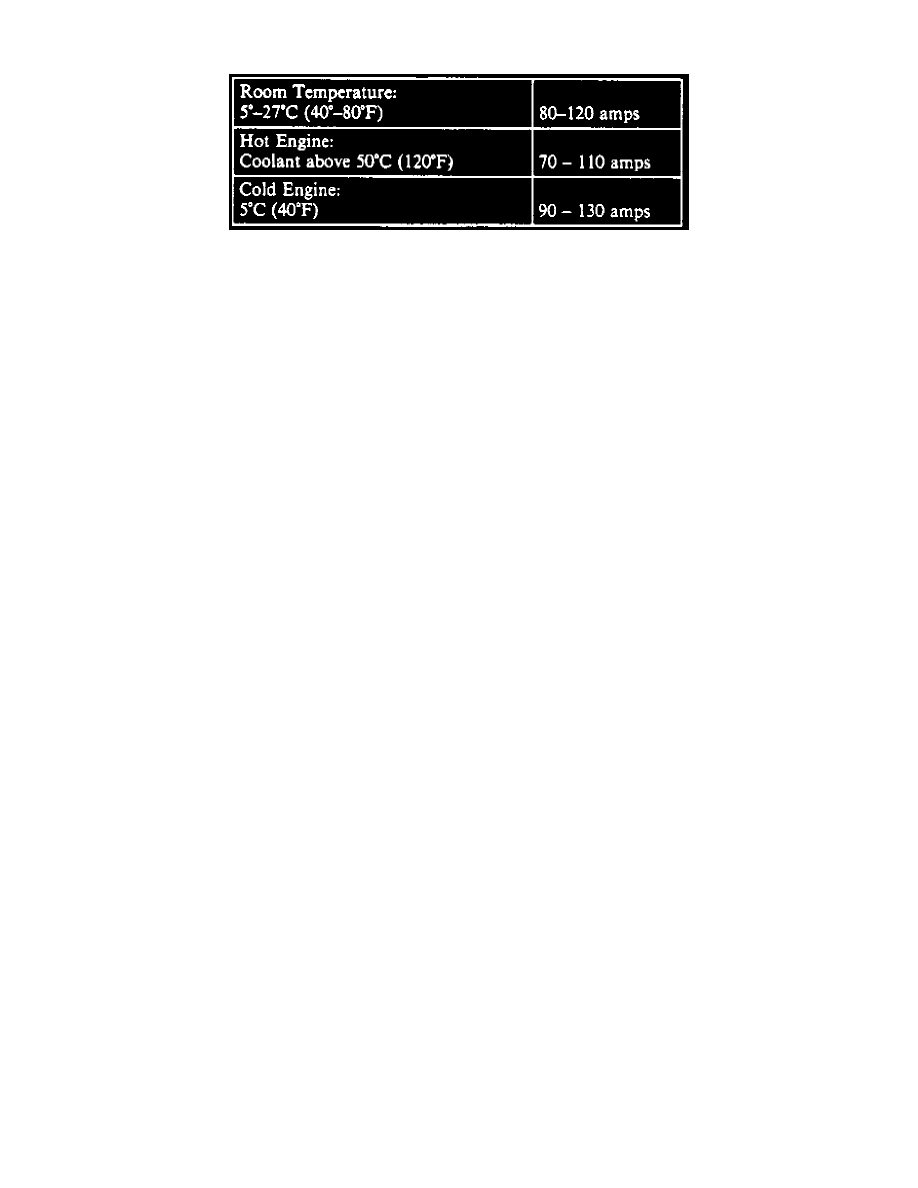
Fig. 2 Cranking Amperage Specifications.
Ensure battery is in satisfactory condition before performing test. If battery power is insufficient, the start motor will not function properly.
Electronic system tester tool No. SA9154Z, or equivalent is required for the following starter system test.
1. Connect red and black tester cables to battery. Place gray inductive current pick-up around positive battery cable.
2. Ensure arrow on gray inductive current pick-up is pointing toward starter motor solenoid.
3. Disable ignition system by disconnecting electrical connection at ignition module.
4. Press Starter Test button on system tester.
5. Position tester so the display can be seen from driver's seat. When display reads Crank Engine, turn ignition to Start position.
6. Tester will continue to display Crank Engine for 15 seconds.
7. The System Tester will display the following information:
a. Cranking Amps: This displays the average amperage drawn by the starter motor during cranking. Refer to Fig. 2. for normal operation
amperage specifications.
b. Cranking Voltage: This displays the average battery voltage during cranking. If the voltage is below 9.5 volts, ensure battery is in
satisfactory condition and properly charged. Correct cranking voltage and a slow stator indicates loose or corroded cables.
c. Good Starter/Bad Starter: If display reads Bad Starter, replace starter motor only after determining there is no engine mechanical
malfunctions or flywheel binding problems.