
SW1 L4-1.9L SOHC VIN 8 (1996)
Control Arm: Service and Repair
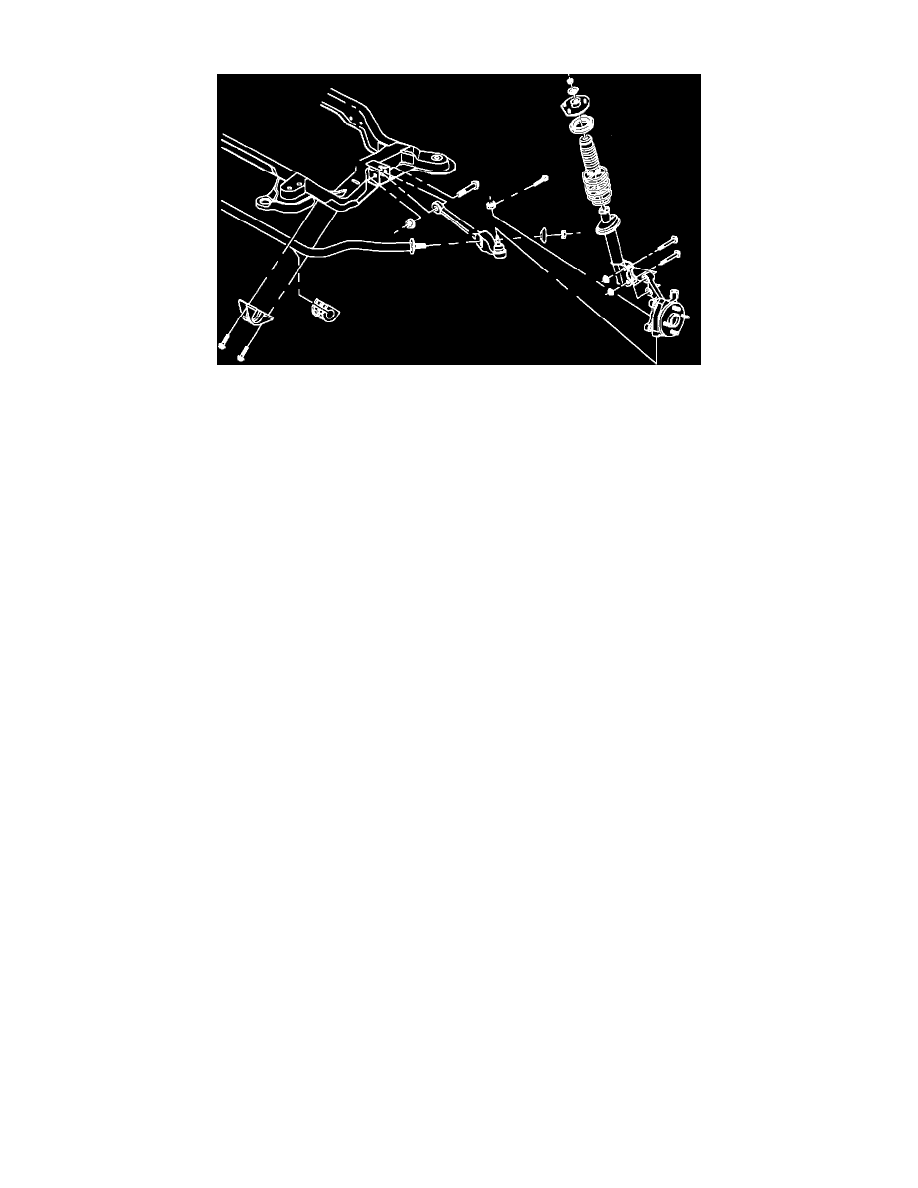
Fig. 2 Exploded View Of Front Suspension
1.
Raise and support vehicle, then remove wheel assembly.
2.
Remove and discard lower control arm ball stud cotter pin.
3.
Loosen lower control ball stud castle nut until level with top of ball stud.
4.
Using tool No. SA9132S or equivalent, separate lower control arm from knuckle. Do not use wedge type tool or ABS speed sensor ring or seal
may be damaged.
5.
Remove lower control arm ball stud castle nut.
6.
Remove inner front fender splash shield.
7.
Remove lower control arm to cradle attaching nut and bolt, Fig. 2.
8.
Remove lower control arm to tension strut attaching nut, then remove arm.
9.
Reverse procedure to install.