
Clutch: repair
- Make
- SEAT
- Model
- Leon Mk1
- Section
- 02J 5-speed gearbox › Clutch, control › Clutch: repair
Power transmissionClutch: repair
|
|
|
|
|
 Note!
| t | Replace the disks and clutch presses that have damaged or loose riveted joints. |
| t | Make the disk match the corresponding clutch press, as per the Microfiche for Spares and the identification letters for the engine. |
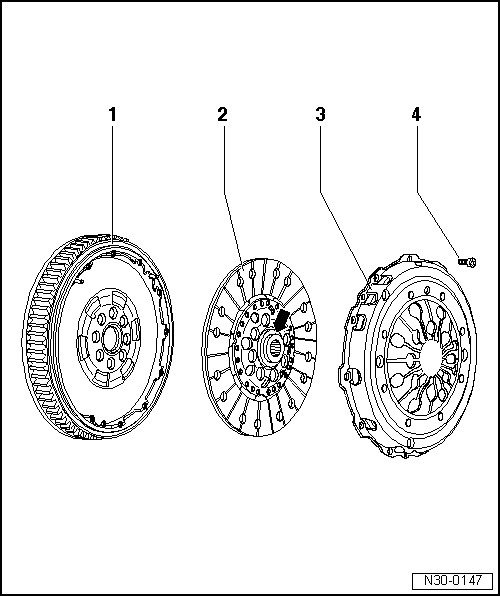
| 1 - | The engine wheel |
| q | Make sure that the centring linchpins are well placed. |
| q | The contact surface with the clutch disk should not have any grooves and they must be free from oil and grease. |
| q | Dismounting and assembling → Rep. Gr.13 |
| 2 - | Disk of clutch |
| q | Diameter → Chapter |
| q | Position for assembly if the wheel has two parts: the shortest boss -arrow- remains facing towards the clutch press. |
| q | Position for assembly if the wheel is a single: the spring housing remains facing towards the press. |
| q | Grease the notches slightly. |
Note!| t | Clean the notches in the main shaft, and in the clutch disk used, remove the corrosion and apply a very fine layer of grease Spare No. -G 000 100-, on the notches in the main shaft. |
| t | Then the clutch disk must be moved back and forth over the main shaft until the hub slides smoothly across the shaft. Remove the remains of excess grease. |
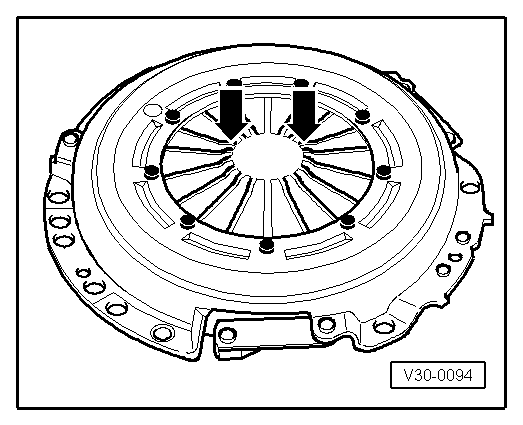
| 3 - | Clutch press |
| q | Dismounting and assembling → Fig. |
| q | Check the ends of the diaphragm → Fig. |
Note!| The clutch press is now greased and protected against corrosion. Only the contact surface can be cleaned, otherwise the useful life of the clutch is reduced. |
| 4 - | Bolt |
| q | Consult the microfiche for Spares in order to assign it |
| q | If the wheel has two parts 13 Nm |
| q | If the wheel is a single one 20 Nm |
| q | Loosen and tighten in a cross in several stages |
|
|
The same page in: Leon Mk2.
Parts & tools for this job For SEAT Leon
- PARTClutch kitSearch: SEAT Leon clutch kit
- TOOLClutch alignment toolSearch: clutch alignment tool
- FLUIDGear oilSearch: SEAT Leon manual gearbox oil
Links open Amazon search results in a new tab. As an Amazon Associate I earn from qualifying purchases.