
Leon Mk1
| Differential: dismantling and assembling |
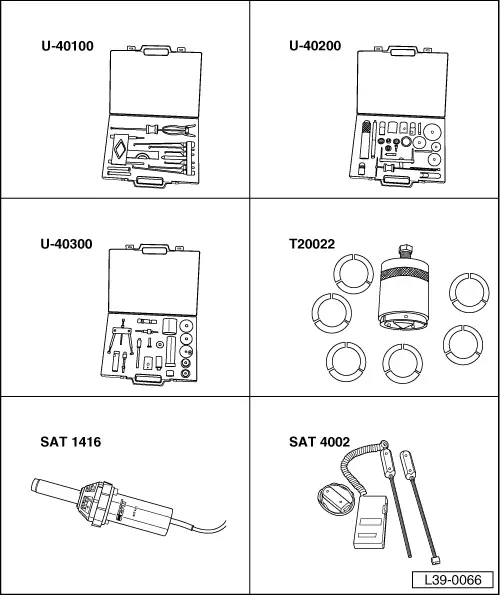
| Special tools and workshop equipment required |
| t | Gearbox extractor set -U-40100- |
| t | Gearbox repair set -U-40200- |
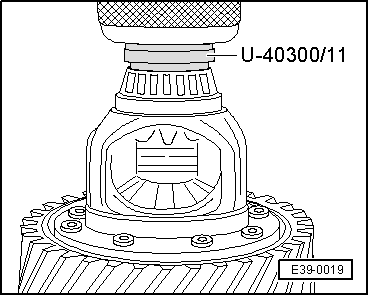
| t | Gearbox repair set -U-40300- |
| t | Clip extractor with claws -T20022- |
| t | Electric blower -SAT 1416- |
| t | Digital thermometer -SAT 4002- |
 Note!
Note!| t | The roller bearings and their corresponding outer tracks are matched pairs. They must not be confused or interchanged. |
| t | The two roller bearings should be replaced together. |
| t | Adjust the differential whenever the roller bearings, differential casing, gearbox casing or clutch housing are replaced. |
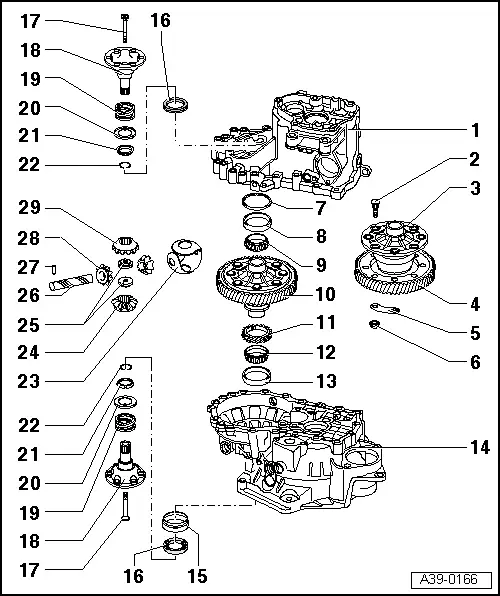
| 1 - | Gearbox casing |
| 2 - | Bolt |
| 3 - | Differential casing |
| q | If replaced, refer to Adjustment chart → Chapter |
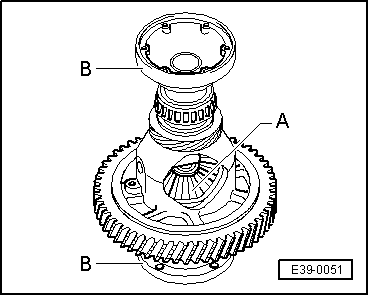
| 4 - | Differential crown |
| q | Riveted in factory |
| q | If renewed, the differential crown and the layshaft must be replaced together |
| q | Removing and fitting → Chapter |
| 5 - | Plate supplement |
| 6 - | Nut |
| q | 70 Nm |
| 7 - | Shim |
| q | For differential |
| q | Determine thickness → Anchor |
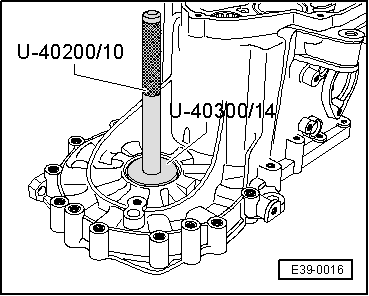
| 8 - | Outer track, roller bearing |
| q | Remove → Fig. |
| q | Fit → Fig. |
| 9 - | Roller bearing |
| q | Remove → Fig. |
| q | Fit → Fig. |
| 10 - | Differential assembly |
| q | Crown riveted in factory |
| q | If renewed, the differential crown and the layshaft must be replaced together Refer to Adjustment chart → Chapter |
| q | Drill the rivets and install with bolts → Chapter, Differential crown: removing and installing |
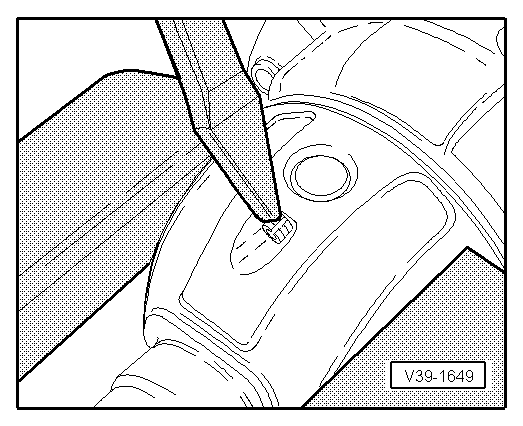
| 11 - | Speedometer mechanism sprocket |
| q | Remove levering with a flat screwdriver |
| q | Installing: fit as far as it will go into the differential casing before installing the roller bearing track → Item |
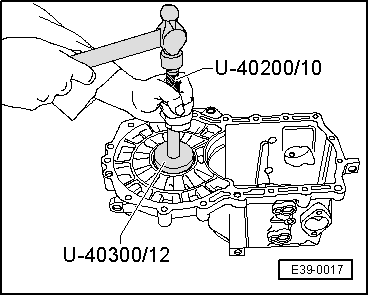
| 12 - | Roller bearing |
| q | Remove → Fig. |
| q | Fit → Fig. |
| 13 - | Outer track, roller bearing |
| q | Remove → Fig. |
| q | Fit → Fig. |
| 14 - | Clutch housing |
| 15 - | Bush |
| q | To house the articulation flange oil seal → Item |
| q | Removing and installing → Fig. |
| 16 - | Articulation flange oil seal |
| q | Renew → Chapter |
| 17 - | Conical bolt |
| q | 25 Nm |
| q | Bolt with the threaded device for securing the articulation flanges → Item |
| 18 - | Articulation flanges |
| q | Removing and fitting → Chapter |
| 19 - | Articulation flange spring |
| q | Fit behind the articulation flange |
| 20 - | Thrust washer |
| q | Assembly position: Collar towards the spring, core towards the conical ring |
| 21 - | Conical ring |
| q | With recess for the thrust washer |
| q | Assembly position: conical side facing the differential casing |
| 22 - | Safety ring |
| q | Maintains the position of the conical ring, washer and spring of the articulation flange when dismantled |
| 23 - | Set of thrust washers |
| q | Impregnate with gearbox oil before installation |
| 24 - | Planet gear |
| q | Fit → Fig. |
| 25 - | Threaded component to secure the articulation flanges |
| q | Fit → Fig. |
| 26 - | Satellite shaft |
| q | Remove with a drift |
| q | Fit → Fig. |
| 27 - | Elastic pin |
| q | To hold the satellite shaft |
| q | Removing and fitting → Fig. |
| 28 - | Satellite |
| q | Fit → Fig. |
| 29 - | Planet gear |
| q | Fit → Fig. |
Note!
|
|
Note!
|
|

Note!
|
|
|
|
|
|