
Leon Mk1
| Clutch: repair |
| Assembly chart |
 Note!
Note!| t | Always replace clutch plates and clutch presses that have loose or damaged rivets. |
| t | When replacing, assign the clutch plate and press according to the Replacement Parts Microfiche. |
| t | For working on the clutch, it is necessary to dismount the vehicle's gear box differential. |
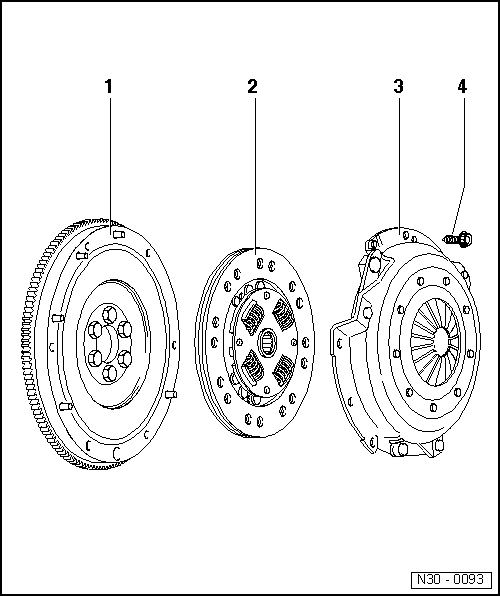
| 1 - | Engine flywheel |
| q | When fitting the clutch plate, check that the centering pins are firmly set. |
| q | The contact surface with the clutch plate should be clean of oil and grease and without gashes or grooves. |
| q | Dismounting and assembly of the engine flywheel → Rep. Gr.13 of the corresponding engine |
| 2 - | Clutch plate |
| q | When replacing, assign according to the Replacement Parts Microfiche. |
| q | Lightly grease the strias. |
| q | Assembly position: the spring cage should face the clutch plate. |
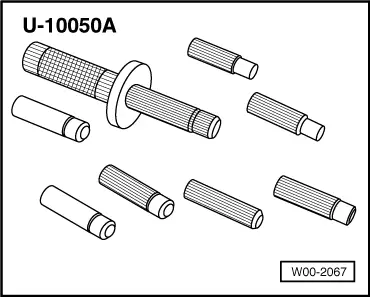
| q | Clutch plate centering → Fig. |
Note!| Clean the strias of the primary shaft and the clutch plate. Remove the rust from used clutch plates. Apply a fine layer of -G 000 100- grease on the strias of the primary shaft. With a to-and-fro movement, move the clutch plate on the primary shaft until it gently slides. Remove any excess grease. |
| 3 - | Clutch plate |
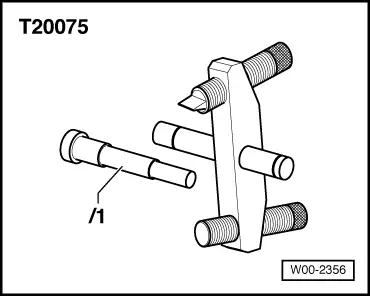
| q | Dismounting and assembly → Fig. |
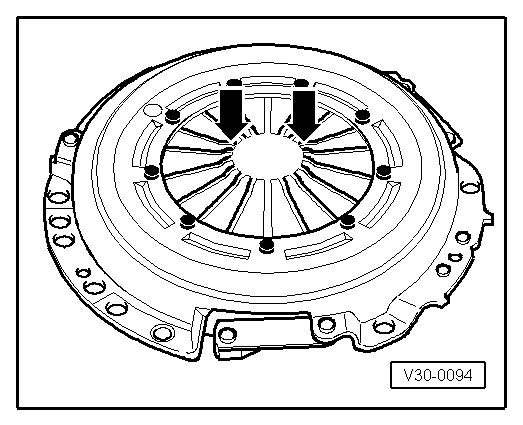
| q | Check the edges of the diaphragm → Fig. |
Note!| Clutch plates are greased and protected against rust. Clean only the clutch plate contact surface of any grease or oil, otherwise the working life of the clutch will be reduced. |
| 4 - | Screw, 20 Nm |
|
|
|
Note!
|
|
|
|