seat Workshop Repair Guides

SEAT Workshop Service and Repair Manuals

Clutch casing: repair > < Checking the oil level in the gearbox
Adjusting the selector finger and guide collar
Special tools and workshop equipment required
   
t  Tool for adjusting the guide collar -U-40201-
  W00-2250
t  Universal tester stand -T20020-
The selector finger and guide collar must only be adjusted when one or more of these components has been replaced:
l  Selector finger
l  Guide collar
l  Selecting bar
l  Clutch casing
l  Gearbox casing
–  Loosen the screw -1- and separate the slider -A- on tool -U-40201-.
–  Measure the diameter of the round head of the selector finger on the gearbox.
  W00-2300
–  On the slider -A-, attach the round head -B- that has the same diameter as the round head of the selector finger and secure it with the screw -1- without tightening it up.
  E34-0086
–  Set tool -U-40201- over the gearbox casing and secure it with two screws -A-.
  Note!
Remove the slider -A- on tool -U-40201- beforehand. Use the hexagonal screws that secure both casings.
  E34-0087
–  Set tool -T20020- with a tester on top of tool -U-40201-. Put the end of the tester on the reverse gear drag link with a pretension of 1mm.
–  Push the reverse gear drag link in the direction of the arrow and adjust the tester to “0”.
–  Push the reverse gear drag link in the opposite direction and note the reading in the tester (example: 0.70 mm).
–  Calculate the mean value for the range of displacement of the reverse gear drag link by dividing the value of the previous measurement by two:
Mean value =
0,70 mm
2
= 0,35 mm
–  Secure the reverse gear drag link with the screw -2- in the position of the value obtained beforehand (in this case, 0.35mm).
  E34-0088
–  Using the tool hook -C-, move the selector finger towards the inside of the reverse gear ring.
–  In this position, put the slider -A- with the corresponding round head in the tool. Thread the screw -1- without tightening it.
  E34-0089
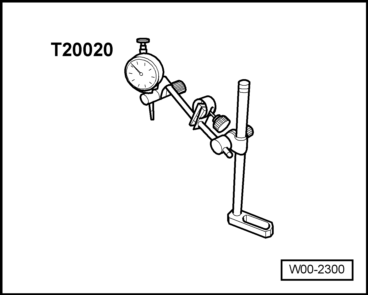
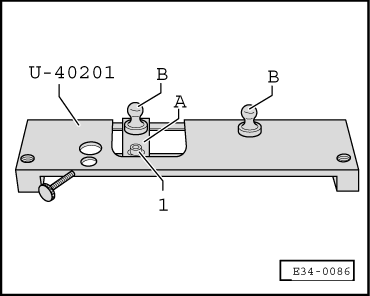
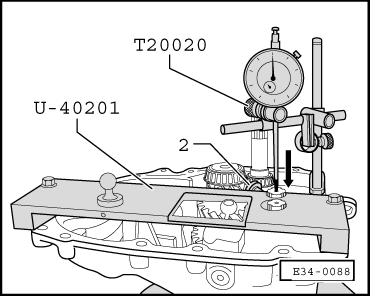
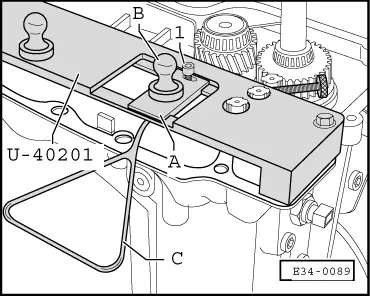
–  Set tool -T20020- with a tester on top of tool -U-40201-. Put the end of the tester on one side of the round head -B-, with a pretension of 1mm.
–  Move the round head to one side and adjust the tester to “0”.
–  Move the round in the opposite direction again and note the reading in the tester (example: 0.60 mm).
–  Calculate the mean value for the range of displacement of the selector finger by dividing the value of the previous measurement by two:
Mean value =
0,60 mm
2
= 0,30 mm
–  Secure the slider with the screw -1- in the position of the value obtained previously (in this case, 0.30 mm).
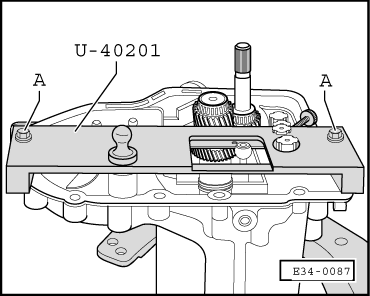
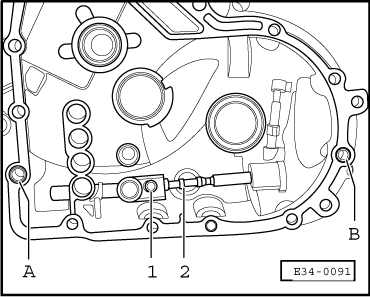
–  Remove the tool -U-40201- from the gearbox casing.
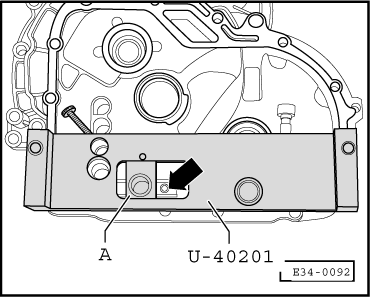
  Note!
Do not alter the position of the components of tool -U-40201-. This would give the wrong adjustment for the selector finger and guide collar.
  E34-0090
–  Loosen the screw -1- that secures the bush on the clutch casing until this moves smoothly on the selector shaft.
–  Place the selector shaft in the central slot -2-.
–  Check that the centering sleeves -A- and -B- are correctly placed in the clutch casing.
  E34-0091
–  Remove tool -U-40201-, turn it 180° and mount it on the clutch casing.
t  The tool -U-40201- must fit perfectly into the centering sleeves in the clutch casing.
t  The round head of the slider -A- must fit correctly in the guide collar.
–  With all of the elements inserted properly, tighten the screw -arrow- securing the guide collar to the selector shaft.
t  Tightening torque: 35 Nm
–  Remove the tool from the clutch casing.
  E34-0092

Clutch casing: repair > < Checking the oil level in the gearbox