seat Workshop Repair Guides

SEAT Workshop Service and Repair Manuals

Gearbox: dismounting and assembly > < Gearbox: dismounting and assembly
Dismounting
Dismounting
–  Unhook the clutch cable from the clutch release lever. Put it to one side without bending it.
Automatic clutch cables → Chapter.
Non-automatic clutch cables → Chapter.
   
–  Disconnect the speedometer mechanism -arrow-.
–  Remove the bracket for the starter motor and speedometer mechanism cables.
  V34-2538
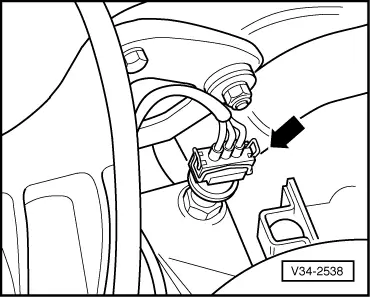
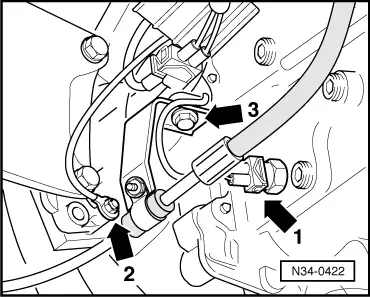
–  Remove the connection of the reversing light switch -arrow 1-, the earth terminal -arrow 2- and the cable bracket of the electrical installation -arrow 3-.
  Note!
The earth terminals may be in different positions, depending on the model.
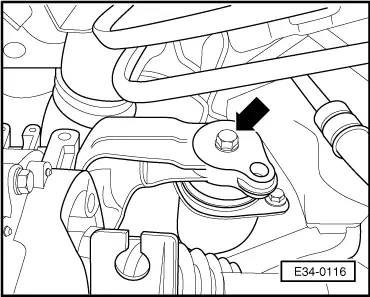
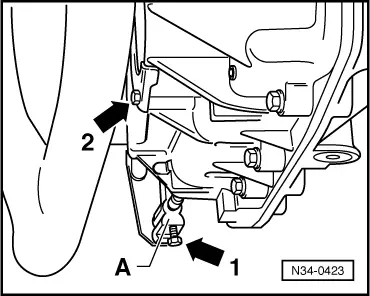
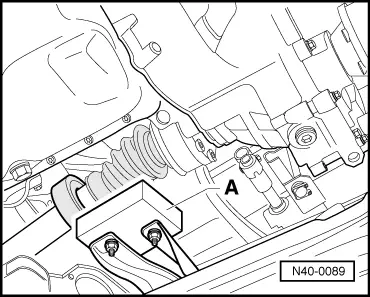
–  Remove the pipe brackets on the power steering system. Carefully move the pipes out of the way by not bending nor forcing them.
  Note!
t  To keep the power steering pipes out of the way, fix them to the body or other appropriate component by using string or fine wire.
t  One should avoid twisting or stretching the pipes when moving them out of the way. Fix them so they do not get in the way when dismounting or fitting the gearbox.
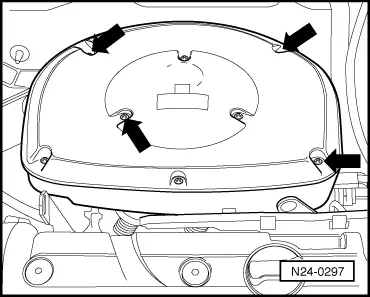
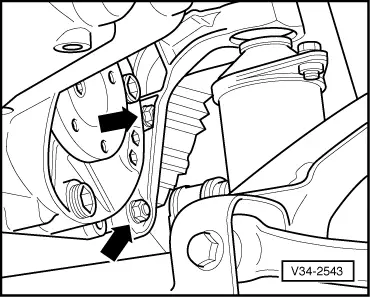
–  Take out the retaining screws on the starter motor.
  N34-0422
–  Take out the retaining screws -arrow- on the air filter and remove it.
  N24-0297
–  Fit the grip tie -U-30025- to secure the engine.
  Note!
Remove any cable brackets, cables and pipes that may interfere in fitting the grip tie.
–  Tighten the screws on the grip tie -U-30025-.
  E34-0115
–  Take out the bolt on the rear gearbox bracket.
  E34-0116
–  Take out the bolts -arrow 1- and -2-) on the front gearbox bracket and remove it.
–  Take out the bolts securing the gearbox to the engine, on the upper part of the clutch casing.
–  Jack up the vehicle.
  N34-0425
–  Take out the bolts -arrows- on the front gearbox bracket and remove it.
  V34-2543
–  Dismount the connector finger -A- on the connector shaft on the gearbox by loosening the screw -arrow 1-.
–  Take out the screw -arrow 2- and remove the protecting plate from the gearbox.
–  Take out the screw that secures the exhaust pipe to the bracket.
–  Loosen (don't take out) the back bolt securing the gearbox to the engine and remove the front exhaust pipe bracket.
–  Move the starter motor to one side and fasten it conveniently.
  N34-0423
–  Take out the screws securing the coupled axles to the gearbox flanges.
t  Use a -U-40020- tool spanner of the appropriate diameter.
–  Remove the counterweight -A- from the bracket holder.
t  Mark the assembly position of the counterweight.
–  Turn the steering wheel right round to the left.
–  Move the left coupled axle out of the way and fasten it appropriately, making sure not to damage it.
–  Place tool -T20083- on the hydraulic column jack -SAT 1001-.
–  Put the hydraulic column jack -SAT 1001- under the vehicle and fit tool -T20083- to the gearbox.
  Note!
Check that tool -T20083- is correctly attached to the gearbox.
–  Take out the bolts securing the gearbox to the engine on the lower part of the clutch casing.
–  Separate the gearbox from the engine making sure not to damage any of the vehicle's components.
  Note!
t  To make it easier to separate the gearbox from the engine, slightly incline the engine. Lightly slacken off the left screw of the grip tie -U-30025- to make separating them easier.
t  On inclining the engine, check that no damage is caused to any of the vehicle's components.
  N40-0089

Gearbox: dismounting and assembly > < Gearbox: dismounting and assembly