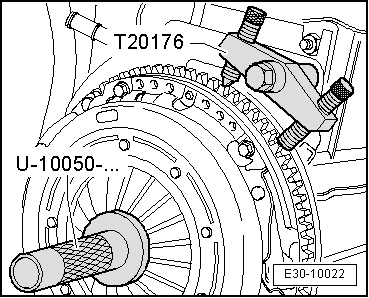
| l
| Installation is carried out in the reverse order of removing, when doing this note the following. |

Note | t
| Replace clutch plate and pressure disk with damaged or loose riveted unions. |
| t
| To reduce the unpleasant smells of a burnt clutch, the clutch bell-housing must be thoroughly cleaned, along with the flywheel and engine at the side facing the clutch. |
| t
| Eliminate any corrosion from the input shaft teeth and the disk hub of the clutch, applying a fine layer of approved lubricating grease → Parts catalogue. Then move the clutch plate on the input shaft from side to side, until the hub moves smoothly on the shaft. It is essential to remove excess grease. |
| t
| The pressure disk has anti-corrosion protection and is greased. Only the contact surface must be cleaned; otherwise the working life of the clutch will be considerably reduced. |
| t
| The contact surface of the pressure disk and clutch plate lining must be in total contact with the flywheel. Only then can the securing bolts be inserted. |
| l
| Clutch plate installation position: the spring cage should point towards the pressure plate. |
|
|
|
 Note
Note
 Note
Note