
Leon Mk1
| Dismantling and assembling 3rd and 4th gear clutch -K3- with turbine shaft |

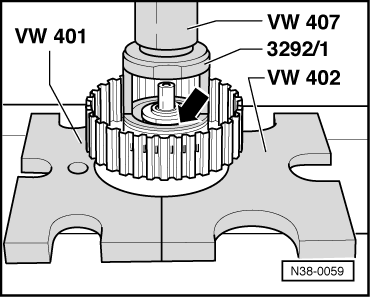
| Special tools and workshop equipment required |
| t | Pressure plate -VW 401- |
| t | Pressure plate -VW 402- |
| t | Press tool -VW 407- |
| t | -3292/1- from fitting appliance -3292- |
| The clutch is only allowed to be dismantled for cleaning or when you are carrying out visual check. |
| Clutches -K1- and -K3- can be pressed together in some gearboxes. |
| Press -K1- off -K3- → Chapter |
| Press -K1- onto -K3- → Chapter |
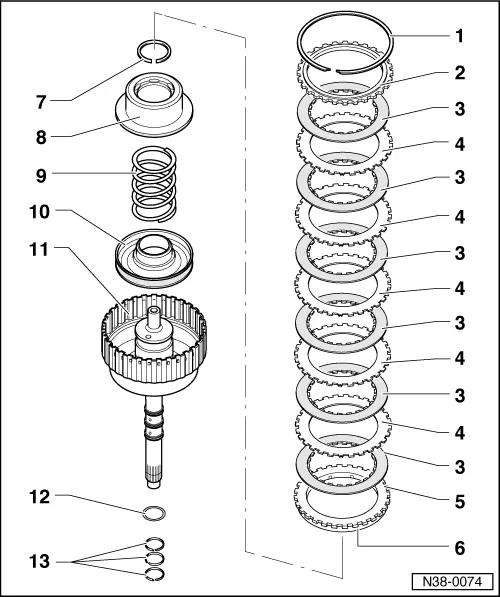
| 1 - | Circlip |
| q | Different thickness. |
| q | Marking after removing and inserting at same point. |
| 2 - | Pressure plate |
| q | Installing with stepped side facing circlip. |
| 3 - | Inner disc |
| q | Quantity → Chapter. |
| q | Before installing place in ATF for 15 minutes. |
| 4 - | Outer disc |
| q | Quantity → Chapter. |
| 5 - | Thrust plate |
| q | Installing with peened corrugated washer facing piston. |
| 6 - | Corrugated washer |
| q | Peened to thrust plate → Item. |
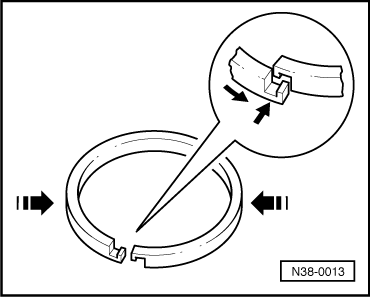
| 7 - | Circlip |
| q | Removing and installing → Fig.. |
| 8 - | Piston cap |
| q | Sealing lips are vulcanised to piston cap. |
| q | Moistening sealing lips with ATF before installing. |
| q | Turn piston cap slightly when installing. |
| q | When removing and installing press down and fit circlip → Item. |
| 9 - | Spring |
| q | Seating between piston and piston cap. |
| 10 - | Piston |
| q | Sealing lips are vulcanised to piston. |
| q | Moistening sealing lips with ATF before installing. |
| q | Turning piston slightly when installing. |
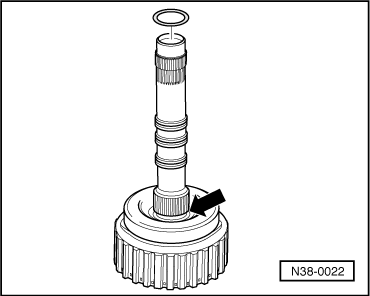
| 11 - | Clutch housing with turbine shaft |
| q | Height varies according to number of inner and outer discs. |
| 12 - | O-ring |
| q | Always renewing. |
| q | Installing → Fig.. |
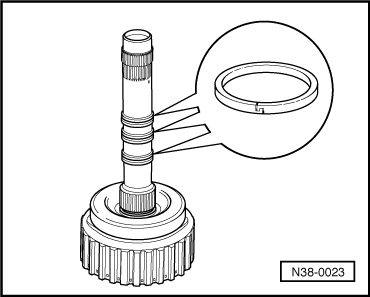
| 13 - | Piston ring |
| q | Checking that it is correctly located → Fig.. |
| q | Fitting → Fig.. |
|
|
|
|
|
|