
Leon Mk1
|
|
|
|
|
 Warning
| t | The valve body or the conductor strip can also be removed when the gearbox is installed. |
| The conductor strip can be removed individually. |
| t | After reinstalling oil pan, check ATF level and top up → Chapter. |
| t | Always renew a valve body which is fouled or defective. |

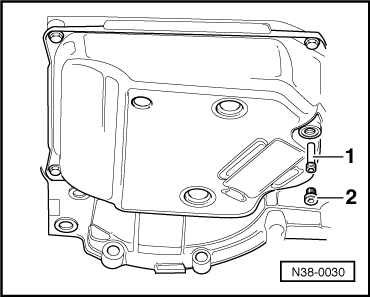
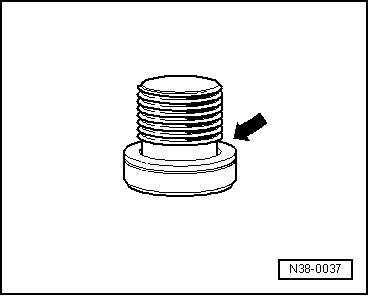
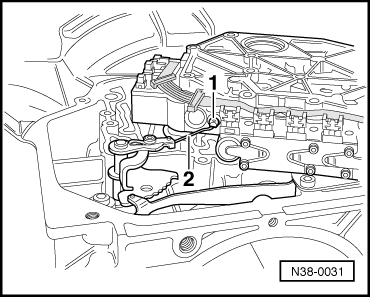
| 1 - | Plug |
| q | Always renewing oil seal → Fig.. |
| q | Checking ATF level and topping up → Chapter. |
| 2 - | Overflow pipe |
| q | Removing to drain ATF → Fig.. |
| q | Screwing in onto stop. |
| q | Checking ATF level and topping up → Chapter. |
| 3 - | Oil pan |
| 4 - | Bolt, 12 Nm |
| 5 - | Magnet |
| q | Inserting in the recess in oil pan. |
| 6 - | Spacer bush |
| q | Pressing into gasket. |
| 7 - | Seal |
| q | Always renewing. |
| q | Pressing spacer bushes into gasket. |
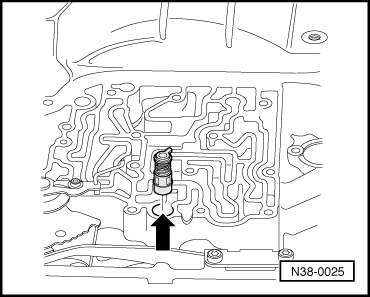
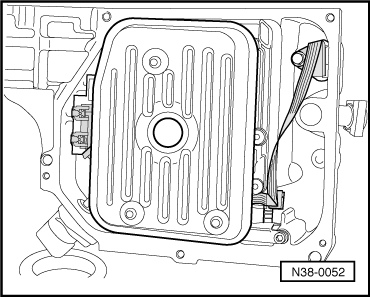
| 8 - | ATF strainer |
| q | Installing → Fig.. |
| 9 - | Bolt, 5 Nm |
| 10 - | Seal |
| q | Always renewing. |
| q | Inserting in valve body. |
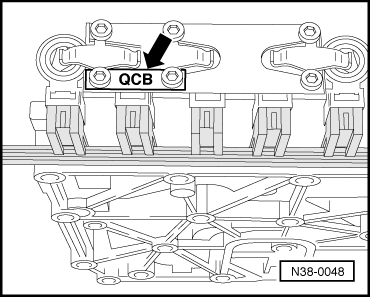
| 11 - | Valve body |
| q | Removing → Fig.. |
| q | Installing → Fig.. |
| q | Identification → Fig.. |
| q | Inserting seal → Item. |
| 12 - | Bolt, 10 Nm |
| 13 - | O-ring |
| q | For cable lead-through. |
| q | Always renewing. |
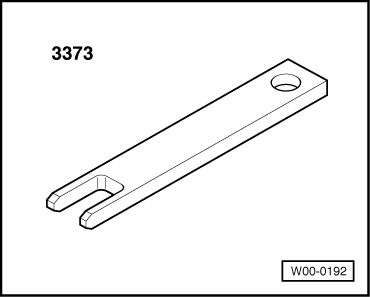
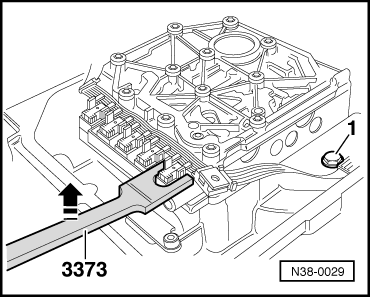
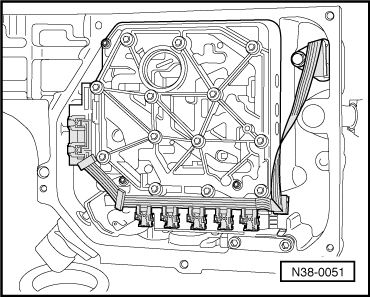
| 14 - | Conductor strip with connector for solenoid valves |
| q | With cable lead-through and connector. |
| q | Can also be removed and installed with gearbox installed. |
| q | Pulling off solenoid valves with -3373- → Fig.. |
| 15 - | Sealing plug |
| q | Taking out before removing and installing freewheel. |
| q | Inserting so that the lug is located in the groove on housing → Fig.. |
| q | Placing O-rings onto sealing plug. |
| 16 - | O-ring |
| q | Always renewing. |
| 17 - | O-ring |
| q | Always renewing. |
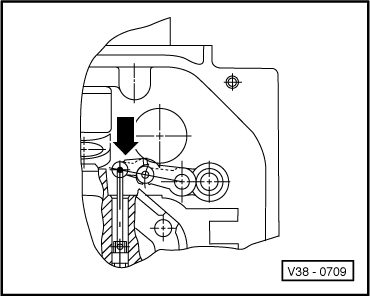
| 18 - | Operating rod for spool valve |
| q | Unhooking → Fig.. |
| q | Installing with stepped side facing spool valve → Fig.. |
| q | Adjusting → Fig.. |
|
|
|
|
|
|
|
|
|
|
|
|
|
|
|
|
|
|