seat Workshop Repair Guides

SEAT Workshop Service and Repair Manuals

Clutch action > < Overview - power transmission
Removing and installing clutch
   
Removing and installing clutch
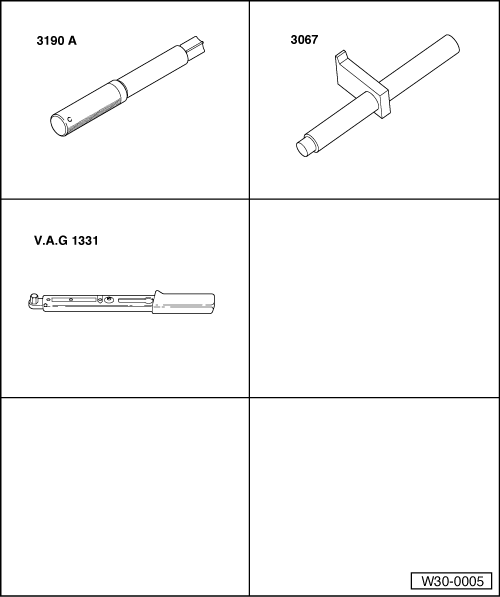
Special tools and workshop equipment required
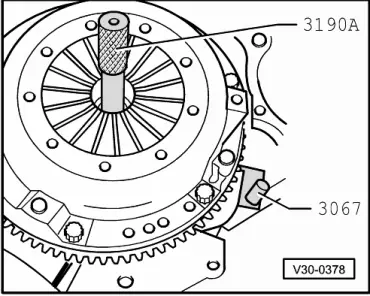
t  Counterhold tool -3067-
t  Centring mandrel. -3190 A-
t  Torque wrench -V.A.G 1331-
t  Grease for clutch plate splines -G 000 100-

Removal:
l  Gearbox removed.
   
–  Use counterhold tool -3067- to loosen bolts.
–  Loosen bolts in small steps and in diagonal sequence.
–  Remove pressure plate and clutch plate.
Installation
Installation is carried out in the reverse sequence; note the following:
  Note
t  Pressure plate contact surface and clutch plate lining must make full contact with flywheel.
t  Tighten securing bolts diagonally and evenly to prevent damage to pressure plate centring hole and flywheel centring pins.
  V30-0378
l  Installation location of the clutch plate: Lettering „gearbox side“ or spring cage aligned towards pressure plate
–  Reverse position of counterhold tool -3067- when installing.
  A30-0144
Centring clutch plate
–  Tighten bolts in small steps and in diagonal sequence to avoid damaging centring holes in pressure plate and dowel pins on flywheel. Tightening torque → Item
–  Install manual gearbox.
  V30-0378

Clutch action > < Overview - power transmission