
Leon Mk1
| Repairing clutch |
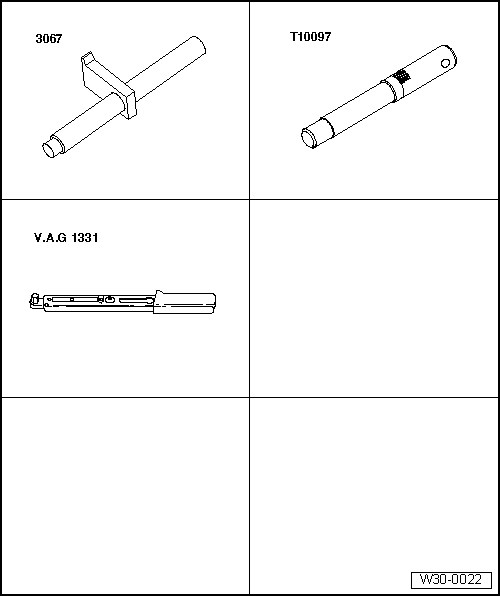
| Special tools and workshop equipment required |
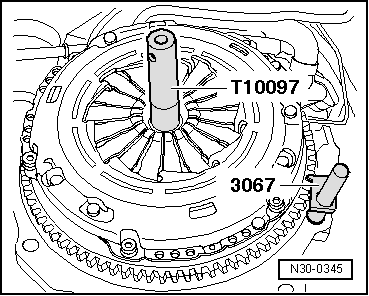
| t | Counterhold -3067- |
| t | Centring mandrel -T10097- |
| t | Torque wrench -V.A.G 1331- |
| t | Grease -G 000 100- |
|
 Note!
Note!| t | Replace clutch plates and pressure plates having damaged or loose rivets. |
| t | Allocation → Electronic parts catalogue (ETKA) |
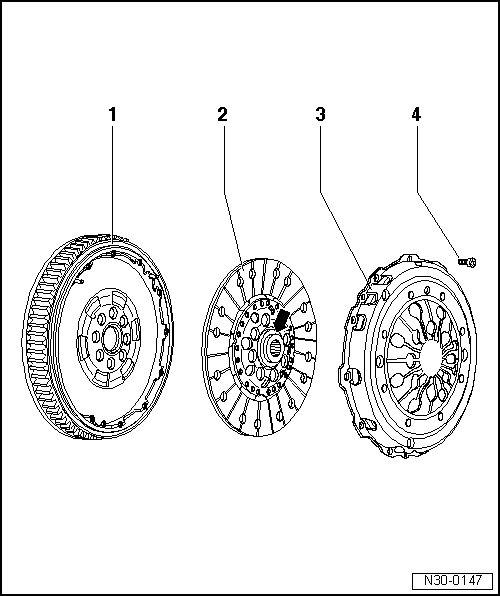
| 1 - | Flywheel |
| q | Ensure that centring pins fit tightly |
| q | Contact surface for clutch lining must be free of grooves, oil and grease |
| q | Removing and installing → Rep. Gr.13 |
| 2 - | Clutch plate |
| Allocation → Electronic parts catalogue (ETKA) |
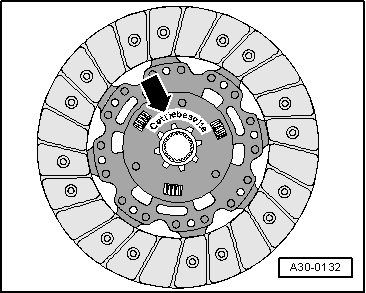
| q | Installation position on dual-mass flywheel → Fig. |
| q | Installation position with single piece flywheel: spring cage faces pressure plate |
| q | Centring → Fig. |
| q | Lightly grease splines |
Note!| Clean input shaft splines and, on used clutch plates, hub splines; remove corrosion and apply only a very thin coat of grease -G 000 100- to the input shaft splines. Then move clutch plate to and fro on input shaft until hub moves freely on shaft. Remove excessive grease. |
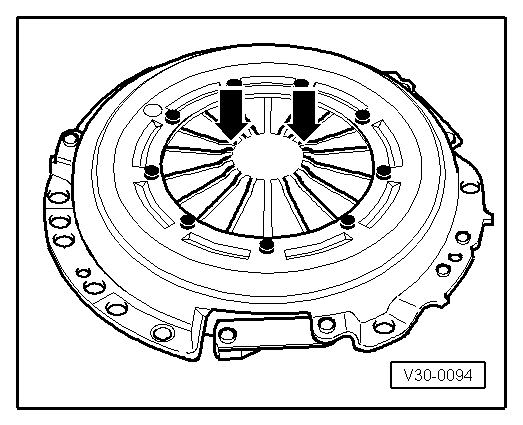
| 3 - | Pressure plate |
| q | Removing and installing → Fig. |
| q | Resetting adjuster ring of pressure plate in vehicles with 6-cylinder engines → Chapter |
| q | Check ends of diaphragm spring → Fig. |
Note!| Pressure plates are protected against corrosion and greased. Clean contact surface only; otherwise the service life of the clutch will be considerably reduced. |
| 4 - | Bolt |
| q | Allocation → Electronic parts catalogue (ETKA) |
| q | On dual-mass flywheel |
| q | 22 Nm |
| q | On single-piece flywheel |
| q | 20 Nm |
| q | Loosen or tighten diagonally and in steps |
|
|
Note!
|
|
|
|