seat Workshop Repair Guides

SEAT Workshop Service and Repair Manuals

Installing > < Removing and installing rear final drive
Removing
Removing
–  Raise vehicle.
   
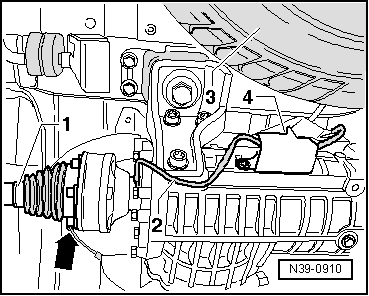
–  Unbolt left and right drive shafts -1- and tie them up.
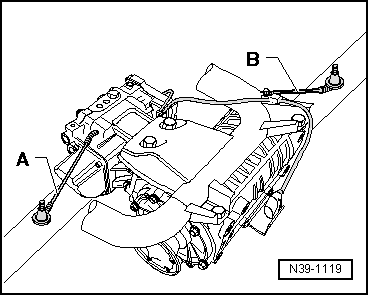
–  Unbolt earth strap -2-, if present, from left final drive cover.
–  Remove spare wheel -3-.
–  Pull connector -4- off Haldex coupling connection.
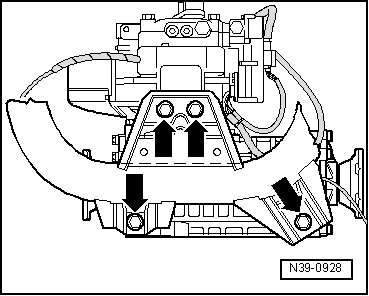
–  Pull breather pipes on left and right out of carrier -arrow-.
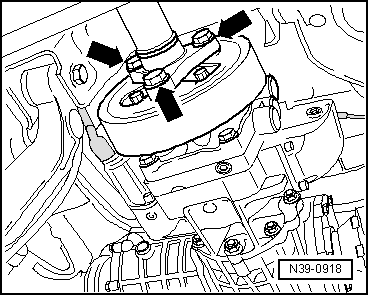
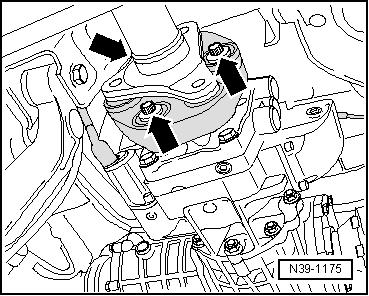
  Note!
Before removing, mark positions of all parts relative to each other. Reinstall in the same position. Otherwise imbalance will be excessive, and the mountings could be damaged, causing droning noises.
Vehicles through 08.00
  N39-0910
–  Unbolt rear propshaft from rear flexible coupling -arrows-.
Vehicles from 09.00
–  Unbolt rear propshaft with flexible coupling and vibration damper from rear final drive -arrows-.
  N39-0918
Third bolt is not visible in figure.
Continuation for all vehicles
–  Remove rear propshaft → Chapter.
  N39-1175
–  Position engine and gearbox jack -V.A.G 1383/A- with universal support -V.A.G 1359/2- beneath final drive and secure final drive with strap -A-.
–  If present, remove linkage for vehicle level sender from right axle beam. → Electrical system; Repair group 94; Headlights with gas discharge lamps, 06.00 ▸; Removing and installing vehicle level sender on rear axle
  N39-0930
–  Remove securing bolt for final drive mounting bracket from cross member -arrows-.
–  If final drive is to be renewed or mounted on assembly stand, remove mounting bracket -A-.
–  To do this, remove bolts -B- with socket -T10035-.
–  Lower final drive slightly.
  N39-0929
–  Remove upper bolts -arrows-.
–  Lower final drive.
–  If final drive is to be renewed or propshaft flange is to be removed from final drive, it is necessary to remove rear flexible coupling.
  N39-0928
–  If final drive is to be renewed, left -A- (110 mm) and right -B- (200 mm) breather pipes must be transferred to new component.
  N39-1119

Installing > < Removing and installing rear final drive