| Installation is carried out in the reverse sequence; note the following: |

Note | t
| Replace clutch plates and pressure disk with damaged or loose riveted joints. |
| t
| The pressure disks and the clutch plate must always be replaced together. |
| t
| To reduce the unpleasant smells of a burnt clutch, the clutch bell-housing must be thoroughly cleaned, along with the flywheel and engine at the side facing the clutch. |
| t
| Clean the input shaft grooves, and if the clutch plates are worn, also those of the hub; eliminate corrosion and apply a very fine layer of approved lubricating grease to the grooves → Spare parts catalogue. Then, move the clutch plate on the input shaft from side to side, until the hub moves smoothly on the shaft. Always remove excess grease. |
| t
| Pressure plates are protected against corrosion and greased. Clean contact surface only; otherwise the service life of the clutch will be considerably reduced. |
| t
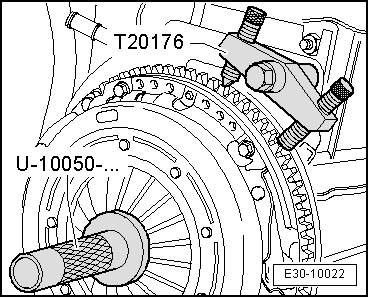
| Pressure plate contact surface and clutch plate lining must make full contact with flywheel. Only then can the securing bolts be inserted. |
| –
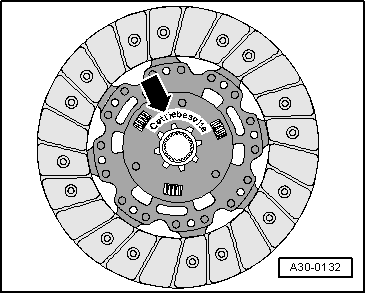
| Pay special attention to the clutch plate installation position: |
|
|
|