SEAT Workshop Service and Repair Manuals
HOME
FEATURES
MENU
INDEX
ABOUT US
Electrical and electronic components and their locations >
< Dismantling and assembling gearbox
Leon Mk1
Automatic gearbox 099 - 4-speed
Automatic gearbox, control, assembly, housing
Repairing selector mechanism for vehicles before 05.00
Removing
Removing
–
Move selector lever to “P” position.
–
Vehicles with coded radio unit, note or obtain code.
–
Remove battery
→ Electrical system; Rep. Gr.27
.
–
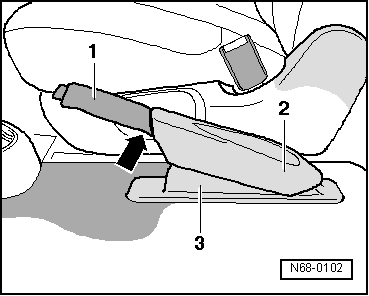
Remove air duct trim
-1-
.
–
Remove trim
-2-
for battery.
–
Unscrew battery trim and expansion tank for cooling system
-arrows-
and put to one side. Do not open cooling system.
–
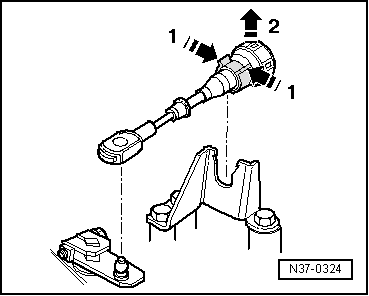
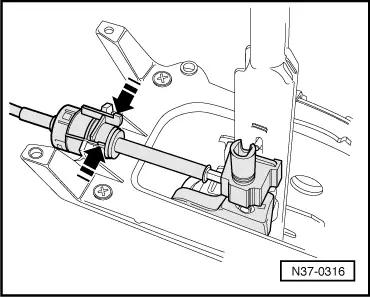
Remove selector lever cable from selector shaft lever on gearbox.
–
First unlock selector lever cable
-1-
then remove it from support bracket
-2-
.
–
Loosen socket head bolt
-arrow-
.
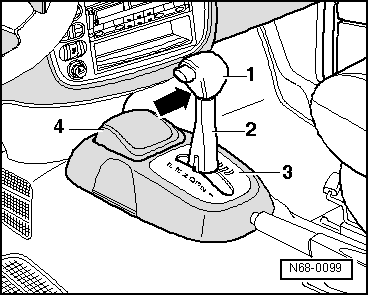
–
Remove selector lever handle
-1-
and trim
-2-
upwards.
–
Unclip cover
-3-
.
–
Open ashtray
-4-
and pull it out upwards.
–
Remove cross head screws
-arrows-
.
–
Unclip bulb holder for ashtray lighting
-2-
and unclip diagnostic connector
-3-
.
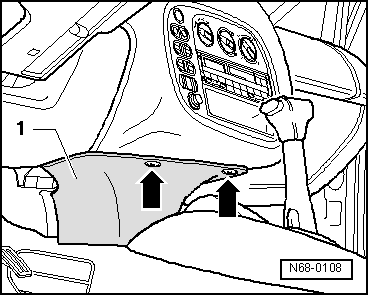
–
Remove centre console
-1-
upwards from selector lever.
–
Remove cross head screws
-arrows-
.
–
Remove cover
-1-
.
–
Remove front cover.
–
Pull up parking brake lever.
–
Use a screwdriver to lever out two engagement pins
-arrow-
.
–
Pull handle
-1-
forwards off parking brake lever.
–
Pull trims
-2-
and
-3-
off parking brake lever.
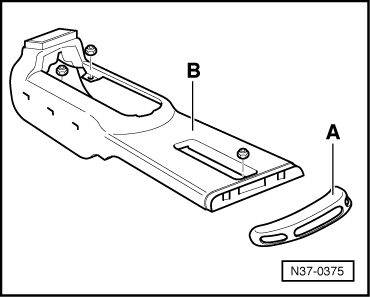
–
Remove rear vent
-A-
and attachment of air duct
-B-
.
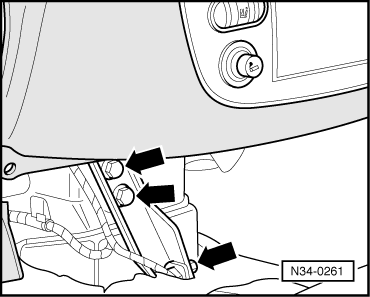
–
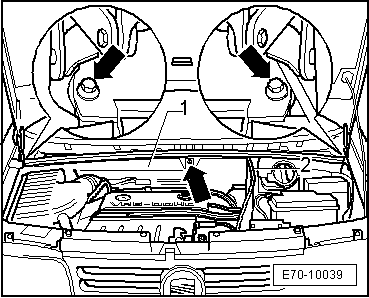
Remove reinforcement strut beneath dash panel
-arrows-
.
–
Cut through floor covering in front of reinforcement strut.
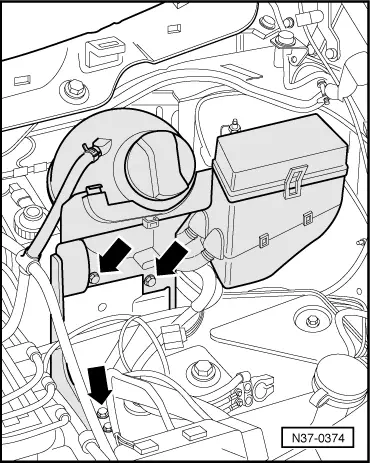
–
Push air duct of rear vent backwards until support bracket of selector lever cable is accessible and nuts
-arrows-
can be removed.
–
Unclip support bracket of selector lever cable and remove selector lever cable.
–
Remove selector lever cable.
Automatic gearbox 099 - 4-speed
Automatic gearbox, control, assembly, housing
Repairing selector mechanism for vehicles before 05.00
Electrical and electronic components and their locations >
< Dismantling and assembling gearbox