
Leon Mk1
| Spoiler ecomotive: removal and installation |
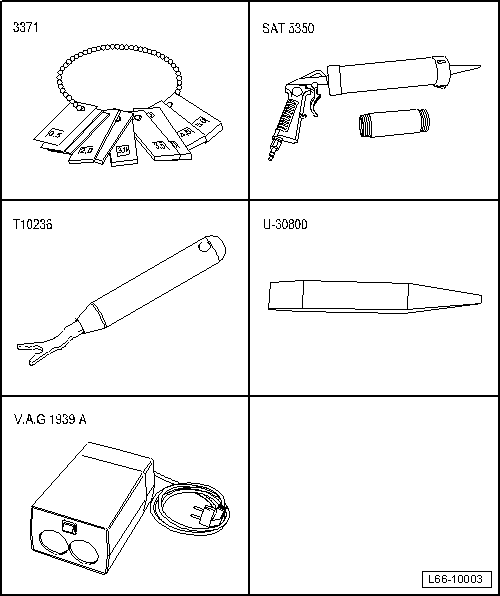
| Special tools and workshop equipment required |
| t | Adjustment gauges -3371- |
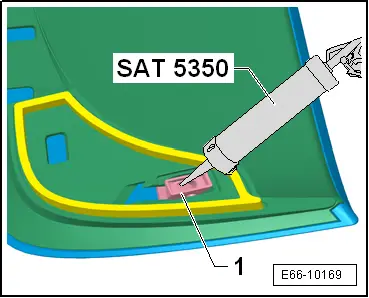
| t | Window sealant pistol -SAT 5350- |
| t | Release tool -T10236- |
| t | Lever -U 30800- |
| t | Cartridge heater -VAG 1939A- |
|
| Information below is only for the 5-door model |
 Note
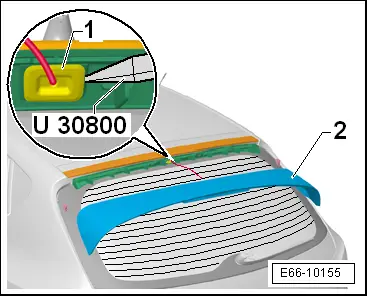
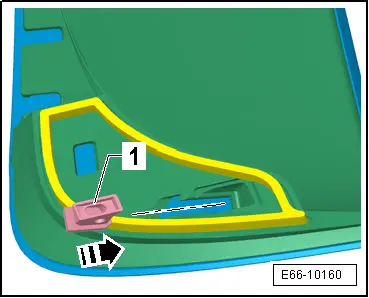
Note| For the purpose of protecting the rear lid panel -1-, glue to the rear lid -2- as shown in the figure. |
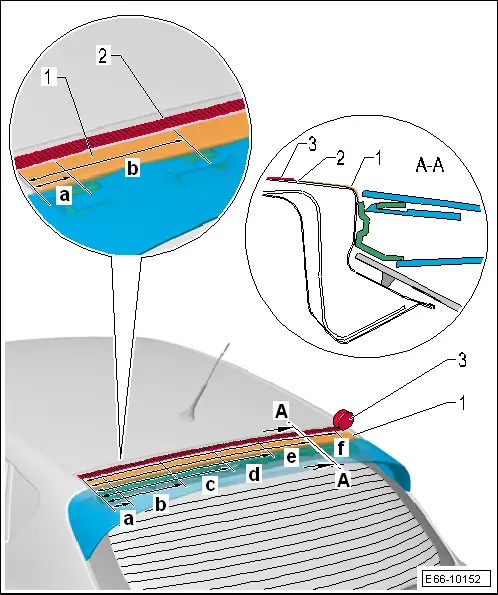
| – | As shown in the figure, apply the measuring tape -3- to the rear lid. |
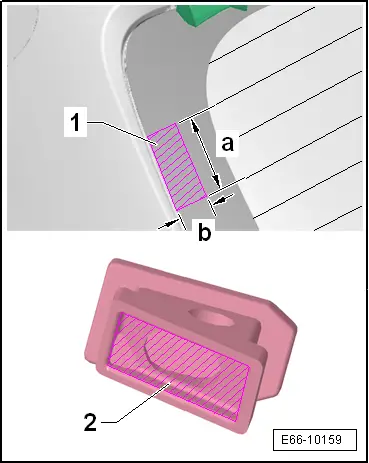
| – | Starting on the left side, follow the dimensions marked using a pen: |
| t | a = 57 mm |
| t | b = 230 mm |
| t | c = 399 mm |
| t | d = 600 mm |
| t | e = 775 mm |
| t | f = 950 mm |
| – | Place the lever -U 30800- between the dimensions -a- and -b- between the rear lid and place the spoiler on the edge of the roof. |
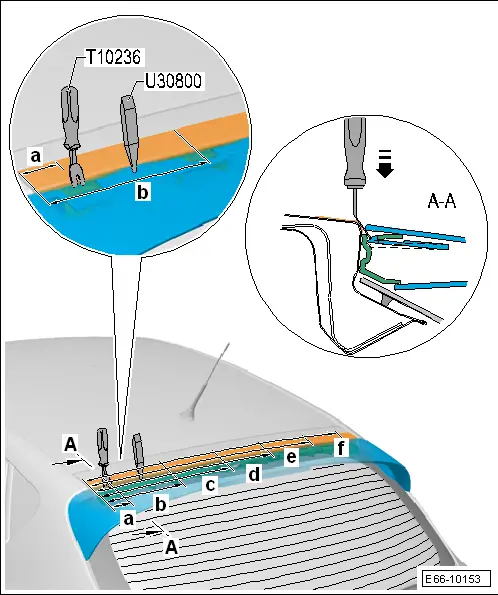
| – | Place the release tool -T10236- on the dimension -a- and press lightly in the direction of the -arrow- so that the clips can be released from the mountings of the roof spoiler. |
Note| To make the removal easier, a second mechanic holds the spoiler so that the clips that have been removed are not re-engaged as a result of the spoiler geometry. |
| – | Repeat the procedure for the remaining clips of the spoiler until all clamps are released. |
Note| To enable the clips to be seen easier, insert the lever -U 30800- between the respective dimensions. |
| Information below is only for the 3-door model |
Note| For the purpose of protecting the rear lid panel -1-, glue to the rear lid -2- as shown in the figure. |

| – | As shown in the figure, apply the measuring tape -3- to the rear lid. |
| – | Starting on the left side, follow the dimensions marked using a pen: |
| t | a = 28 mm |
| t | b = 200 mm |
| t | c = 378 mm |
| t | d = 578 mm |
| t | e = 756 mm |
| t | f = 926 mm |
| – | Place the lever -U 30800- between the dimensions -a- and -b- between the rear lid and place the spoiler on the edge of the roof. |
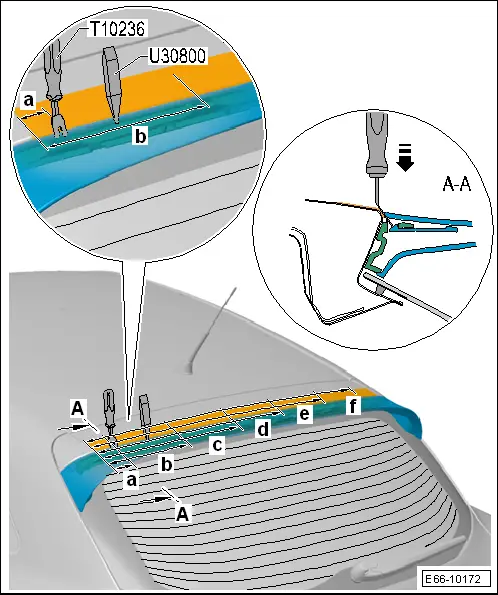
| – | Place the release tool -T10236- on the dimension -a- and press lightly in the direction of the -arrow- so that the clips can be released from the mountings of the roof spoiler. |
| – | Repeat the procedure for the remaining clips of the spoiler until all clamps are released. |
Note| To enable the clips to be seen easier, insert the lever -U 30800- between the respective dimensions. |
| Continues for all models |
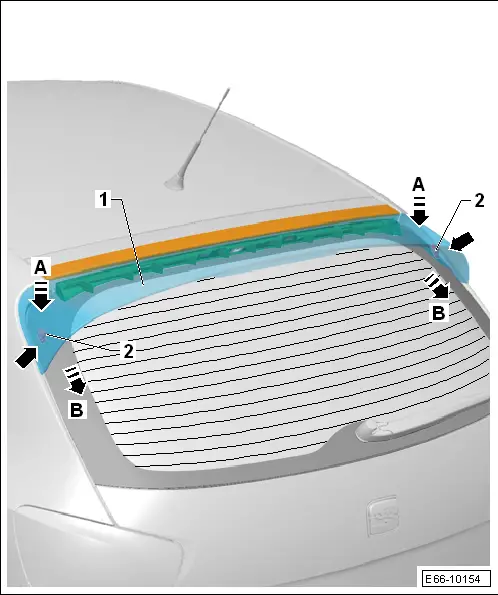
| – | Using the help of a second mechanic, hold the spoiler to the side -arrow- and apply downward pressure -arrow A- at the same time and push along the rear window in the direction of -arrow B-. |
| – | Release the spoiler -1- from the side guides -2-. |
Note| The mounts of the side guide -2- must have been fixed to the rear window. |
|
|
Note| Check all clips of the spoiler -3- and the fastenings of the mount -5- and replace when damaged or broken. |
| If the fixings of the side guides -4- have loosened when removing the spoiler, proceed as follows → Anchor. |
| If the rear window has to be replaced or with new side guides -4-, proceed as follows → Anchor. |
| – | Connect the electric connector -1-. |

| – | Apply grease to the periphery of the wall bushing -2- and insert this into its mount -6-. |
| – | With the assistance of a second mechanic, place the spoiler -1- onto the side guides -2-. |
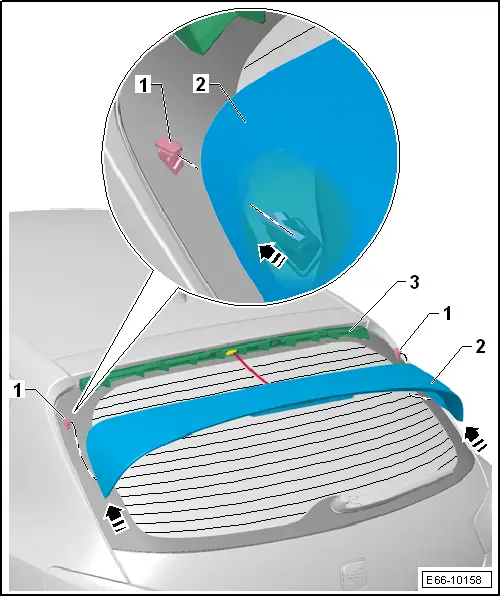
| – | Hold the spoiler -2- on the side guides and push in the direction of the -arrow- at the same time until you can hear the clips → Item of the spoiler engaging in the fixings of the mount -3-. |
Note
|
|
|
|
|
|
 WARNING
|

|
Note
|

|