| t
| Tailgate, self-adhesive emblem of the model version: Removing → Anchor |
| t
| Tailgate, self-adhesive emblem of the model version: Installing → Anchor |
| Tailgate, self-adhesive emblem of the model version: Removing |
| –
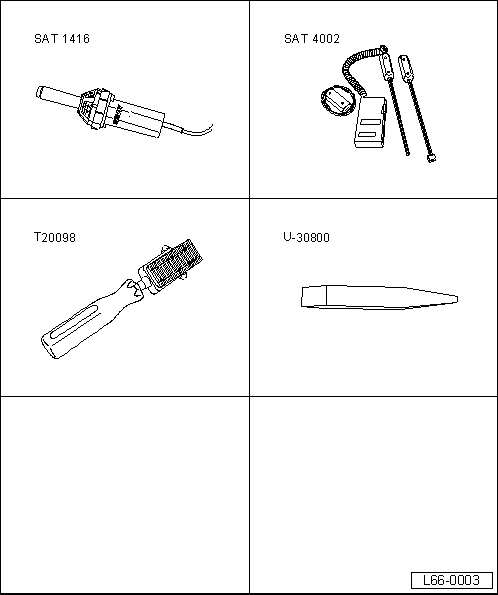
| Using the hot air blower -SAT 1416-, heat the self-adhesive emblem to a temperature of approx. 25 C. Check the temperature using the digital thermometer -SAT 4002-. |
| –
| Remove the self-adhesive emblem using the lever -U 30800-. |
| Tailgate, self-adhesive emblem of the model version: Installing |

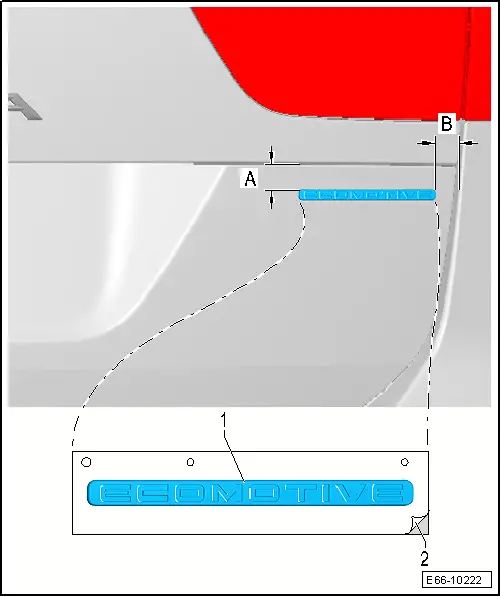
Note | Do not remove the protective film of the self-adhesive emblem until the assembly work on the vehicle has been completed. |
| –
| Clean the area of the tailgate where new self-adhesive emblem is to be applied with isopropanol or heptanes alcohol. Then apply silicone based cleaning agent. |
| –
| Thoroughly clean the area with dry absorbent paper. |
| –
| Using the hot air blower -SAT 1416-, heat the application area on the bodywork to approx. 35°C. Check the temperature using the digital thermometer -SAT 4002-. |
|
|
|