
Leon Mk1
|
 Note
Note
|
|
| Carry out following work: |
| – | Remove front door trim → General body repairs, interior; Rep. gr.70. |
| – | Secure door window against sliding down with adhesive tape. |
 Caution
|
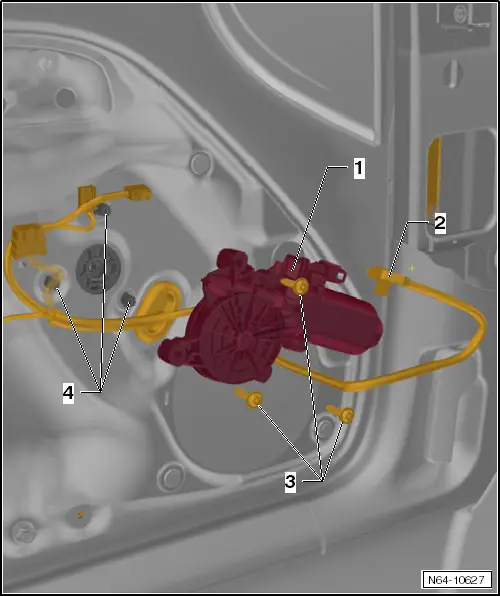
| – | Disconnect connector -2-. |
| – | Remove bolts -3- (Qty. 3). |
| – | Remove window regulator motor with control unit -1- from mounting brackets -4-. |
|
 WARNING
|
| Carry out following work: |
| – | Slot window regulator motor -1- onto mounting brackets of cable drum -4-. Move door window up and down slightly so that the splines between window regulator motor and cable drum engage more easily. |
| – | Tighten bolts -3- (qty. 3) to specified torque of 3 Nm. |
| – | Connect connector -2-. |
| – | A new window regulator motor must be coded using → Vehicle diagnostic tester. |
| – | The work procedure and notes on the automatic window raising and lowering system as well as on the excess-force limitation feature can be found in → Booklet. |
| Further installation is performed in the reverse order of removal. |