seat Workshop Repair Guides

SEAT Workshop Service and Repair Manuals

Rear door trim with mechanical window lifter, installation > < Rear door trim with mechanical window lifter, assembly overview
Rear door trim with mechanical window lifter, removal
  WARNING
Disconnect the battery earth strap before carrying out any work on the electrical system.
  Note
t  Before disconnecting the battery, note the instructions from the radio manual relating to the coding.
t  During removal and installation, take note of small amounts of deviations depending on the equipment.
–  Turn off the ignition and all electricity consumers.
–  With the ignition switched off, disconnect the earth lead from the battery → Starter motor, voltage supply; Rep. gr.27.
   
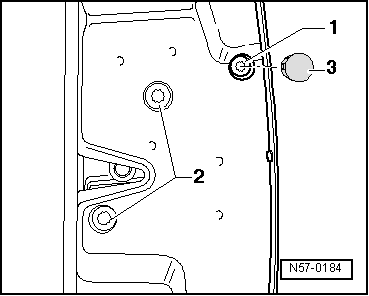
–  Remove the cover -3-, by levering.
  N57-0184
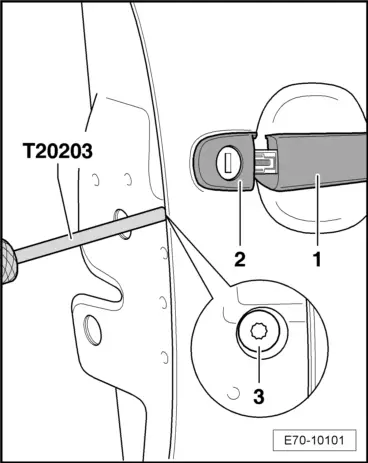
–  Pull the handle -1- and hold it.
–  Unscrew bolt -3-,with wrench -T20203- and Torx T20 nail, to its limit.
–  In this manner the lock cylinder housing is released -2-.
–  Remove the lock cylinder housing -2- from the placement unit at a straight angle to the handle.
  E70-10101
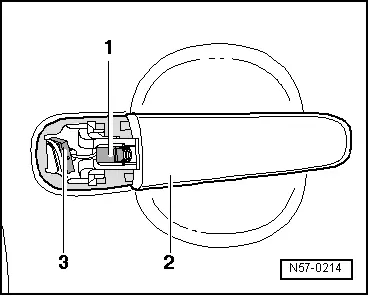
–  Unclip clip -1- from door handle -2-.
  N57-0214
–  Remove interior trim -1- using the lever -U 30800-.
–  Detach loudspeaker grille -14-using lever -U 30800-.
–  Detach lining cover in the door -15- using the lever -U 30800-.
–  Window handle -13- → Fig..
–  Unscrew the screws -12- (2x).
–  Detach the upholstery of the trim -11- using removal pliers -T20065-, starting with the upper part.
–  Disengage the operating cable -5- from the trim cover -11 - → Fig..
–  Unscrew the screws -3- (4x) of the loudspeaker -4-.
–  Remove the loudspeaker -4-and disconnect the connector.
–  Remove the cover -10-, by levering.
–  Lower door window until bolts and expansion plugs of the window riser cavity are accessed, and remove these using the tappet -T20087-.
–  Remove window glass → Body, exterior assembly work ; Rep. gr.64.
–  Loosen the screws -6- (3x) and remove mechanical unit -7-.
–  Unscrew the screws -8- (2x).
–  Unscrew the screws -2- (2x).
–  Unscrew the screws -17- (2x).
–  Remove exterior door lining assembly → Fig.
–  Remove window frame → Fig.
–  Remove front trim of the rear door -9- by raising it and extracting it towards the door hinge side.
–  Turn the rear panel lining over and disconnect the door lock connector.
–  Remove the window riser unit from the rear panel lining.
–  Finally, unhook the clips of the electrical cables in the rear part of the rear door panel lining.

   
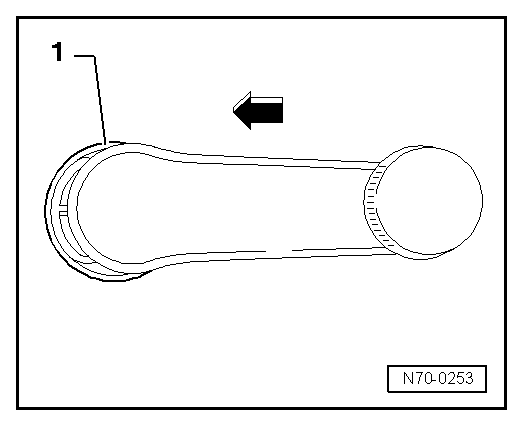
Removal of winding handle
–  Move spacer ring -1- in -direction of arrow - (releasing safety clip) and remove actuating lever.
  N70-0253
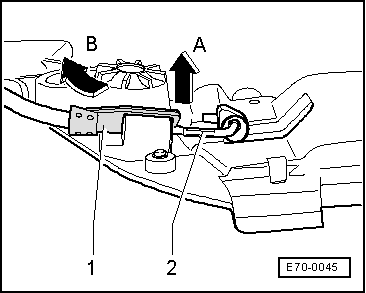
Dismount operating cable
–  Unhook the locking device for the cable tension cover -1- in the door trim.
–  Press the hook for fixing the cover of the door trim -arrow A- together and remove the locking mechanism of the window guide of the door trim cover -arrow B-.
–  Unhook the control cable hook -2-.
  Note
Insert a protective device between the surface where the trim should be lent against and its contact surface to prevent the possibility of dirt entering.
  E70-0045
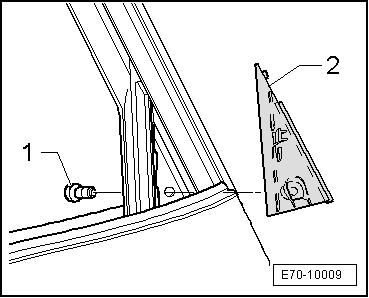
Remove exterior door trim assembly
–  Unscrew bolt -1- (5 Nm) and remove exterior door lining -2-.
  E70-10009
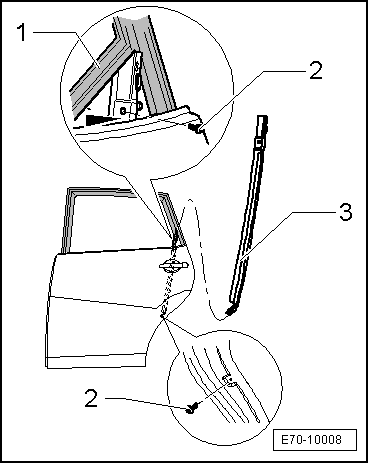
Removing the window frame
–  Remove the window guide -1- from the window frame -3-.
–  Unscrew bolts -2- (6 Nm).
–  Remove the window frame -3-.
  E70-10008
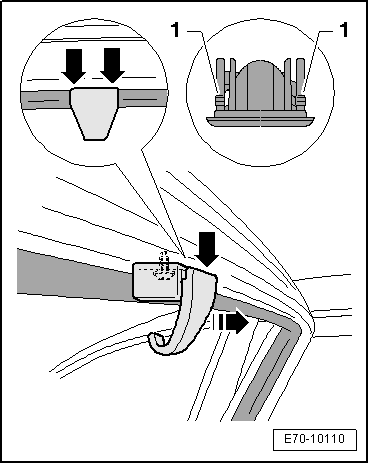
Removing and installing hook for roller sun blind
–  Feed in the lever -U 30800--arrow- and loosen the mountings -1-.
–  Undo the screw and then remove the hook bracket.
–  Installation is carried out in reverse order.
  E70-10110

Rear door trim with mechanical window lifter, installation > < Rear door trim with mechanical window lifter, assembly overview