
Leon Mk1
|
 WARNING
| – | Remove sunshades on the right and left side. |
| – | Remove cover on middle mount for sun visor -7-. Push lever -80 200- 1mm underneath the cover -8-. |
 Note
Note| If the lever -80 200- is pushed in further, it would be under the centre adaptor of the sunshade. Cover can then not be prised off. |
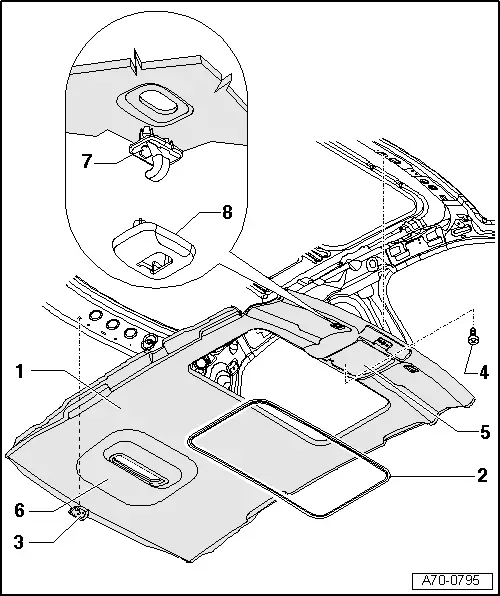
| – | Detach sunshade centre bracket -7-. |
| – | Remove upper A-pillar panelling on the left and right → Chapter. |
| – | Remove the upper lining of strut B → Chapter. |
| – | Remove roof end strip. |
| – | Remove D-pillar panelling on the left and right . |
| – | Remove rear interior/reading light -6- → Electrical system; Rep. gr.96. |
| Vehicles with sliding sun roof |
| – | Completely open the sliding sun roof and open sun shield 2/3. |
| – | Remove sliding sun roof frame -2- with the lever -T10039-. |
| – | Remove left and right vanity mirror light → Electrical system; Rep. gr.96. |
| – | Remove front interior/reading light -5- → Electrical system; Rep. gr.96. |
| – | Unclip cover at base of interior mirror and unplug connector to interior mirror. |
| – | Move gear lever/selector lever to front position. |
| – | Move backrest of front passenger's seat to rearmost position. |
| – | Move backrest of driver's seat to rearmost position. |
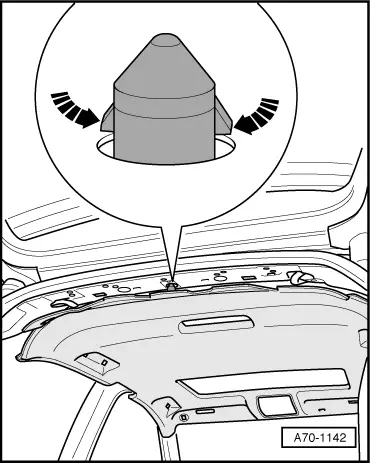
| – | Loosen the rear clip -3- of the roof lining using a lever -U30800-. |
Note
|
|
|
Note
|

|