
Leon Mk1
|
 Note
Note| The storage compartment on the front passenger side -1- is secured in the dash panel -3- with steel clips -2-. The three steel clips must be released to remove the storage compartment without causing any damage. |
| – | Open storage compartment. |
| – | Insert flat blade screwdriver in opening on front edge of storage compartment -1- and release three steel clips -2- in -direction of arrow-. |
| – | When doing this, pull on storage compartment to prevent steel clips from engaging again. |
 Note
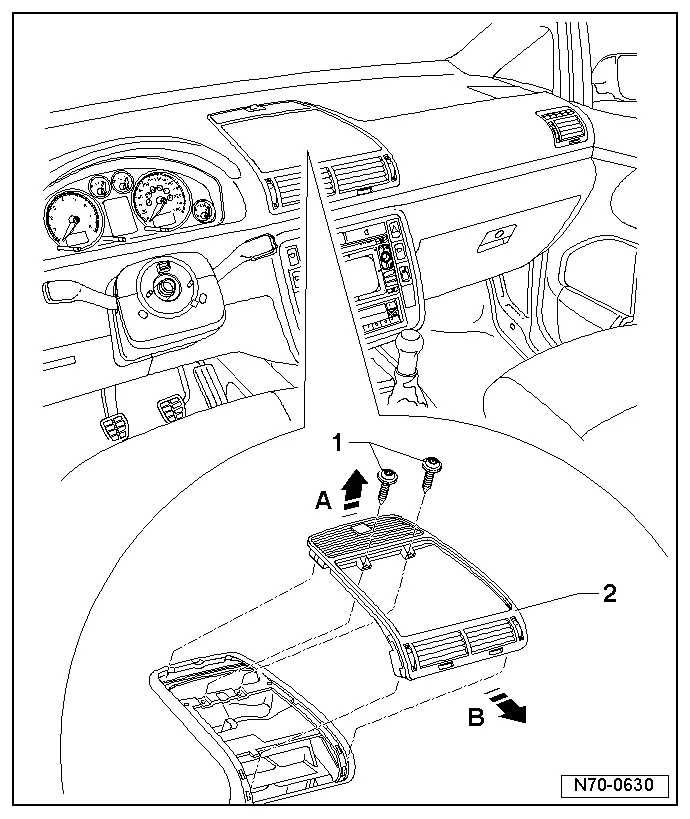
Note| The storage compartment in the middle -1- is secured in the vent housing -3- with steel clips -2-. To remove the storage compartment without causing any damage, the two steel clips must be released. |
| – | Open storage compartment. |
| – | Insert a flat blade screwdriver in opening on front edge of storage compartment -1- and release the two steel clips -2- in -direction of arrow-. |
| – | When doing this, pull on storage compartment to prevent steel clip from engaging again. |

| – | Remove screws -1-. |
| – | Lift up vent housing -2- in front area -arrow A-. |
| – | Then remove vent housing -2- from dash panel in direction of -arrow B-. |
| – | Separate connectors for temperature sensor and vent lighting. |
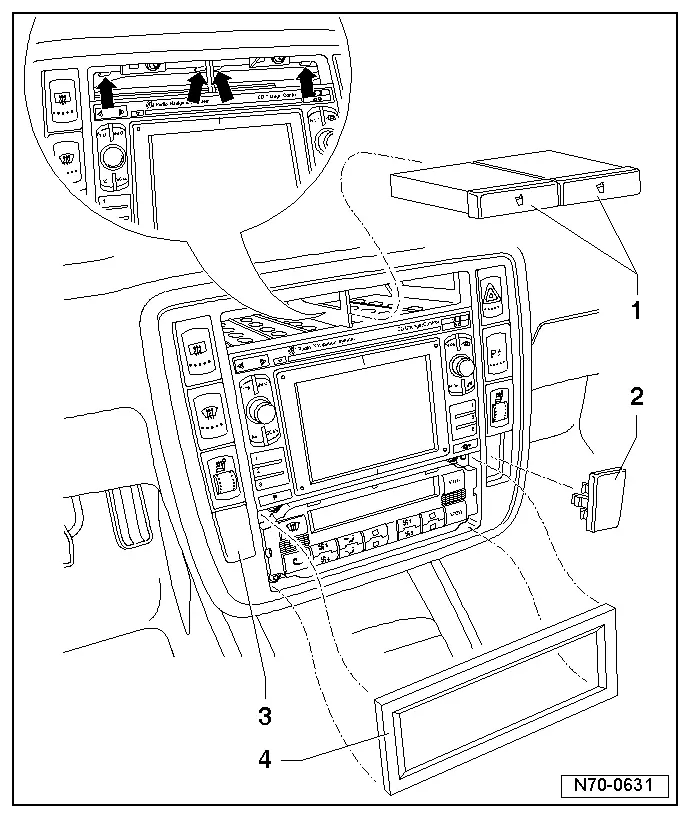
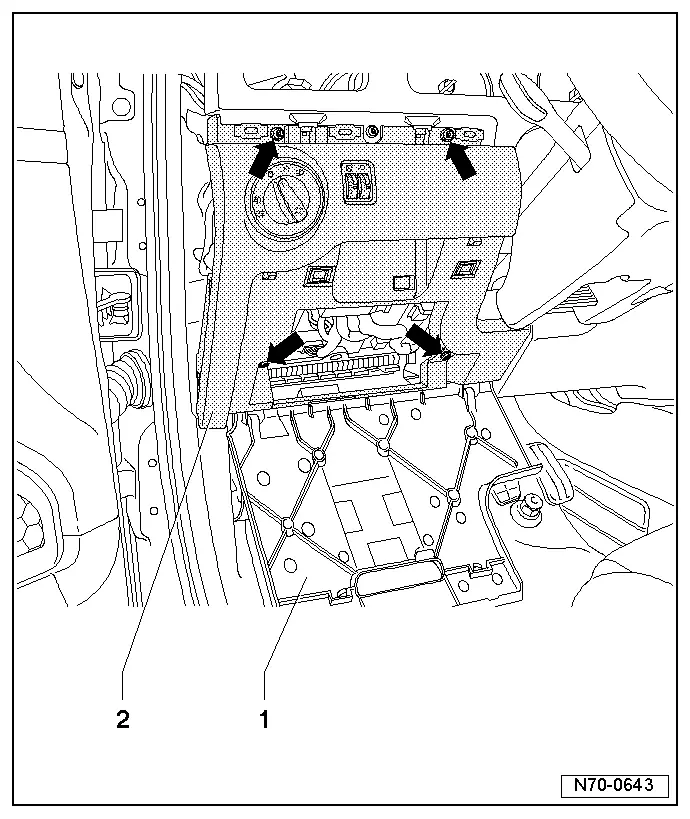
| – | Using a small screwdriver, push up locking lugs -arrows- and pull out beverage holders -1-. |
| – | Unclip vacant slot covers -2- and -3- using a small screwdriver again. |
| – | Remove frame -4- from Climatronic actuator. |
| – | Insert radio release tools -T10057- in release slots of radio navigation system. |
| – | Remove radio navigation system out of dash panel by pulling on rings of radio release tools. |
| – | Disengage connectors and pull off. |
| – | With the point of assembly tool -T10034-, reach behind rear of switches on right -2- and left switch panel -3- and pull out switches. |
| – | Disconnect connections. |
| – | Unscrew four screws -arrows- and remove Climatronic actuator -4-. |
| – | Disengage connectors and pull off. |

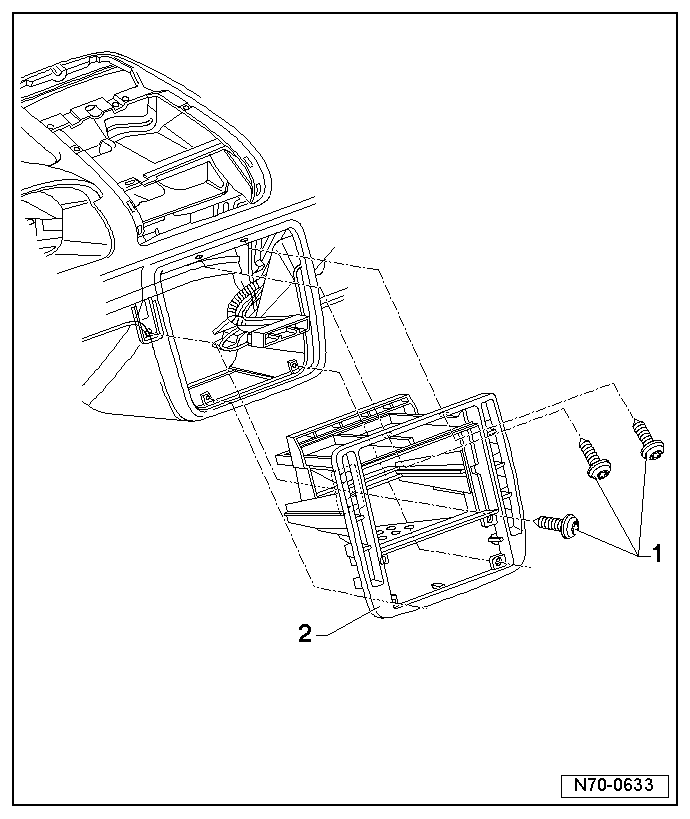
| – | Remove three screws -1- and pull out trim -2-. |
| – | Remove the four speed nuts which are used to secure the heating and air conditioning control panel. |
| – | Unclip locking part on left and right with a flat blade screwdriver. |
| – | Release opened storage compartment flap by disengaging pins -1-. |
| – | Pull storage compartment stop tabs -2- out of dash panel in -direction of arrow-. |
Note| When installing, first engage the stop tabs of the storage compartment flap -2- in the dash panel then engage the pins -1- in their mountings |
 Note
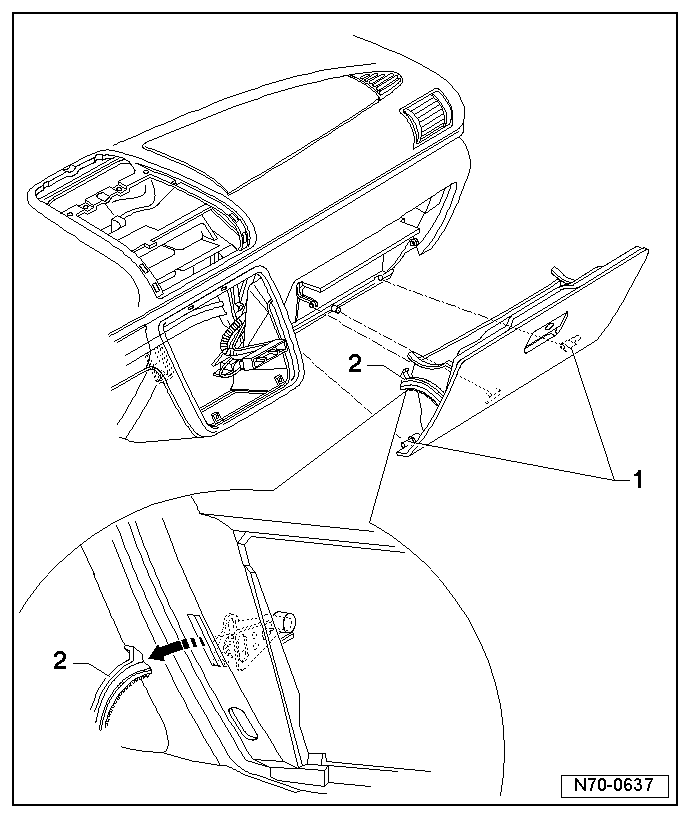
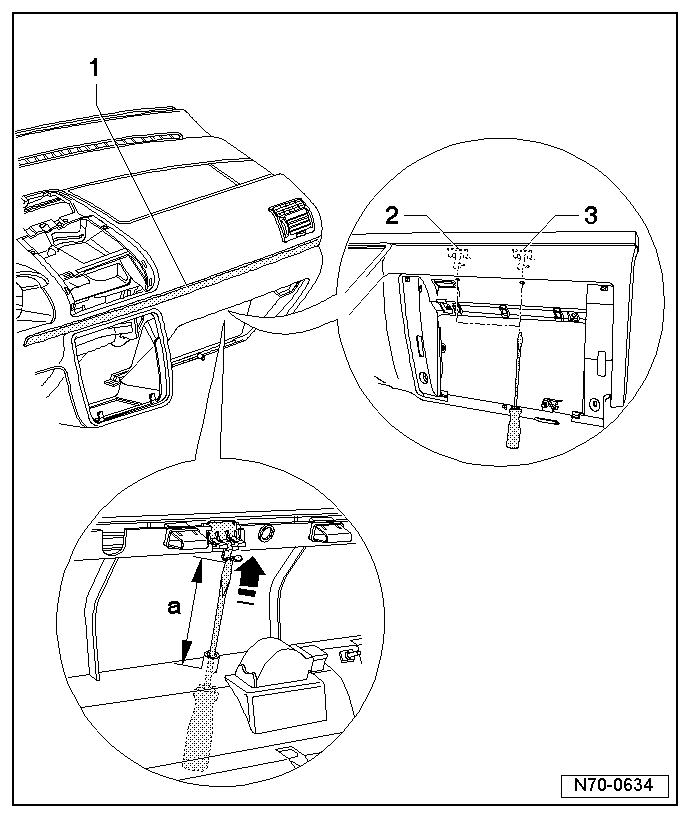
Note| t | In the event of the front passenger airbag being triggered in an accident, it is important to ensure that the trim strip -1- cannot be worked loose from the dash panel. |
| t | For this reason, the trim strip is also attached to the dash panel by two securing clips -2- and -3-. |
| t | The securing clips cannot be seen from the exterior. |
| t | Located in the upper area of the glove compartment are two openings via which the clips can be reached with a screwdriver. |
| – | Using a screwdriver, push the two securing clips -2- and -3- upwards in a vertical motion. |
Note| The distance from the opening to the clip is approx. 80 mm (dimension a). |
 Note
Note| By pushing the clips upwards in -direction of arrow-, the locking lugs -2- are released. The locking lugs are an integral part of the strip. |
| – | Using a small screwdriver, unclip strip -1-, starting at edge. |

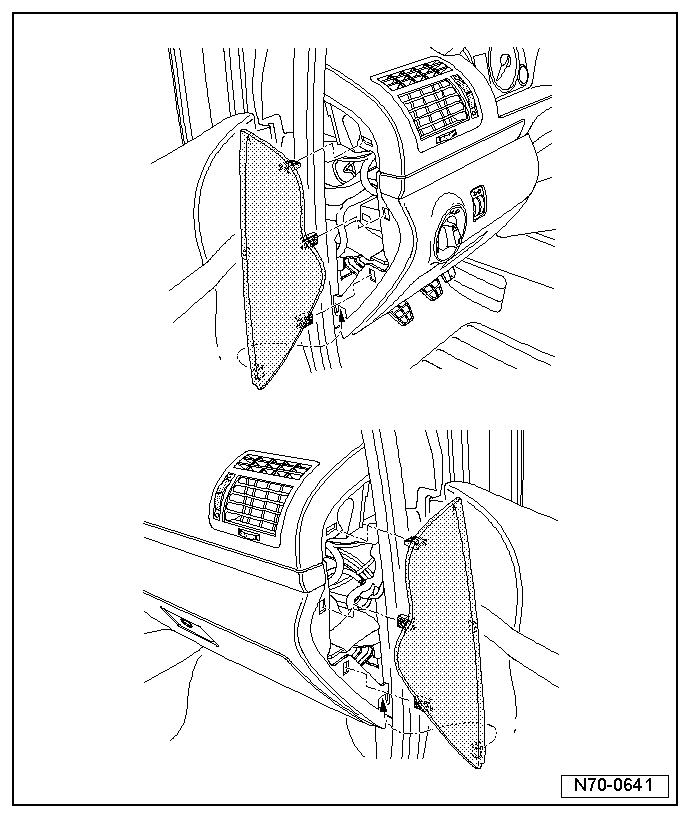
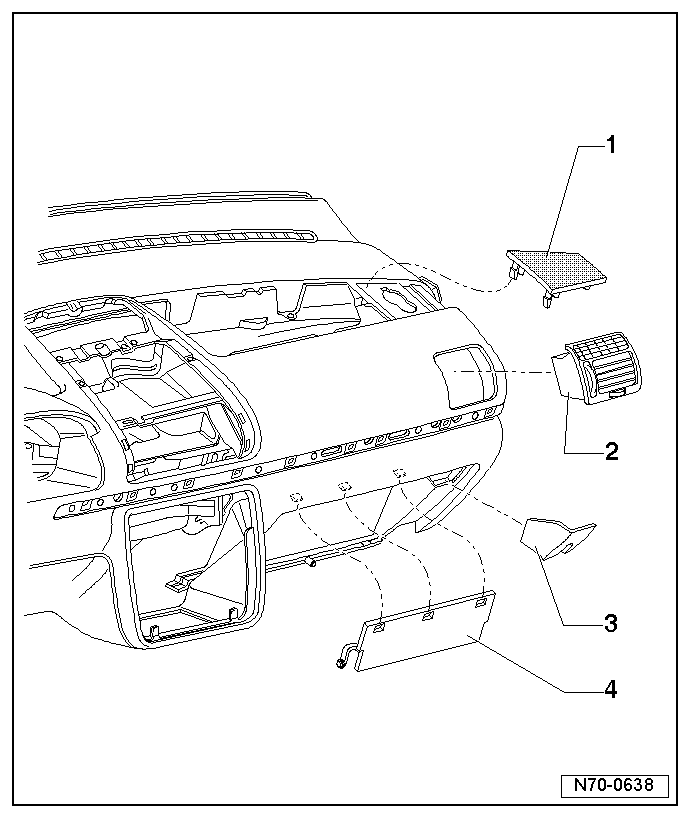
| – | Unclip right loudspeaker cover -1- using a small screwdriver. |
| – | Unclip right vent -2- using a small screwdriver and separate vent lighting connector. |
| – | Take off cover -3-. |
| – | Pull cover flap -4- out of mountings. |
| – | Unclip left loudspeaker cover -1- using a small screwdriver. |
| – | Unclip left vent -2- using a small screwdriver and separate vent lighting connector. |
| – | Using a small screwdriver, unclip trim strip -3-. |

| – | Unclip side trim elements -1- and -4- on left and right using a small screwdriver. |
| – | Remove screws -2- and -5- (2 Nm). |
| – | Release loudspeakers -3- and -6- and separate connectors. |

| – | Open cover -1- and remove four screws -arrows-. |
| – | Take off cover -2- and separate connectors. |
| – | Remove screws (Qty. 10) and take off trim. |

| – | Remove screws -1- and -2-. |
| – | Pull dash panel insert -3- out of dash panel and separate connectors. |

| – | Remove twelve screws. |
| – | Separate front passenger airbag connector. |
| – | Take dash panel out of the vehicle. |
