
Leon Mk1
|
 Note
Note
|
|
Note
|
|
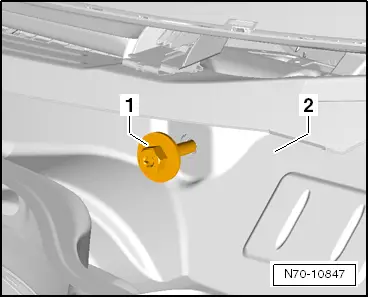
| – | Release expanding rivet -1- and remove upwards. |
| – | Remove defrost duct -3- from dash panel central tube. |
| – | Unclip air distributor -2- from heater and air conditioning unit and remove. |

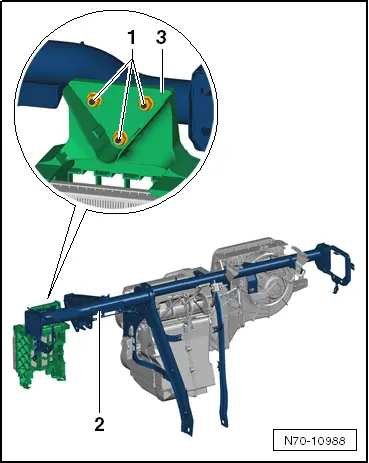
| – | Unscrew 2 bolts -1- (3.5 Nm). |
| – | Unscrew 2 bolts -2- (3.5 Nm). |
| – | Remove bolt -3- (3.5 Nm). |
Note| When installing, first install bolt -3- and then bolts -2- (3.5 Nm). |
 Note
Note| In area of nuts -2 and 3-, use a scriber to mark vertical and horizontal position of central tube in vehicle. |
| – | Remove nut -2- on front passenger side (20 Nm). |
| – | Unscrew nut -3- and bolt -4- on driver side (20 Nm). |
Note| Before removing, check whether all wiring harnesses have been detached from central tube -1-; detach if necessary. |
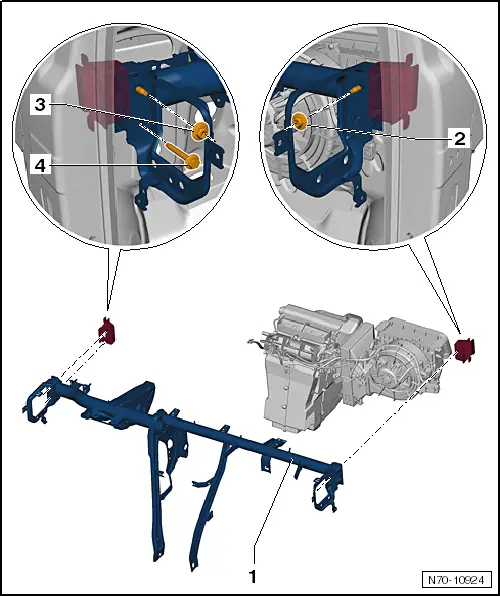
| – | Release wiring harness fasteners, depending on vehicle equipment level, from central tube -1-. |
Note
|
|