seat Workshop Repair Guides

SEAT Workshop Service and Repair Manuals

D-pillar trim, ST models: Assembly overview > < Lower C-pillar trim: Assembly overview
Lower C-pillar trim: Removing and installing.
Special tools and workshop equipment required
   
t  Release lever -A71101-
Removal:
  Note
The illustration shows the lower C-pillar trim on the left side. The work for removal and installation of the lower C-pillar trim on the right side is identical.
  W00-2029
Remove rear seat backrest:
t  Continuous backrest → Chapter.
t  1/3 section of rear seat backrest, left side → Chapter.
t  2/3 section (right-side) of split backrest → Chapter.
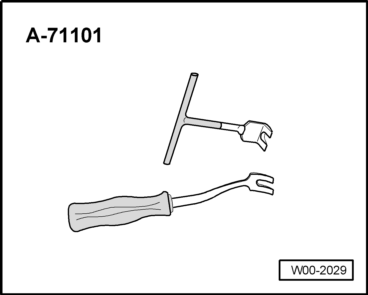
–  Remove threaded plugs -1- using the lever -A71101-.
–  Slacken the trim -3- from the attachment of clip -2-, disengage the catches -4- under the foot strip at the same time and remove the trim.

Installation
Installation is carried out in the reverse order. When installing, note the following:
  Note
Before installation the lining check the condition of the clips and fasteners and replace if necessary.
   

D-pillar trim, ST models: Assembly overview > < Lower C-pillar trim: Assembly overview