
Leon Mk1
|
|
|
|
|
| – | Release the trim of the B-pillar upper section → Chapter. |
| Remove rear bench seat: |
| t | Continuous rear seat bench → Chapter. |
| t | 1/3 seat bench, left side → Chapter. |
| t | 2/3 seat bench, right side → Chapter. |
| Remove rear seat backrest: |
| t | Continuous backrest → Chapter. |
| t | 1/3 section of rear seat backrest, left side → Chapter. |
| t | 2/3 section (right-side) of split backrest → Chapter. |
| – | Remove bolts -2-. |

| – | Unscrew threaded plugs -3-. |
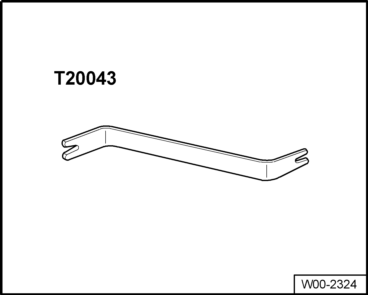
| – | Detach trim -1- from clip fasteners -4- with lever -T20043- and remove. |
 WARNING
|
| – | Detach side trim -1- from front seatbelt. |
|
| Installation is carried out in the reverse order. When installing, note the following: |
 Note
Note| Before installation the lining check the condition of the clips and fasteners and replace if necessary. |
| – | Insert bottom clips for side trim into fasteners in door sill moulding and inner side element. |
| – | Insert clips -4- for side trim -1- from rear of C-pillar. |
| – | Insert front seatbelt into side trim. |
| – | Tighten bolt -2- to torque of 1.5 Nm. |
| – | Install upper B-pillar trim → Chapter. |
| – | Install rear seat backrest. → Chapter. |
| – | Install rear bench seat → Chapter. |