seat Workshop Repair Guides

SEAT Workshop Service and Repair Manuals

Dismantling and assembling pistons and conrods > < Dismantling and assembling engine
5-cyl. injection engine, (4-valve), Mechanics
Dismantling and assembling engine
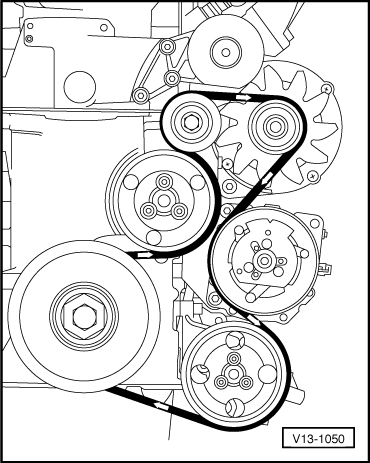
Removing and installing ribbed belt

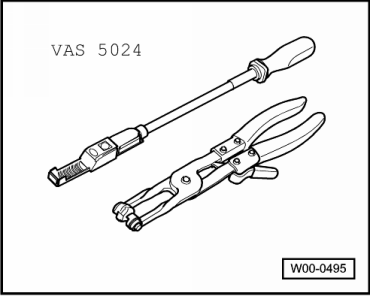
Special tools, workshop equipment, testers, measuring instruments and auxiliary items required

 
W00-0495
  • ◆ VAS 5024 Spring-type hose clip pliers
  • ◆ Hexagon bolt M8x45

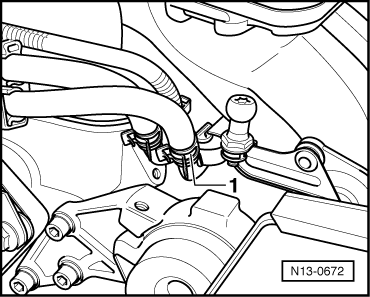
Removing ribbed belt

Note:

Before removing the ribbed belt mark the direction of rotation. When installing the belt ensure it is correctly seated in the pulley.

  • ‒ Remove engine cover.
 
N13-0672
  • ‒ → Pull off return hose -1- (with blue marking) and collect escaping fuel with a rag.
  • ‒ Seal the pipes so that the fuel system is not contaminated by dirt etc.
  • ‒ Observe rules for cleanliness .
  • ‒ Mark direction of rotation of ribbed belt.
 
N13-0673
  • ‒ → Screw M8x45 bolt in threaded hole -A- of tensioner until the ribbed belt is no longer under tension.

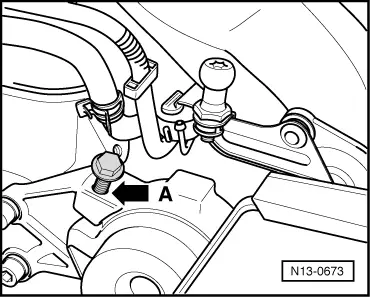
Note:

Screw bolt in only until the ribbed belt can be removed. Otherwise the tensioner housing can be damaged.

  • ‒ Remove noise insulation tray.
  • ‒ Remove ribbed belt.

Installing ribbed belt

  • ‒ Install in reverse order.

Notes:

  • ◆ Ensure, before installing ribbed belt, that all ancillaries (alternator, air conditioner compressor, power assisted steering vane pump) are secured tightly.
  • ◆ When fitting the ribbed belt observe belt direction of rotation and that the belt is seated correctly in the belt pulleys.
 
V13-1050
  • ‒ → Fit ribbed belt.
  • ‒ Remove M8 bolt from the tensioner!

After completing repairs always:

  • ‒ Start engine and check belt running.
  • ‒ Install noise insulation tray.
  • ‒ Install engine cover.

Dismantling and assembling pistons and conrods > < Dismantling and assembling engine