SEAT Workshop Service and Repair Manuals
HOME
FEATURES
MENU
INDEX
ABOUT US
Control unit for heating and air conditioning: removing and installing|Installation >
< Control unit for heating and air conditioning: removing and installing
Leon Mk1
Heating-ventilation-air conditioning system
Heating, air conditioning
Heating
Heating: repairing / ntrol_unit_for_heating_and_air_conditioning_removing_and_installing/">Control unit for heating and air conditioning: removing and installing
Removing
Removing
Removing
–
Remove the radio:
→ Radio, telephone, navigation system; Rep. Gr.91
–
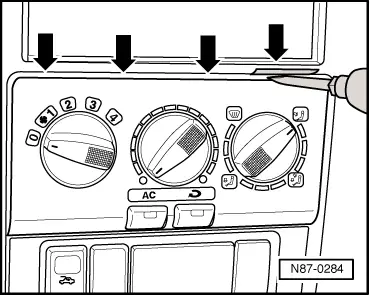
Detach from the clips, carefully, the regulator unit trim
-arrows-
by prising with the tool -U-30800- or with a screwdriver.
–
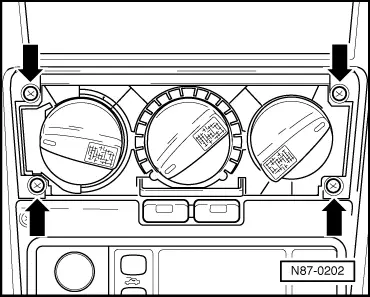
Remove the screws
-arrows-
from the switch frame panel.
–
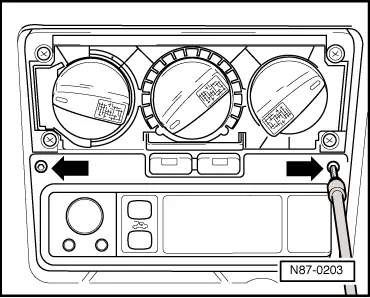
Press control unit for heating and air conditioning outwards the panel switch frame guide.
–
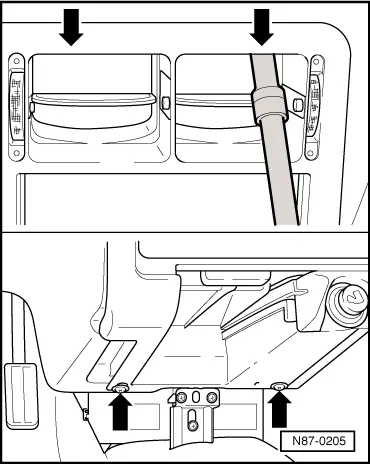
Loosen screws
-arrows-
of the shelf or from the electric headlamp switch panel.
–
Fold the dash panel forward.
–
Uncouple optional equipment switch connectors.
–
Remove carefully the rotating elements
-1-
for the central difuser, with the tight mouth pliers
-arrows-
.
–
Remove fixing bolts
-arrows-
from the panel switch frame with central difuser.
–
Remove the panel switch frame with central difuser.
–
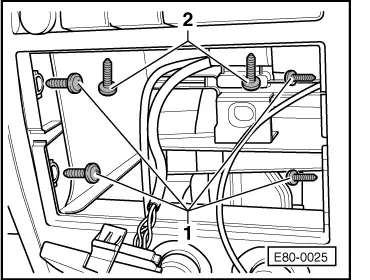
Pull forward from control unit with the fitted cables.
–
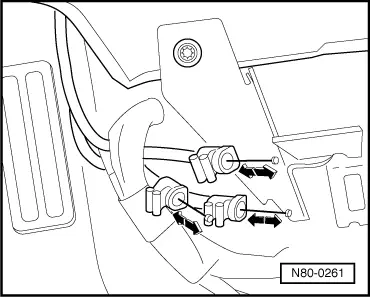
Uncouple the connectors of the control unit.
–
Release actioning cables of control unit, unclipping the clips
-arrows-
.
Checking functioning of heating and air conditioning actioning cables, immediately after dismounting the control unit.
–
To do so move from one side to the other the ends of the actioning cables in the direction of the arrow.
–
Substitute actioning cables which are deteriorated or move with difficulty.
Heating-ventilation-air conditioning system
Heating, air conditioning
Heating
Heating: repairing / ntrol_unit_for_heating_and_air_conditioning_removing_and_installing/">Control unit for heating and air conditioning: removing and installing
Removing
Control unit for heating and air conditioning: removing and installing|Installation >
< Control unit for heating and air conditioning: removing and installing