Remove the noise insulation via the fresh-air blower. For this purpose, cut the plastic brackets on the top side.
–
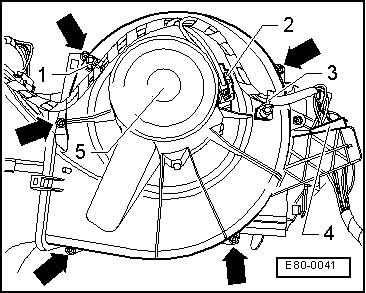
Pull out the plug -2-.
–
Carefully cut the cable holder -1- and -3-.
–
Disconnect the plug connection -4- and remove the connector from the support -5-. For this purpose, press the right part of the connector to the front and to the outside at the same time.
–
Unscrew bolts -arrows- (1 Nm) on the fresh air blower and remove it from the casing.
–
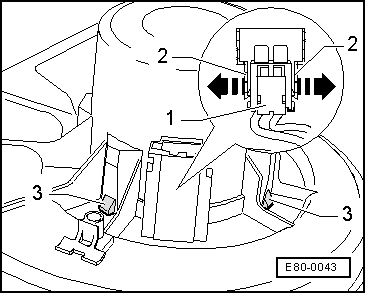
Press tabs -2- on the connector casing outwards in the direction of the arrows using a screwdriver and slide the connector -1- downwards to remove.
–
Press the fastenings -3- inwards and downwards with a screwdriver.
–
Remove the fan motor with the blades of the support.
Installing
Install in the reverse order to removal. However, observe the following:
The fan motor for the heater is different to the one for the air conditioner. Note the spare part number!
Caution
The fan wheel can break or bend (imbalance).
if pressure is applied when fitting fresh air blower -V2- on fan wheel.
Apply pressure only to the shaft when pressing fresh air blower -V2- into its housing.
t
The connector should fit into the casing correctly.
t
The rubber elements of the motor bracket must project fully out of housing.
t
Before assembling the fresh air blower -V2- check that it is operating correctly.

 Caution