seat Workshop Repair Guides

SEAT Workshop Service and Repair Manuals

Heating system heat exchanger: removing and fitting > < Heating heat exchanger: removing and fitting
Removing
Removing
–  Carry out the preparation work for removal of the heat exchanger → Chapter.
   
–  Remove the 4 bolts -A- and remove the cover -B-.
  Note
t  This diagram shows the air conditioning version with additional electric heating
  A87-0685
t  
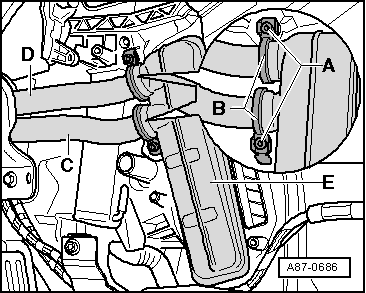
There are different versions of the cover -B- (for vehicles with or without additional electric heating).
t  If the lever -C- to the left hand side temperature vent is in a position that makes it impossible to reach the upper bolt -A-, turn on the ignition and select a different temperature regulation on the Climatronic control unit -J255- to the left.
–  Cover the floor in the area under the heat exchanger with an impermeable layer and absorbent paper.
  A87-0685
–  Remove the bolts -A- and remove the clips -B- from the coolant tube connections -C- and -D- on the heat exchanger -E-.
–  Release the coolant tubes -C- and -D- from the heat exchanger -E- (move the coolant tubes to the transverse panel).
–  Pull heat exchanger -E- out of climate control (heater).
  A87-0686

Heating system heat exchanger: removing and fitting > < Heating heat exchanger: removing and fitting