seat Workshop Repair Guides

SEAT Workshop Service and Repair Manuals

Removing and fitting the pulley (compressor brand ?Zexel?) > < Replacing the compressor pulley
Removing drive plate
  Note
t  Compressors with the part number 1K0 820 803 from index „N“ have the disk grooves on the drive plate fastened to the grooves on the compressor shaft.
t  Compressors with the part number 1K0 820 803 to index „L“ have the disk grooves on the drive plate free from the grooves on the compressor shaft. In these compressors it is possible that the drive plate grooves wear down and can no longer drive the compressor. In this case, check whether the compressor moves easily, and replace the drive plate if necessary (using the repair kit 1 K0 898 814) → Parts catalogue
   
–  Hold the pulley -A- using a strap wrench (with a braided strap) and release the bolt -B-
  Note
t  If the protection against overloading the drive plate is active -D-, the pulley turns freely without driving the compressor. Check ease of movement in the compressor by turning it by its bolt -B-; should movement be difficult, replace the compressor with the pulley. If the compressor does move easily, remove the bolts -C- and remove the drive plate. To do this, the clutch plate hub must be held in place by pliers to remove bolt -B-.
  A87-10246
t  The bolt -B- cannot be released if the pulley grooves are worn (the compressor shaft turns with the bolt). In this case, remove the bolts -C- and tighten the drive plate with the disk -A- (flat side facing outwards), the washers -B- and the bolts -C- (included in the repair kit 1 K0 898 814 → Parts catalogue) on the compressor shaft
–  Remove the bolt -D- then.
–  Remove the disk -A- and remove the drive plate -A-.
  Note
  A87-10247
t  
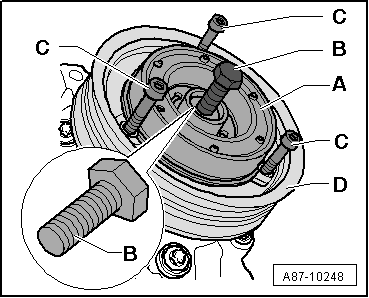
If the drive plate -A- is fastened to the compressor shaft, fit three long bolts -C- through the orifices in the clutch plate -A- on the pulley -D- and separate the drive plate -A- with a normal bolt -B- (bolt with M8 thread, flat in front and with a resistance of min. 10.9). At the same time, hold the pulley -D- with a normal strap wrench (with a braided strap).
t  When the drive plate -A- has already been replaced once and has been pasted with sealing agent D 154 102 A1, it may occur that the plate connects itself with the compressor shaft in such a way that it will not be able to be separated. In this case the complete compressor must be replaced.
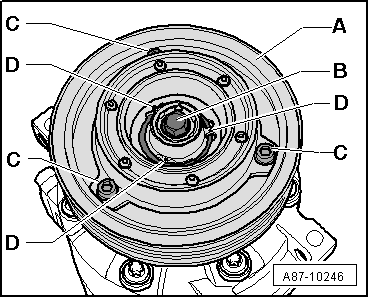
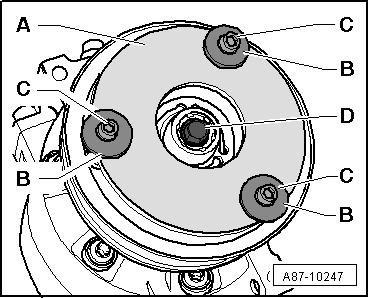
–  If the pulley must be replaced, release the circlip and remove the pulley
–  Clean the grooves of the compressor shaft and examine it; replace the compressor if there are signs of wear in the grooves
  Caution
Do not use compressed air for cleaning, as the dirt particles can reach the compressor shaft seal and damage it.
  A87-10248

Removing and fitting the pulley (compressor brand ?Zexel?) > < Replacing the compressor pulley