seat Workshop Repair Guides

SEAT Workshop Service and Repair Manuals

Adjustment overview > < Removing and installing oil seals for drive shafts
5-speed manual gearbox 006
Dismantling and assembling differential
 
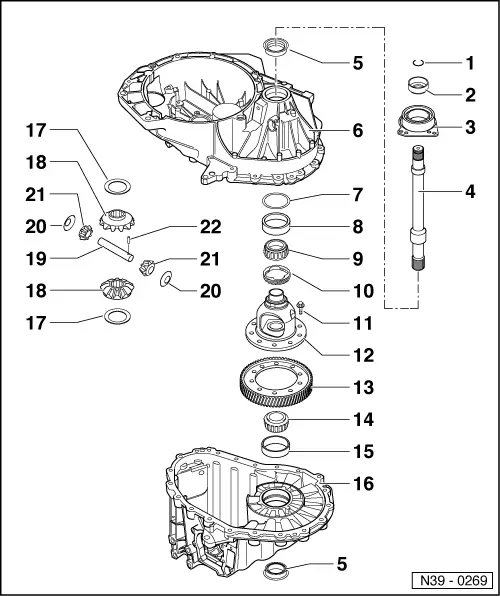
N39-0269

Notes:

  • ◆ Heat taper roller bearing inner race to
    100 °C before installing.
  • ◆ Always renew both taper roller bearings together as a set.
  • ◆ If differential housing, gearbox housing or clutch housing taper roller bearings are renewed adjust differential .
  • Circlip
    • ◆ Always renew
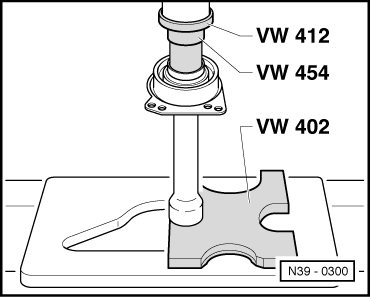
  • Protective cap
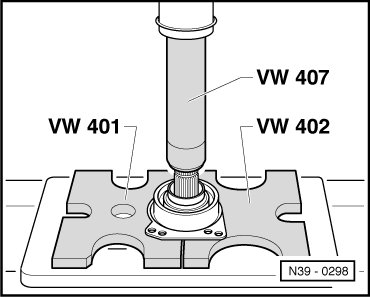
    • ◆ Pressing off => Fig.13
    • ◆ Pressing on => Fig.15
 
N39-0269
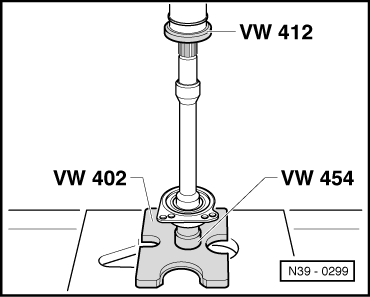
  • Centre bearing
    • ◆ Pressing off => Fig.13
    • ◆ Pressing on => Fig.14
  • Axle shaft
  • Oil seal
    • ◆ Pulling out => Fig.1
    • ◆ Driving in =>Fig.2
  • Clutch housing
  • Shim
    • ◆ For differential
    • ◆ Determining thickness => Page 39-21
  • Taper roller bearing outer race
    • ◆ Pressing out => Fig.3
    • ◆ Pressing in => Fig.4
  • Taper roller bearing inner race
    • ◆ Pulling off => Fig.5
    • ◆ Pressing on => Fig.6
 
N39-0269
  • Speedometer drive wheel
    • ◆ Fit onto differential housing as far as stop before pressing on inner race
    • ◆ Must engage in housing cut-out
  • Hexagon bolt, 85 Nm
  • Differential cage
    • ◆ Bolt to final drive gear => Fig.8
    • ◆ When renewing: Observe adjustment overview => Page 39-20
  • Final drive gear wheel
    • ◆ Bolt to differential housing => Fig.8
    • ◆ Pressing off => Fig.7
    • ◆ Is paired with output shaft, only renew as a set
 
N39-0269
  • Taper roller bearing inner race
    • ◆ Pulling off => Fig.5
    • ◆ Pressing on => Fig.6
  • Taper roller bearing outer race
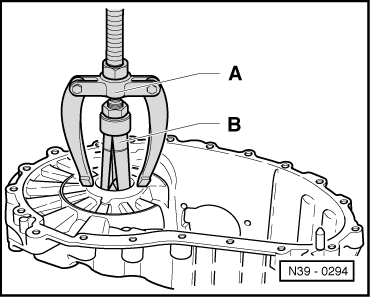
    • ◆ Pulling out => Fig.9
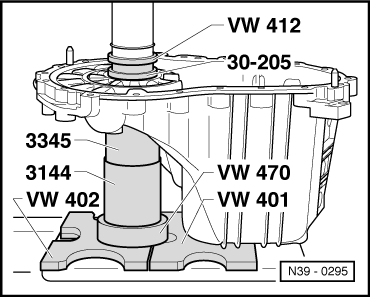
    • ◆ Pressing in => Fig.10
  • Gearbox housing
  • Thrust washer
    • ◆ For sun wheels
  • Sun wheel
    • ◆ Installing => Fig.12
  • Planet pinion axis shaft
    • ◆ Knock out with drift
  • Thrust washer
    • ◆ For planet pinions
  • Planet pinion
    • ◆ Installing => Fig.12
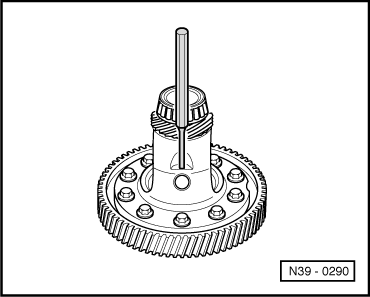
  • Spring pin
    • ◆ For securing planet pinion axis shaft
    • ◆ Removing and installing => Fig.11
 
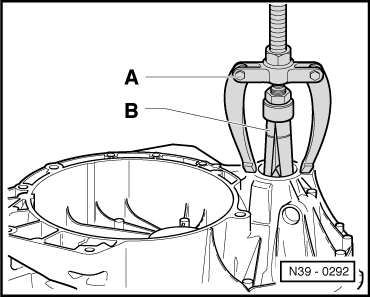
N39-0292

→ Fig.1    Pulling out oil seal.

A - Counter support, e.g. Kukko 22/2

B - Internal puller 36...46 mm, e.g. Kukko 21/6

Note:

Pulling the left and right-hand seals out is the same.

 
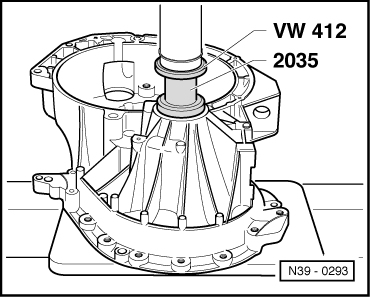
N39-0293

→ Fig.2    Driving in oil seal

Note:

Pressing the left and right-hand seals in is the same.

 
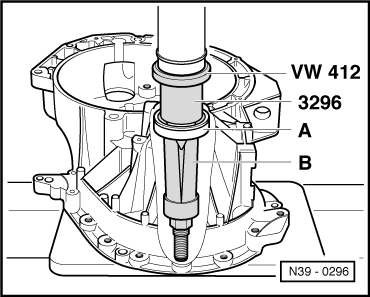
N39-0296

→ Fig.3    Pressing taper roller bearing outer race -A- out from clutch housing

B - Internal puller 46...58 mm, e.g. Kukko 21/7

 
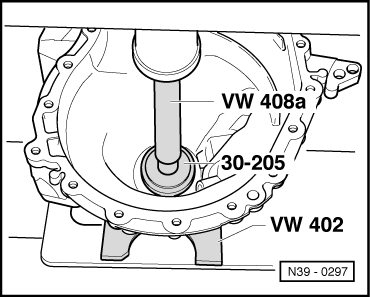
N39-0297

→ Fig.4    Pressing taper roller bearing outer race into clutch housing

  • ‒ Fit shim under outer race.
 
N39-0270

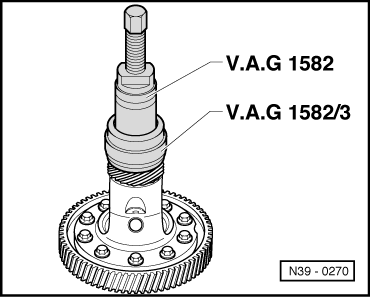
→ Fig.5    Pulling off taper roller bearing inner race

  • ‒ Before fitting the extractor position press piece 40-105 on differential housing.

Note:

Both both taper roller bearing inner races are pulled off the differential housing in the same way.

 
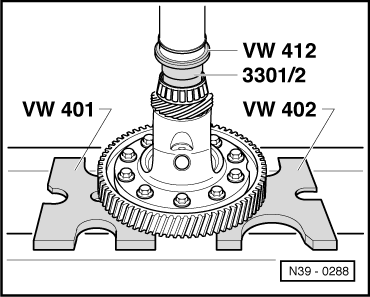
N39-0288

→ Fig.6    Pressing on taper roller bearing inner race

Note:

The taper roller bearing inner races for gearbox housing and clutch housing are pressed on with the same press tools.

 
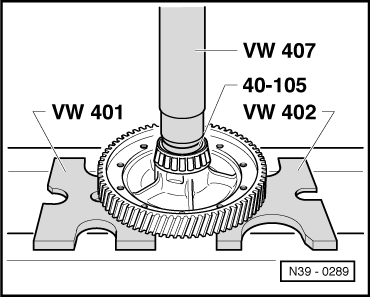
N39-0289

→ Fig.7    Pressing off final drive gear

  • ‒ Place thrust piece 40-105 on differential housing.

 
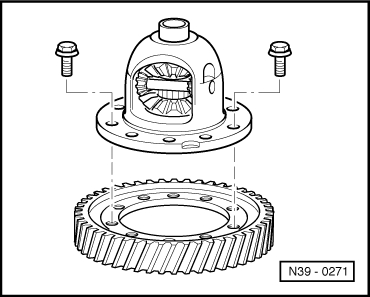
N39-0271

→ Fig.8     Bolting final drive gear and differential housing together

Note:

Tighten final drive gear wheel evenly and diagonally.

 
N39-0294

→ Fig.9    Pulling taper roller bearing outer race out from gearbox housing

A - Counter support, e.g. Kukko 22/2

B - Internal puller 46...58 mm, e.g. Kukko 21/7

 
N39-0295

→ Fig.10    Pressing taper roller bearing outer race into gearbox housing

 
N39-0290

→ Fig.11    Removing and installing planet wheel axis shaft spring pin

Removing

  • ‒ Knock into planet pinion axis shaft.
  • ‒ Knock-out of planet pinion axis shaft when shaft has been removed.

Installing

  • ‒ Knock-in flush with differential housing.

 
N39-0291

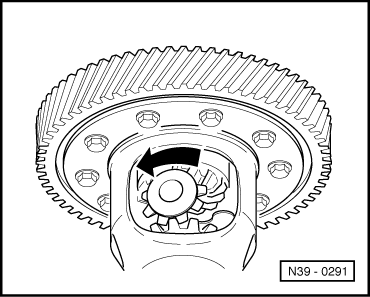
→ Fig.12    Installing differential bevel wheels

  • ‒ Coat thrust washer for sun wheel with oil and fit on sun wheel.
  • ‒ Install both sun wheels and secure.
  • ‒ Coat thrust washer for planet wheel with oil and fit on planet wheel.
  • ‒ Insert planet wheels turned through 180°and pivot into position (arrow).
  • ‒ Drive planet wheel axis shaft into final position and secure with spring pin.
 
N39-0298

→ Fig.13    Pressing off centre bearing with protective cap

 
N39-0299

→ Fig.14    Pressing on centre bearing

 
N39-0300

→ Fig.15    Pressing on protective cap

Adjustment overview > < Removing and installing oil seals for drive shafts