seat Workshop Repair Guides

SEAT Workshop Service and Repair Manuals

Articulation flange oilseals: removing and installing > < Articulation flange oilseals: removing and installing
Removing
Removing
Note the general instructions for gearbox repairs → Chapter
–  With the ignition switched off disconnect battery earth strap.
  Note!
For vehicles fitted with a coded radio, first check the anti-theft code.
–  Remove the insulation tray: → General body repairs-assembly work; Rep. Gr.50.
Articulation flange oilseal, right:
   
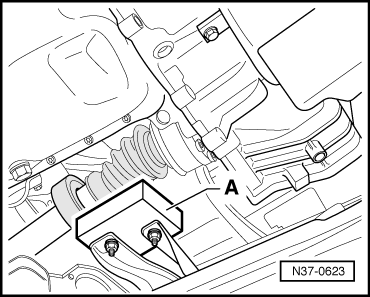
–  Removing the counterweight -A- from the sub-frame. Mark fitting position.
–  Remove the protective cover for the driveshaft.
Articulation flange oilseal, right and left:
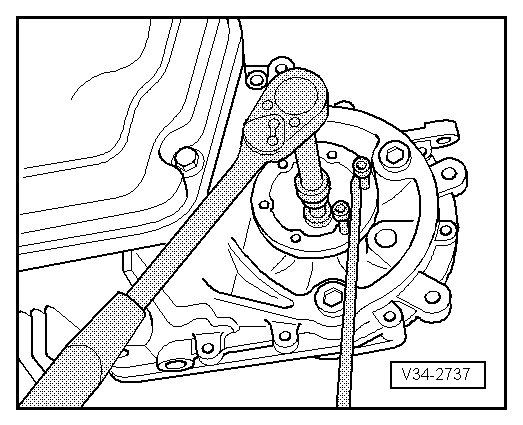
–  Remove the bolts securing the driveshafts to the gearbox flanges, with the correct spanner on tool -U-40020-.
–  Lift the driveshaft as high as possible and secure it conveniently, taking care not to damage it.
–  Drain gearbox oil. Unscrew oil level control cap from gearbox .
  N37-0623
–  Remove the articulation flange bolt; to do this thread two bolts into the flange and immobilise the shaft with a lever.
–  Remove the articulation flange with the spring, thrust washer and conical ring.
  V34-2737
–  Remove the articulation flange oilseal with tool -U-40100/2-. Activate the hammer until the oilseal is removed.
  Note!
t  Take care not to damage the oilseal housing in the gearbox.
t  If the articulation flange bush is damaged it must be replaced → Chapter
  E39-0001

Articulation flange oilseals: removing and installing > < Articulation flange oilseals: removing and installing